Configuring the JavaRConsole System
|
This chapter describes how to set up the JavaRConsole system to deliver the mass storage drivers and Windows Server media for operating system installation.
| Note - If you chose both the Diskette Local and Windows Local delivery methods in Chapter 2, skip this chapter and proceed to Chapter 4.
|
The following sections are included in this chapter:
You have to set up a JavaRConsole system if you chose any one of the following mass storage driver or Windows media delivery methods described in Chapter 2:
- Diskette Remote
- Diskette Image
- Windows Remote
- Windows Image
| Note - This procedure does not provide detailed instructions for configuring the system that is running the JavaRConsole (also known as the ILOM Remote Console). See the Sun Integrated Lights Out Manager (ILOM) documentation for details on configuring your system to run ILOM and JavaRConsole. (Note that there are multiple versions of ILOM; be sure to refer to the guide that matches your server’s installed version of ILOM.).
|
JavaRConsole System Requirements
The JavaRConsole system refers to the system that is hosting the JavaRConsole (ILOM Remote Console application).
The requirements for the JavaRConsole system are:
- Solaris, Linux, or Windows operating system is installed.
- The system must be connected to a network that has access to the Sun Blade X6440 series Ethernet management port.
- Java Runtime Environment (JRE) 1.5 or later is installed.
- If the JavaRConsole system is running on Solaris, volume management must be disabled for JavaRConsole to access the physical diskette and/or CD/DVD-ROM drives.
- If the JavaRConsole system is running on Windows Server, Internet Explorer Enhanced Security must be disabled.
| Note - This procedure assumes that the JavaRConsole system and ILOM service processor have been set up according to the instructions in the Sun Integrated Lights Out Manager documentation. (Note that there are multiple versions of ILOM, be sure to refer to the guide that matches your server’s installed version of ILOM.).
|
Setting Up the JavaRConsole System
To set up the JavaRConsole system, use the following procedure.
 To Set Up the JavaRConsole System To Set Up the JavaRConsole System
|
1. Start the ILOM web interface by typing the IP address of the ILOM service processor into a browser on the JavaRConsole system in URL format as shown in FIGURE 3-1.
FIGURE 3-1 URL Sample

The Security Alert dialog box appears.
FIGURE 3-2 Security Alert Dialog Box
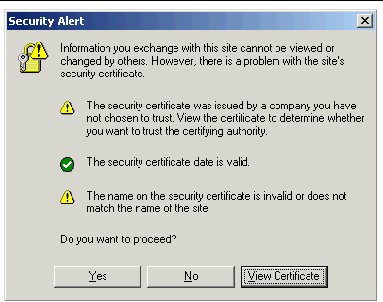
2. Click Yes.
The ILOM login screen appears.
FIGURE 3-3 Login Screen
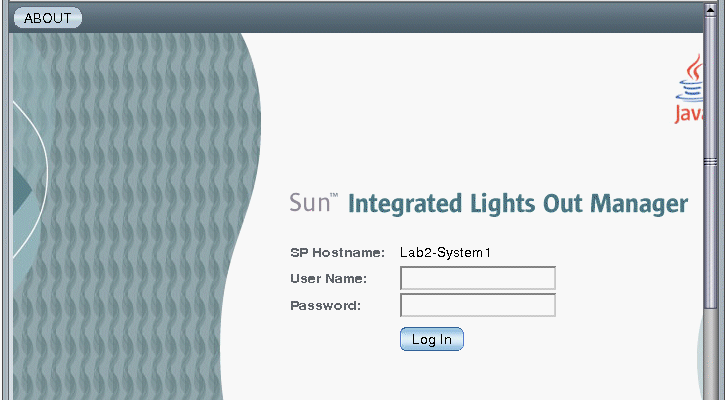
3. Type the user name and password, and then click Log In.
The default user name is root and default password is changeme.
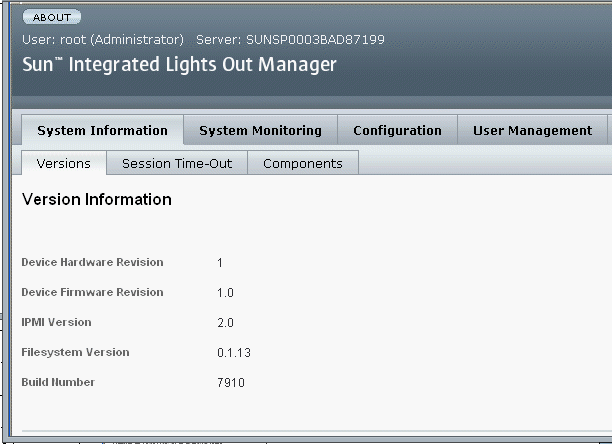
The ILOM Version page appears.
FIGURE 3-4 ILOM Version Page
4. Click the Remote Control tab.
The Remote Control page appears.
| Note - Ensure that the mouse mode is set to Absolute. Under the Remote Control tab, click the Mouse Mode Settings tab, select Absolute from the drop-down menu, and click Save.
|
FIGURE 3-5 ILOM Remote Control Page
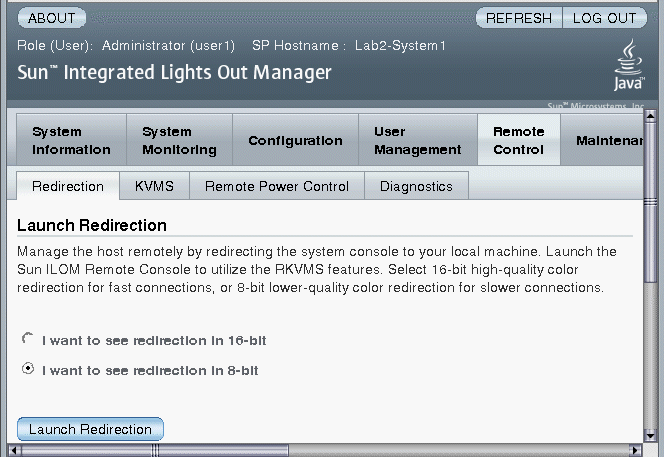
5. Select the Redirection tab, select 8-bit color or 16-bit color, and click Launch Redirection.
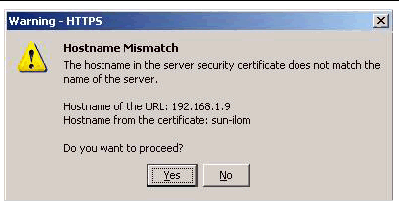
| Note - When using a Windows system for JavaRConsole system redirection, an additional warning appears after clicking Launch Redirection. If the Hostname Mismatch dialog box appears, click the Yes button.
|
FIGURE 3-6 Hostname Mismatch Dialog Box
The Remote Control Login dialog box appears.
FIGURE 3-7 Remote Control Login Dialog Box
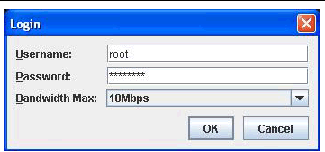
6. In the Remote Control Login dialog box, enter your user name and password and click OK.
The default user name is root and the password is changeme.
After the login is successful, the JavaRConsole screen appears.
FIGURE 3-8 JavaRConsole Devices Menu
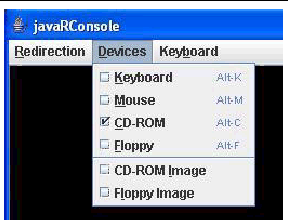
7. From the Devices menu, select one diskette item and/or one CD item according to the delivery method you have chosen.
- Diskette Remote. Select Floppy to redirect the server to the contents of the physical diskette drive attached to the JavaRConsole system.
- Diskette Image. Select Floppy Image to redirect the server to the mass storage drivers diskette image file located on the JavaRConsole system.
- CD-ROM Remote. Select CD-ROM to redirect the server to the operating system software CD contents from the CD/DVD drive attached to the JavaRConsole system.
- CD-ROM Image. Select CD-ROM Image to redirect the server to the operating system software .iso image file located on the JavaRConsole system.

|
Caution - Using the CD-ROM Remote or CD-ROM Image options to install the Windows Server operating system will significantly increase the time necessary to perform the installation as the content of the CD-ROM is accessed over the network. The installation duration will depend on the network connectivity and traffic.
|
| Sun Blade X6440 Server Module Windows Operating System Installation Guide
|
820-3963-10
|
   
|
Copyright © 2008, Sun Microsystems, Inc. All Rights Reserved.


