Using Common Objects
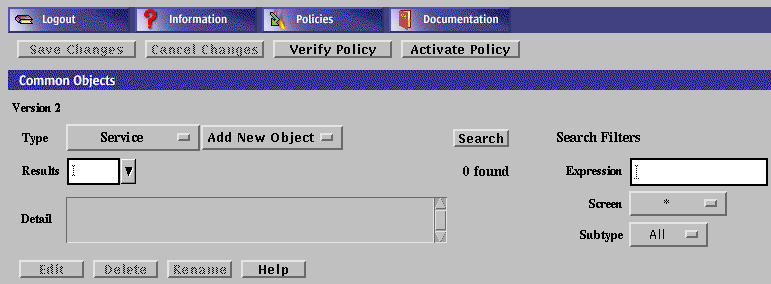
Use the Common Objects area of the Policy Rules page to add common objects and construct policy rules. The changes you make to the common objects do not affect the currently active policy until you activate them.

The following table describes the information, controls, and the buttons in the Common Objects Panel.
Table 2-3 Common Object Information, Controls, and Buttons|
Information |
Control |
Description |
|---|---|---|
|
Version |
|
The version of the registry of common objects that is being used in a policy. The latest version of the registry is used by all policies. If you edit the common objects (registry) the word "modified" appears after the number until you either cancel the changes or save the changes. |
|
Type |
Common Object Choice List |
Displays the list of common objects available. You choose the common object that you want from this list. |
|
|
Subtype Choice List for Adding a New Common Object of Chosen Type |
Displays the choice list of subtypes available for the common object that you selected. Each common object has it own set of subtypes and each subtype requires that you provide different information in a dialog box for that subtype for that common object. |
|
Search |
Search String |
Enter the string for a particular subtype for a common object in this editable text field. When you click the Search button, all matching subtypes appear in the Results choice list. Leaving this field blank returns all entries defined for the selected subtype or local to the selected Screen. Selecting All in Search on Screens and Search Subtype Choice with the Search String field empty returns all entries defined. |
|
|
Search on Screen |
Displays a choice list of the Screens that the Administration Station manages. Selecting a Screen from this list limits the search to common objects exclusive to that Screen. |
|
|
Search Subtypes |
Display a choice list of the subtypes available for the selected common object. |
|
|
Search Button |
Starts the search according to the criteria set. |
|
|
Results |
Displays a choice list of available entries that match the criteria. |
|
Found |
|
Show the number of entries in the search that match the criteria. |
|
Detail |
|
Displays the description for the item chosen from the Results choice list. |
|
|
Edit Button |
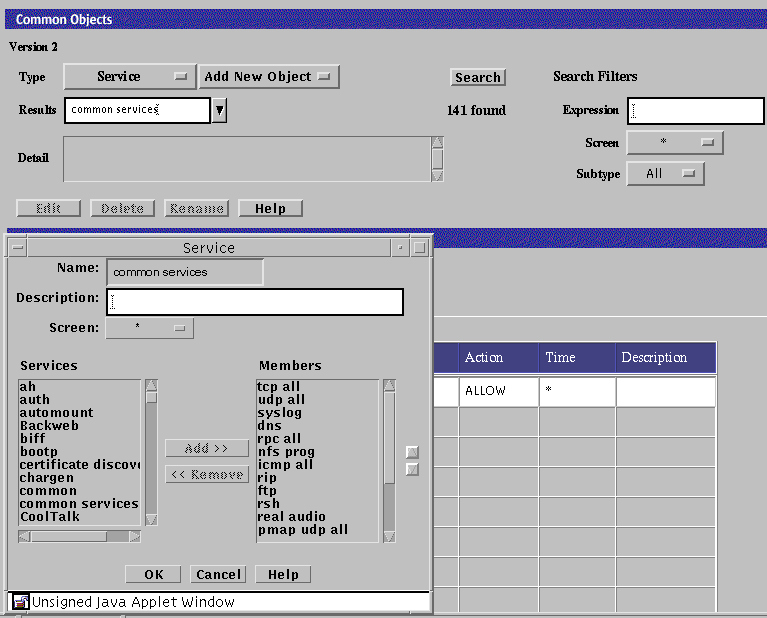
Displays the dialog box for the common object selected. Editing a common object is similar to adding a new one. The difference is that after you have chosen the common object that you want to edit and have clicked the Edit button, the dialog box for that common object contains all the information and you only need to modify the requisite information. |
|
|
Delete Button |
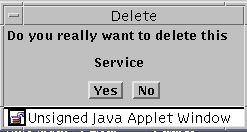
Displays the Delete dialog box. |
|
|
Rename Button |
Displays the Rename dialog box. |
|
|
Help Button |
Displays online help. |
The following table lists the common objects used in SunScreen.
Table 2-4 Common Object Descriptions|
Common Object |
Use |
|---|---|
|
Describes an administrator for your Screen administration |
|
|
IPsec Key |
For IPsec manual keys |
|
Proxy User | |
|
Defines values and objects to a specific Screen |
|
|
Time |
Some of these objects are saved automatically every time they are edited or new objects are added. Although the changes apply immediately and cannot be cancelled, they do not take effect until the policy is activated. The automatically saved objects are:
-
Authorized user
-
Jar hash
-
Jar signature
-
Proxy user
The Screen Field and Common Objects
The Screen field provides a way to define an object or rule for a specific screen in a scenario that utilizes multiple Screens, specifically when you use Centralized Management Groups. It has no effect on standalone Screen administration.
SunScreen allows you to use the same name for different common objects if you select different Screen objects for them. You may also define different parameters for these common objects; the Screens to which they refer then interpret them locally.
An object with "*" selected applies to all Screens. This is the default, and is recommended for all objects unless there is a need to use a single name more than once.
Rules whose Screen field is blank apply to all Screens. Rules with a specific Screen object selected apply only to that Screen.
To Add a Common Object
You use the same steps to add all common objects. The dialog boxes vary according to the common object selected.
-
Execute the steps in "To Modify the Policies Associated with a Common Object".
-
Select the Common Object in the Type list.

-
Click the Add New Object button to display the choices.
-
Type the necessary information in the dialog box.
-
Click the OK button.
To Search for a Common Object
-
Execute the steps in "To Modify the Policies Associated with a Common Object".
-
Select Common Object in the Type list.

-
(Optional) Type or select values in the search filters.
The results depend on whether the common object matches one of the three search criteria for the selected type. The search criteria are:
- Expression
-
This field restricts the search to names that match a specified character pattern. Leaving the field blank returns all names.
- Screen
-
This field restricts the search to match a specified screen. Leaving the field an asterisk (*) returns all names.
- Subtype
-
This field returns all objects when set to All. If you select a specific subtype, the search returns those objects that match the subtype.
-
Click the Search button or press Enter in the Expression field.
-
Select a result from the Results area to retrieve and display its properties in the Detail field.
After you retrieve the common object, you can edit, rename, or delete it.
To Edit a Common Object
-
Execute the steps in "To Modify the Policies Associated with a Common Object".
-
Select Common Object in the Type list.

-
(Optional) Select the search criteria.
-
Click the Search button.
-
In the Results area, select the name of the common object to edit.
The details for the selected common object are displayed.

-
The dialog box for the object appears.

-
Make your changes in the dialog box.
-
Click the OK button.
To Edit a Common Object From the Policy Rules Table
-
Execute the steps in "To Modify the Policies Associated with a Common Object".
-
Click once on the cell in the Policy Rules Table that contains the object to be viewed or edited.
The dialog box for the chosen object appears.

Note -If more than one common object uses a particular name, you may not be able to display the details for the object by clicking on the table cell. In such cases, you must search for desired object and select it.
-
Edit the object if necessary.
-
Click the OK button.
To Delete a Common Object
If you delete a named common object (such as address, service, or certificate) that is being used in a policy object, SunScreen displays a warning message before it deletes the object.
-
Execute the steps in "To Modify the Policies Associated with a Common Object".
-
Select Common Object in the Type list.

-
Select the search criteria.
-
From the Results area, select the name of the common object to delete.

-
Click the Delete button.
-
Click Yes in the Delete Rule dialog box.

Note -Be careful not to remove your Administration Station's address from its interface address group. If you do, you will be unable to administer your Screen after you activate the next policy.
To Rename a Common Object
When you rename a common object with no Screen object, you also rename all references to the object in the current policy.
-
Execute the steps in "To Modify the Policies Associated with a Common Object".
-
Select Common Object in the Type list.

-
Click the Search button.
-
From the Results area, select the name of the common object to be renamed.

-
The Rename dialog box appears.
-
Type the new name in the Please Enter the New Name field.

-
Click the OK button.
- © 2010, Oracle Corporation and/or its affiliates
