Chapter 4 Creating and Managing Policies
This chapter describes:
-
Viewing the Policies List page
-
Working with policies
-
Adding, copying, renaming, and verifying a policy
-
Deleting a policy
-
Backing up all policies
-
Restoring all policies
-
Leaving an administration session
-
Unlocking a policy
-
Saving policy changes
-
Canceling policy changes
-
Activating a policy
The following table list the procedures in this chapter.
Table 4-1 Working With Policies|
Policy Action | |
|
Policy Locks | |
|
Activating Policies | |
Working With Policies
To reach the Policies List page, you can either choose Manage Policies for the Select Task field on the Login page before you click the Login button, or click the Policies button on the administration GUI's navigation bar.
To Work with Policies
Editing Policies
To Edit a Policy
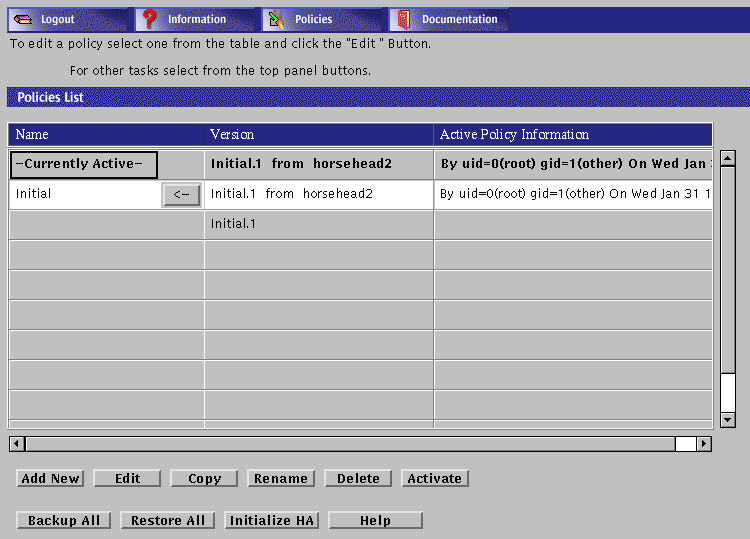
You can edit any policy to which you have WRITE access except the currently active policy. This policy is a READ ONLY copy of a policy that lets you view the rules currently in use by the firewall. The actual editable version of the currently active policy is available through the list of policies on this page.
When you installed SunScreen, a policy named Initial was created, containing enough information for you to start administering the Screen. You can work with this policy or create another policy and set it to be the currently active policy.
Note -
Logging in as a user with an access level of ALL or WRITE puts you into a session. If you make changes to a policy, you cannot log out of the session until you either save or cancel those changes.
Select a policy in the Policies List page.
Note -
The View button appears if the policy you chose can only be read in read-only mode (for example, the Currently Active policy in the first row, and the policy versions in the Version column). See the SunScreen 3.2 Administrator's Overview for more information on policy types.
To Add a New Policy
-
Select a policy in the Policies List page.

-
Click the Add New button.
The Add New Policy dialog box appears.

-
Type the name of the new policy in the Add New Policy dialog box.
-
Click the OK button.
To Copy a Policy
-
Select a policy in the Policies List page.

-
Select the policy you want to copy.
-
Click the Copy button.
The Copy dialog box appears.

-
Type the name of the new policy in the Copy dialog box.
-
Click the OK button.
To Rename a Policy
-
Select a policy in the Policies List page.

-
Select the policy you want to rename.
-
Click the Rename button.
The Rename dialog box appears.

-
Type the name of the new policy in the Rename dialog box.
-
Click the OK button.
To Delete a Policy
-
Select a policy in the Policies List page.

-
Select the policy you want to delete.
-
Click the Delete button.
The Delete Policy dialog box appears.

-
Click the Yes button in the Delete Policy dialog box to delete the policy.
To Verify a Policy
To verify that any changes you have made are stable:
Select a policy in the Policies List page.

Select the Policy you want to verify.
Click the Edit button.
The Policy page for the selected policy appears.
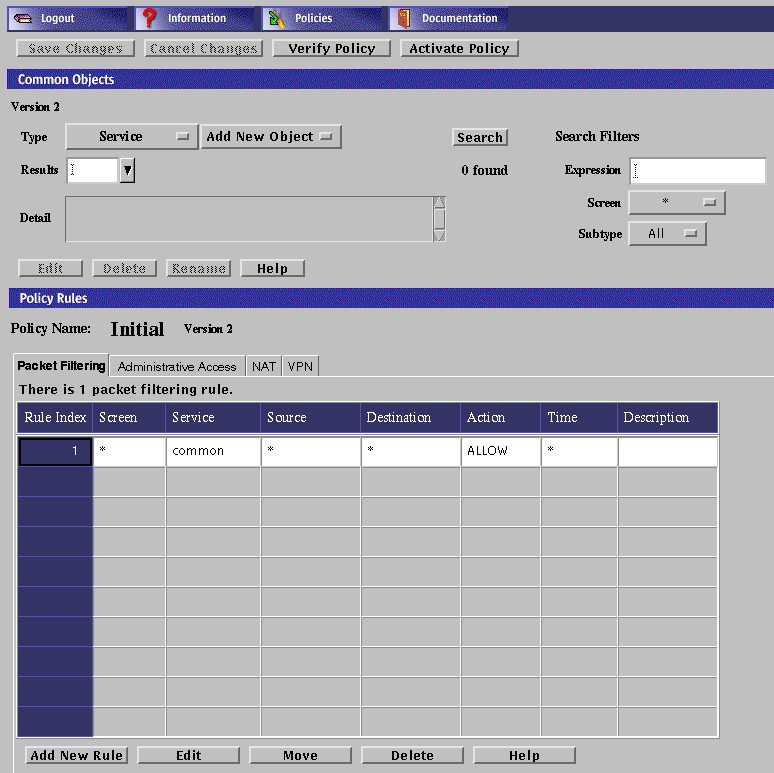
Click the Verify Policy button above the Common Objects area.
Clicking the Verify Policy button verifies that all the rules are valid and should compile successfully when you activate this policy. The rules in the chosen policy file are checked for errors, but the policy is not activated. Verifying a policy allows you to debug it without activating it.
You can activate the policy when verification has succeeded.
To Back Up All Policies
Backing up your policies is always good practice, especially if anything happens to the disk. You also should back up the original policy after you install SunScreen. This makes it easier to restore earlier policies, if necessary. Backing up from the administration GUI backs up only the current versions of all the policies.
The backup medium contains copies of the local identities (the encryption keys and certificates) and must be stored securely and disposed of properly to avoid compromising your security.
Note -
This procedure requires a browser that can be used to access Local files. You can use the HotJava Browser, Netscape, or Internet Explorer with Sun's Java Plug-In and the identitydb.obj file (copied to the correct location). See "To Install the Java Plug-In on the Screen" for informationon how to install the plug-in.
-
Select a policy in the Policies List page.

-
Click the Backup All button to back up the current version of the policies.
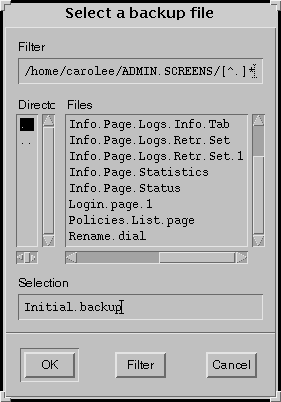
The Select a backup file dialog box appears.
-
Type the path name of the directory in the Filter field and type the name of the backup file in the Selection field.
To Restore All Policies
Note -
This procedure requires a browser that can be used to access Local files. You can use the HotJava Browser, Netscape, or Internet Explorer with Sun's Java Plug-In and the identitydb.obj file (copied to the correct location). See "To Install the Java Plug-In on the Screen" for information on installing the plug-in.
The Restore operation causes all current policy information, including common objects, to be overwritten by the new information from the backup file.
-
Select a policy in the Policies List page.

-
Click the Restore All button.
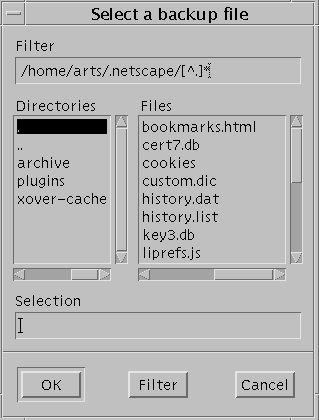
The Select a backup file dialog box appears.
-
Type the path name of the directory in the Filter field and the file name for the backup file in the Selection field.
-
Click the OK button.
Before you change the administration address (such as le0, qe0, or hme0), the administration certificate, the local certificate, or the administration-group certificate, be sure that you understand how each one affects your ability to connect to the SunScreen. If you change these items, you risk losing connectivity from the Administration Station to the Screen. Reestablishing connectivity is difficult and requires that you log into the Screen directly or use an Administration Station that is still working. It also requires an exchange of encryption information.
Working With Policy Locks
To Leave an Administration Session
Logging in as a user with an access level of ALL or WRITE puts you into a session. If you make changes to a policy, you cannot log out of the session until you either save or cancel those changes.
To Unlock a Policy
A lock is automatically acquired and held by the first person to change a policy. The lock is held on a per system basis; if someone acquires the lock, you cannot make changes to a policy.
The lock does not affect the buttons in the SunScreen banner. Anyone can request a search at any time and view the Documentation and Information pages.
If the Could not acquire the lock message appears (to indicate that someone has made changes to the policy):
-
On the command line, type:
edit> QUIT
Or
-
In the administration GUI:
-
Click the Cancel Changes button.
-
Click the Policies button in the SunScreen banner.
You can try to edit the policy later.
Note -
When you click the Save Changes button or log out, you give up the lock and others can work on the Screen.
To Forcibly Clear the Lock
To clear the lock forcibly, type the following at the command line:
# ssadm lock -c policy_name |
Activating Policies
To Save Changes
To save your changes:
-
Select a policy in the Policies List page.
-
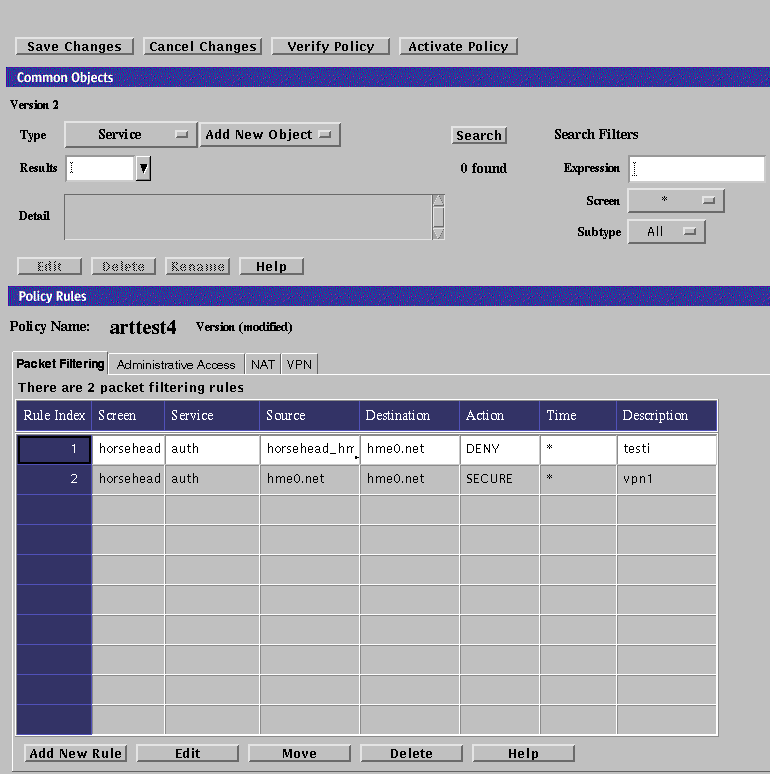
Make required changes to the policy and rules.
-
Click the Save Changes button to save all changes made for all objects and rules in the policy.
An Activate Policy dialog box appears.

-
Select Yes if you wish to activate the policy.
To Cancel Policy Changes
If you want to return to the previous saved version of a rule:
Make changes to either the policies or the rules
Click the Cancel Changes button.
Changes made before you click the Cancel Changes button are not saved.
To Activate a Policy
Use Activate when you want the rules you see to be the ones the Screen uses to filter traffic.
- © 2010, Oracle Corporation and/or its affiliates

