Chapter 5 Using High Availability
"High Availability"(HA) is a SunScreen configuration that consists of a primary Screen and a secondary Screen or Screens that mirror the operations on the primary Screen. In this way, the HA configuration behaves as a single system. Should anything cause the primary Screen to fail, the secondary Screen immediately takes over, providing uninterrupted operation. This chapter describes how to set up high availability Screens. You can also find a detailed example of a high availability configuration in "Stealth Mode With HA" in SunScreen 3.2 Configuration Examples.
Note -
You can upgrade SunScreen EFS 2.0, 3.0, and 3.1 HA clusters to SunScreen 3.2. There is an upgrade script to aid the transition for 3.0 and 3.1 HA clusters to SunScreen 3.2. The Upgrade from EFS 2.0 is a more manual process. See the SunScreen Installation Guide for upgrade information.
The following table list the procedures in this chapter.
Table 5-1 Procedures for Using High Availability|
HA
| |
Setting Up High Availability
To use high availability, (you must install SunScreen as an HA system, as described in the SunScreen Installation Guide. High availability, its limitations, topology, set up, and capability are described in detail in "High Availability" in SunScreen 3.2 Administrator's Overview. For examples of HA configuration, see SunScreen 3.2 Configuration Examples manual.
Note -
The network used for HA traffic must be kept physically secure because all secret keys and configurations are transmitted in the clear over the HA interface.
HA lets you deploy multiple Screens in situations where the connection between a protected inside network and an unprotected outside network is critical. One member of the HA cluster, the active HA Screen, performs packet filtering, network address translation, logging, and encryption/decryption of packets travelling between the inside and outside networks. The other members of the HA cluster, which can be as many as 31 passive HA Screens, receive the same packets, perform the same calculations, and mirror the configuration of the active HA Screen, but they do not forward traffic between the inside network and the outside network. If the active HA Screen fails, one of the passive HA Screens takes over (failover) as the active HA Screen and begins routing and filtering network traffic within seconds. Because the passive HA Screens mirror the active HA Screen, few connections are lost if a failover occurs.
The routing interfaces of all the systems in the HA cluster have the same interface names with the same IP addresses. When a firewall becomes a secondary Screen, the MAC address of each routing interface is changed so that it is the same as the MAC address of the same interface on the primary Screen. Each HA Screen, therefore, receives the same traffic, ensuring that passive Screens can duplicate the state of the packet filter engine should the active Screen fail. The secondary firewalls have the same rules and process the packets in the same way.
Note -
Both Screens mirror configuration. They attempt to mirror state by independently building the same state table, since they see the same traffic. They do not exchange information about what is in each others' state tables, however. That means that if one Screen is rebooted, it will have the same rules, configuration, MAC addresses, etc., but will not have the same state in memory. This Screen will never learn old information from the other Screen; it will only be able to learn new information from listening on the wire. The internal state as far as memory and state tables are concerned will be out of sync for some undetermined amount of time, until all the old state entries time out or are closed from the other Screen.
HA Policy
When you set up an HA cluster, you designate one Screen as the primary HA Screen, and you configure it with the common objects and policy rules that the HA cluster will use. When you activate the policy, it is copied from the primary HA Screen to the other members of the HA cluster. The Solaris system and network configuration are not copied from the primary HA Screen; they must be identical on all the Screens in the HA cluster.
Be sure to keep the HA network physically secure. The HA cluster transmits secret keys and policies in the clear over the dedicated HA network.
The interfaces for network connections must be the same for each HA cluster member. For example, if one HA host uses the le0 interface as its dedicated internal network connection, all HA hosts must use the le0 network interface as their dedicated internal network connections. Similarly, all Screens in the HA cluster must use the same IP address on their non-dedicated interfaces.
Preparing to Install High Availability
HA is designed to maintain the great majority of network connections. During a reboot (an orderly shutdown), the active Screen being rebooted notifies the passive Screens, and the appropriate passive Screen takes over as the active Screen without loss of connections. Because the passive Screens do not forward, reject, or log packets, the load on passive Screens is less than the load on the active Screen. Consequently, load-induced faults that affect the active Screen are unlikely to have affected the passive Screens. Once the previously-passive secondary Screen becomes active, of course, it is subject to the same load that caused the failure.
The machines that are used as the HA Screen should all be of equivalent power, so that the passive HA Screen can keep up with nearly all the processing of the active HA Screen.
No traffic is allowed out of the passive HA Screens with the exception of administration traffic, such as normal GUI administration, HA administration, and HA heartbeat (the communication signal on the dedicated network that assures that the network is working). This means, for example, that you cannot use telnet to connect to the passive HA hosts. You can, however, use telnet to connect to active HA hosts.
Using the /etc/hosts File for Name Resolution
When you configure the hostname resolution in the /etc/nsswitch.conf file for HA hosts, the key word files must appear first in the "hosts line" because:
-
Using the /etc/hosts file for hostname resolution is more reliable than using DNS or NIS or both.
-
An HA Screen in the passive mode cannot send packets over the network; therefore, remote hostname resolution, such as DNS or NIS, will fail for passive HA Screens.
Defining HA
The primary HA Screen manages secondary HA Screens in an HA cluster. A passive HA Screen within an HA cluster mirrors the state of the active Screen, which can be the primary or a secondary HA Screen. When the active Screen fails, the passive Screen that has been running the longest takes over as the active Screen. Primary means the system is the HA administration host for the HA configuration. It does not necessarily mean that the system is the active host
You must use the unique HA interface address for administration. If you use one of the shared addresses, then that address will always resolve to the HA Screen that is currently active. Because the active host is not necessarily the primary administration host, you must use the unique HA interface address to ensure that you are communicating with the correct host.
If you do not use the unique HA interface address, then the connection will be lost and the administration GUI will hang immediately if the remotely administered primary HA Screen is shut down. You will still be able to administer the active HA Screen from the command line, using the command ssadm, but you will be unaware that you are administering a secondary HA Screen. This will not propagate the configuration to any other HA Screen; instead, the configuration will be overwritten when the primary HA Screen comes up again and a policy is activated.
Modifying the HA Service Group
You cannot connect directly to a passive HA Screen, nor can you connect from one HA Screen to another, except with remote administration to the HA interface. You can allow:
-
Services and service groups other than the standard HA services
-
Remote administration
-
Router discover
-
Heartbeat (the communication between or among HA Screens to assure that the dedicated HA network is working)
Adding additional services or service groups may be useful; for example, if you need to copy Solaris system files between the HA hosts or to be able to log into the active HA Screen remotely and then connect to the primary administration HA host with telnet. Adding a service to the HA service group circumvents the passive HA mode and allows the traffic that the added service permits through the SunScreen filters.
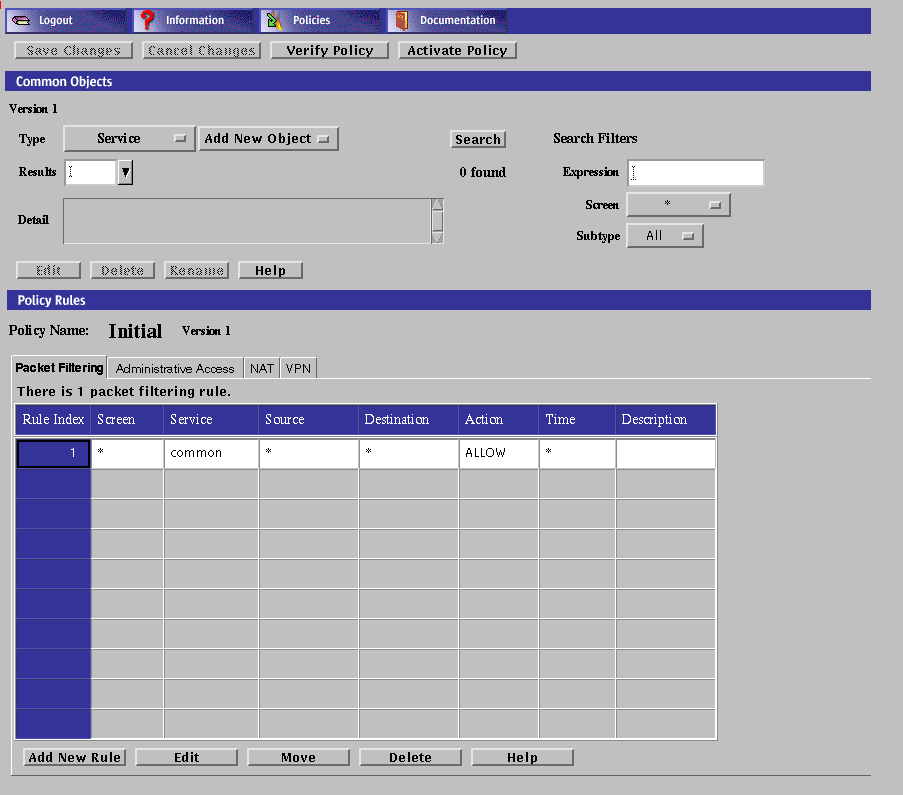
You can add any services to the HA service group by selecting Service in the Type list on the Edit Policy page, saving the change, and reactivating the configuration.
Note -
The services or service groups that you add to the HA service group are allowed only between the HA hosts.
Using NAT With HA in Routing Mode
Depending on the configuration you use for NAT, you must add an ARP (Address Resolution Protocol) entry for static NAT mappings on all Screens in routing mode, active and passive, so that NAT can continue to work after a failover. You must replicate all non-SunScreen configurations, including static ARP entries, on all HA Screens. Because you must do this every time an HA Screen fails over or every time you reboot a Screen, you may want to automate this in one of your start-up scripts. For more information on configuring NAT, see "Network Address Translation" in SunScreen 3.2 Administrator's Overview. For more information on ARP, see the man page for arp(1M).
Installing High Availability
To Edit the Policy
To Install the SunScreen software in an HA Configuration
-
Configure identical interfaces on all HA machines, by editing the /etc/hostname.interface-name file or running the ifconfig command.
-
Dedicate one interface on each machine to HA.
-
You must have a dedicated network between the HA hosts that, for reasons of security, is not connected to any other network.
-
All the HA machines must be configured with the same interface names and be connected to the network and to each other in the same way.
-
The dedicated HA interface must have a unique address name and IP address (so that the configurations, including interface configurations, can be synchronized later).
-
-
Connect the HA interfaces of the HA machines one at a time after installing the operating system (if necessary) and configuring the routing on these machines.
Since the HA hosts have the same names and IP addresses, you must connect the non-HA interfaces of only one of the HA machines (for example, HA1, as shown by the solid line in Figure 5-1). This machine will become the primary and active HA Screen. This approach prevents confusion from arising in the routing and ARP tables on the active HA Screen. After the HA configuration is complete, the HA software keeps the routing and ARP tables orderly.
-
Connect the secondary Screen, for example, HA2 (as shown by the broken line in Figure 5-1) to the hubs.
You do not have to install any special software for HA other than SunScreen. The HA software is automatically installed as part of SunScreen.
Note -Do not perform this step until you have installed, configured, and tested the both the primary (active) and secondary HA Screens.
Figure 5-1 Wiring Before and During HA Configuration

To Install HA on the Secondary HA Screen
-
Start the full SunScreen install on the secondary HA Screen.
-
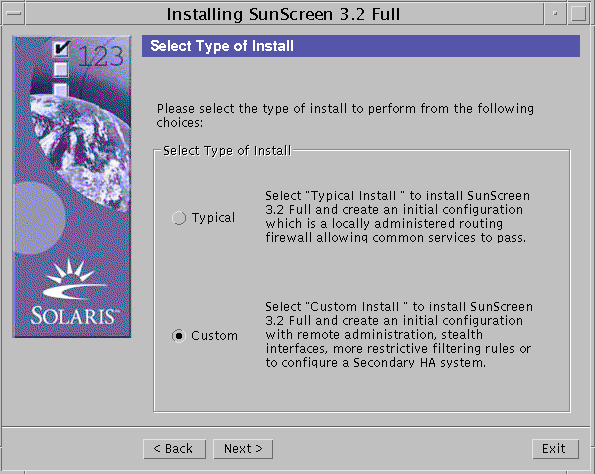
Select the "Custom" option on the Select Type of Install panel and click the Next button.
-
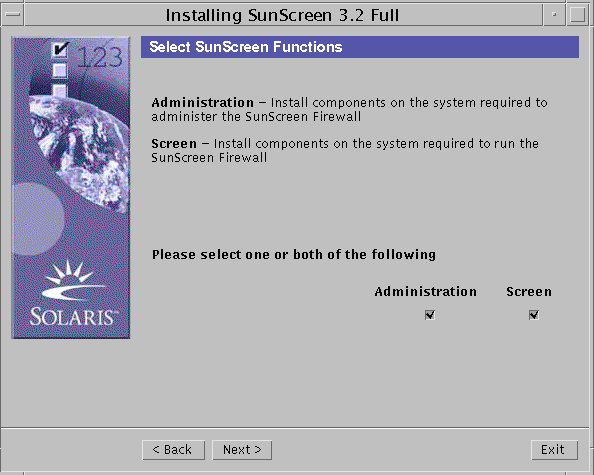
Select which Sunscreen function you want to install
-
Click Next
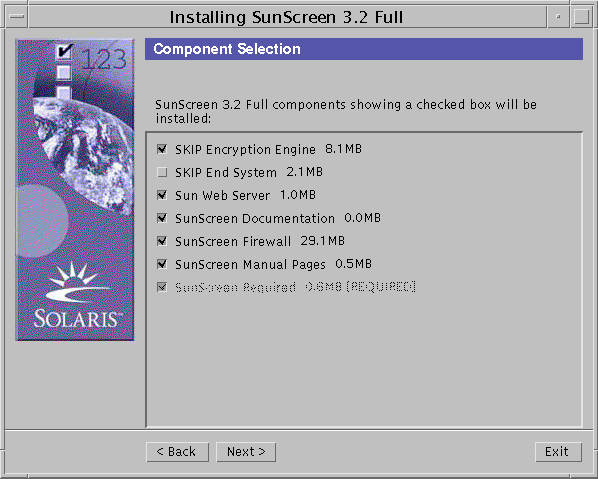
The Component Selection Dialog appears.
-
Select the components to be installed and click Next.
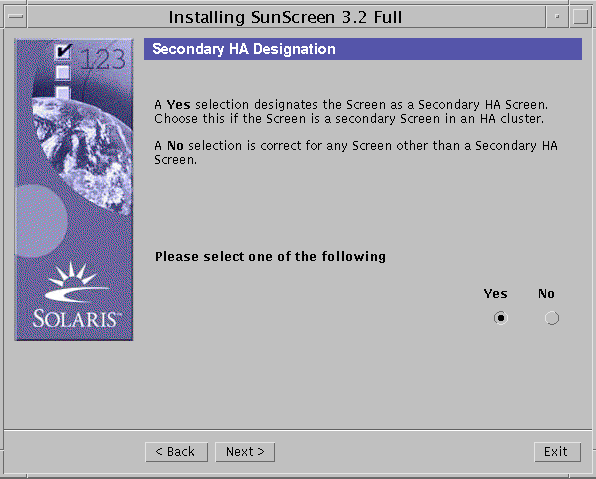
The Secondary HA Designation dialog appears.
-
Select Yes and click the Next button.
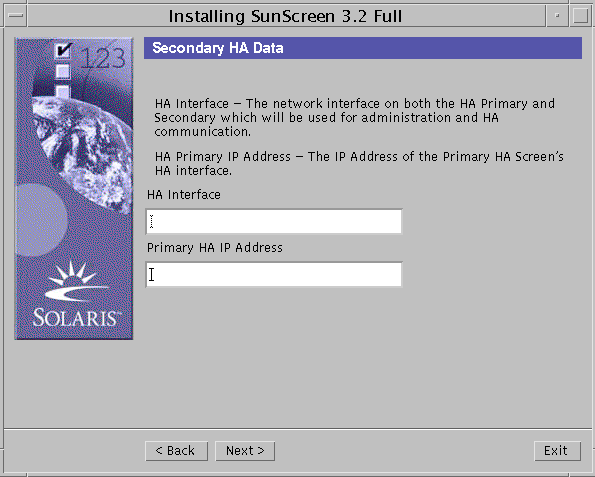
The secondary HA data dialog box appears.
-
In the secondary HA Data dialog box:
-
Click the Next button.
-
Reboot the secondary HA Screen when the final panel appears.
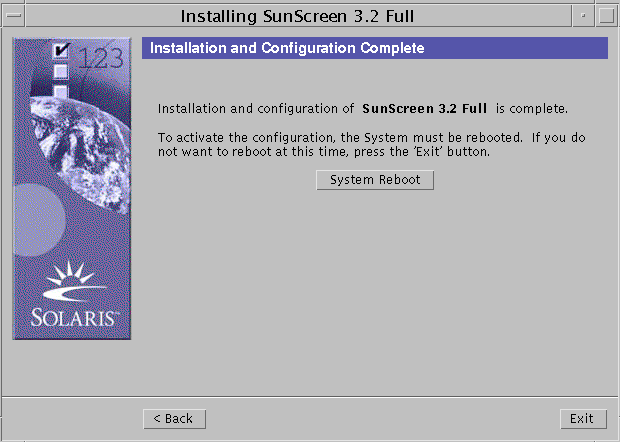
Note -You should ignore the plumbing error message on the stealth/routing interfaces during bootup. Once the HA configuration is pushed over from the primary, this error is eliminated.
To Define the HA Interface
The dedicated HA interface can be any interface on the Screen that has been plumbed and is not defined as a screening interface. To define an HA interface, perform the following steps:
-
Execute the steps in "To Edit the Policy".
-
Select Interface from the Type list.

-
Click the Search button.
-
Select the interface name that you want to dedicate to HA and click Edit.
If the interface does not appear, select New from the Add New list.
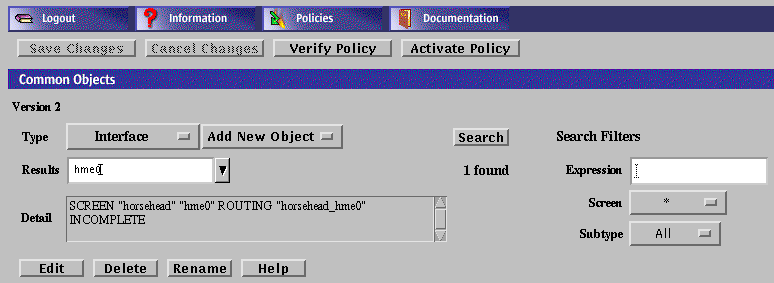
-
Define the interface, selecting HA as the Type.
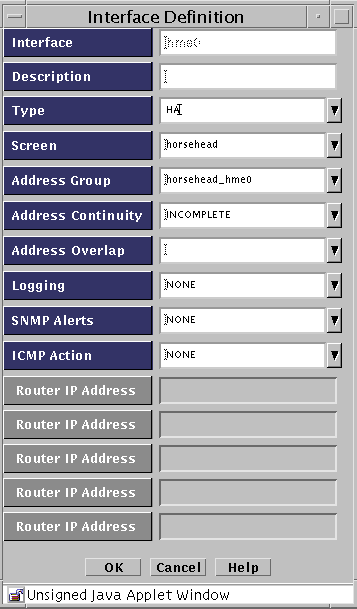
-
Click the OK button.
To Define the Screen Object for the HA Primary Screen
-
Execute the steps in "To Edit the Policy".
-
Select Screen in the Type list.

-
Click the Search button.
-
Select the name of the Screen that you want to use as the primary HA Screen, then click the Edit button.
If the Screen object is not yet defined for the primary Screen, select New from the Add New list and type the name of the primary Screen in the Name field.
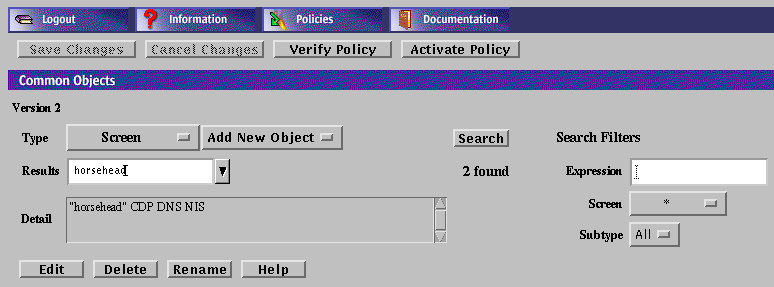
-
Select Primary in the High Availability field.
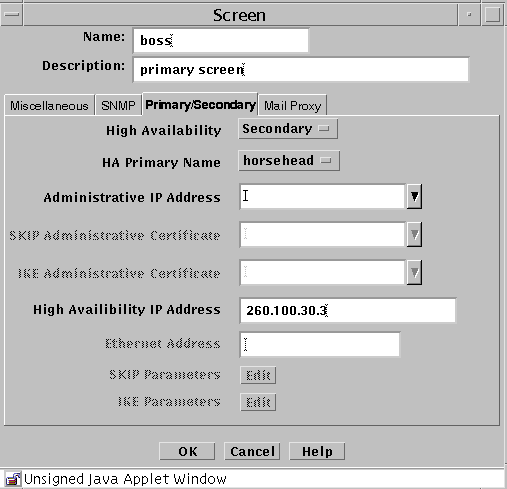
-
Type the IP address of the primary Screen's dedicated HA interface in the High Availability IP Address field.
-
Type the Ethernet address of the interface on the primary Screen in the Ethernet Address field.
-
Click the OK button.
To Initialize HA on the Primary HA Screen
-
Execute the steps in "To Edit the Policy".
-
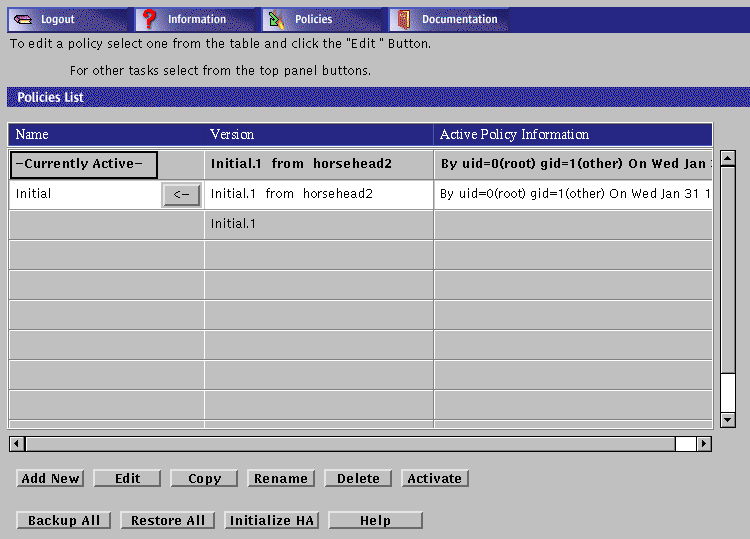
In the Policies List page, click on Initialize HA.
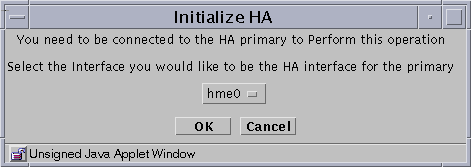
The Initialize HA dialog box appears.
-
Select the interface to be the HA interface from the Interface list.
Note -The HA interface on the primary HA Screen and secondary HA Screen must be the same.
-
Click the OK button
The Policies List page appears.
To Add the Secondary HA Screen to the Primary HA Screen
-
Execute the steps in "To Edit the Policy".
-
Select Screen from the Type list.

-
Select New from the Add New Object list.
The Screen dialog box appears.
-
Type the name of the secondary HA Screen in the Name field.
-
Click the Primary/Secondary tab in the Screen dialog box.

-
Set the following values in the Primary/Secondary area of the Screen dialog box:
- High Availability
-
Secondary
- Primary Name
-
Name of primary Screen
- Administrative IP Address
-
Leave blank
- High Availability IP Address
-
Secondary Screen IP address
-
Click the OK button.
-
Click the Save Changes button on the Policies List page.
The Activate Policy dialog box appears.

-
Click Yes.
-
Fully connect the secondary HA Screen to the network.
After adding an HA secondary Screen and activating your policy, the new secondary Screen may become active. If it does, you must direct the secondary Screen to become passive before you can perform additional administration on the primary Screen.
Note -Make sure all wires and cables are connected properly.
-
Configure the service and policy rules on the primary HA Screen.
All changes made on the primary HA Screen are automatically copied to all secondary HA Screens.
-
Save and activate the policy.
To Allow Non-Administrative Traffic on an HA Network
-
Execute the steps in "To Edit the Policy".
-
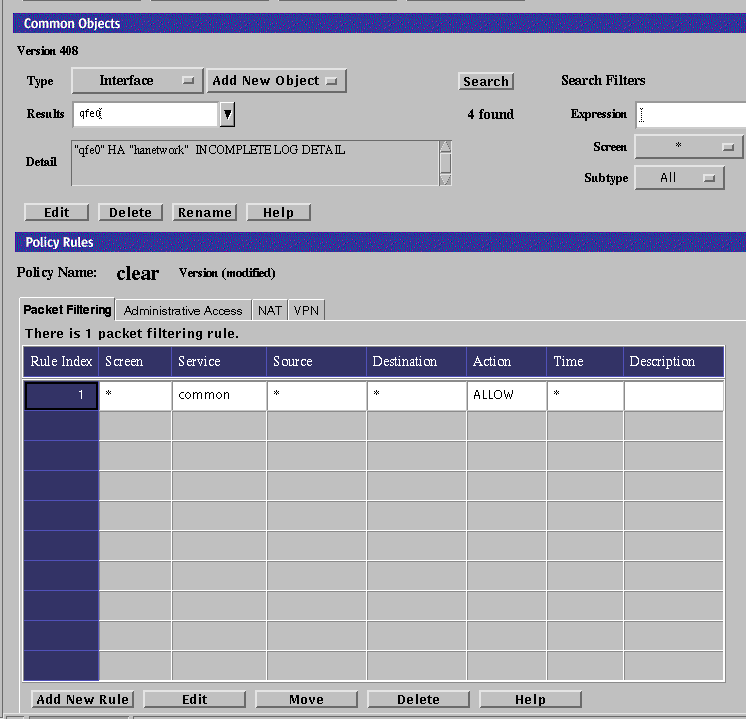
Select Interface from the type list.

-
Click the Search button.
-
Select the interface name.
-
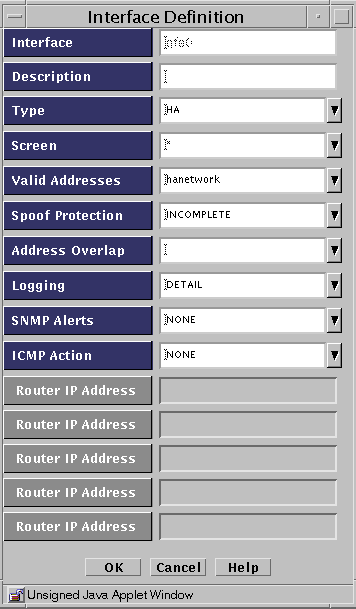
Click the Edit button.
-
Note the name in the Valid Address field for later use as the Destination Address for the new rule to be defined.
-
Click the Cancel button to close the Interface Definition panel.
-
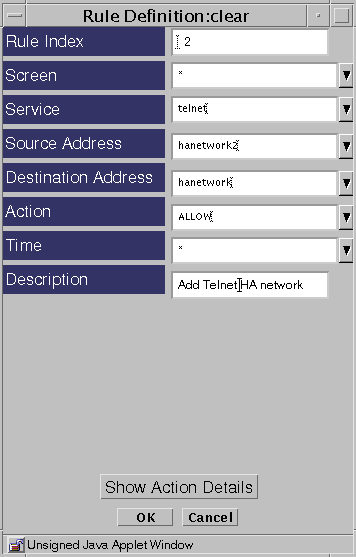
Click the Add New Rule button.
-
Fill in the fields. Make sure you set the Destination Address to the same name that was in the Valid Address field in Step 6above.
-
Click OK.
-
Click Save Changes.
The Activate Policy dialog box appears.

-
Click Yes to activate the policy.
Configuring Policies for an HA Cluster
You configure the HA cluster just as you configure a single Screen. Policy rules for passive HA Screens are configured when they connect to the primary HA Screen. You should write a rule for connecting to the unique address of each host in the HA service group.
Updates to the primary HA Screen are automatically relayed to all the other HA Screens. This synchronization takes place during activation. When a configuration is activated, the primary HA Screen transfers the configuration--including certificates, local keys, addresses, and policy rules--to all other secondary HA Screens.
When an HA host is in the passive mode, you cannot connect to that host directly, except with remote administration to the HA interface. This also applies to connections from one HA host to another on the HA interface.
You can allow services other than the standard HA service or remote administration and heartbeat. These services will only be allowed between the HA hosts. Add them to the HA service group by selecting Service in the Type list on the Edit Policy page, and add the services you want to include.
Removing HA
Removing HA involves removing both software and hardware. Simply disabling the HA configuration is insufficient and is only one part of the process. Because there is more than one Screen that has the same IP address on the network, simply disabling HA would leave two or more HA Screens on the network that are trying to route the same traffic, which would disrupt the network traffic through the Screens.
Remove the HA hosts one at a time to reduce the chances of disrupting the network. Remove the passive HA host or hosts first to avoid losing connections.
If you must remove the active HA host, use the following command on both the active HA host that you want to remove and on the passive HA host that will become the active HA host. This will help you to find out whether any connections will be lost.
-
For local administration:
# ssadm lib/statetables
-
For remote administration:
# ssadm -r Screen_Name lib/statetables
If the state tables are in an acceptable level of synchronization, you can proceed to remove the active HA host.
HA Logging
Information about the HA Screen is not shown as such in the Log Browser.
If you want to see the changes in state, be sure that /etc/syslog.conf contains the following lines:
*.err;kern.notice;auth.notice;user.none;daemon.info /dev/console *.err;kern.debug;daemon.info;mail.crit;user.none /var/adm/messages |
Note -
Some HA messages are now sent to syslog and some sent to regular log.
- © 2010, Oracle Corporation and/or its affiliates

