Using the HTTP Proxy
The HTTP proxy provides a relay capability for the World Wide Web supporting the HTTP protocol. As with other proxies, it allows or denies sessions based on the source or destination address. It also provides selective filtering of content based on the source and destination of sessions. The selective filtering options include Java filtering, ActiveX, and cookies.
The HTTP proxy filters Java by reading the signatures encapsulated in Java Archives (Jars) or on a precomputed hash of Java Archive content.
For user-based authentication, select a proxy user. For more information on configuring the HTTP proxy, see "To Define PROXY_HTTP".
To Configure the Browser to Use the HTTP Proxy
Basically, you point your browser at the Screen instead of allowing the browser to target HTTP servers directly. This example procedure is designed for configuring the Netscape browser. Consult the documentation for your browser to determine how to set the HTTP proxy server address and port number.
The server address should be the Screen's address and the port number must be 80.
-
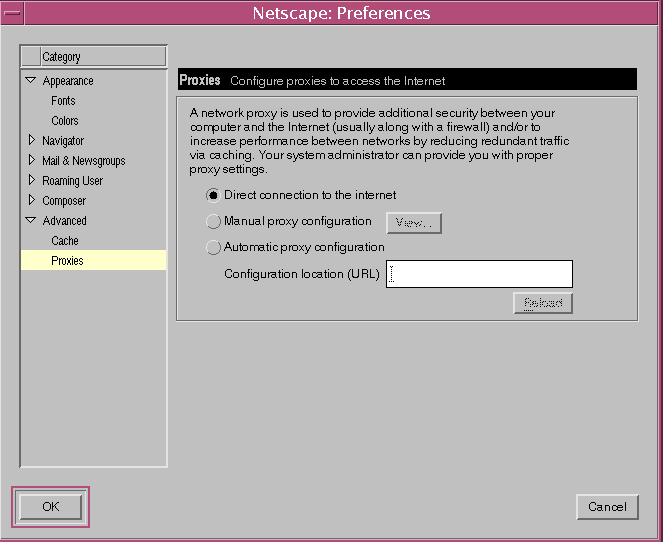
Select Preferences in the Edit pulldown.
The Preference page is displayed.
-
Select Advanced on the Preferences page.
-
Select Proxies under the Advanced selection.

-
Select Manual proxy configuration.
-
Click the View button beside the Manual proxy configuration.

-
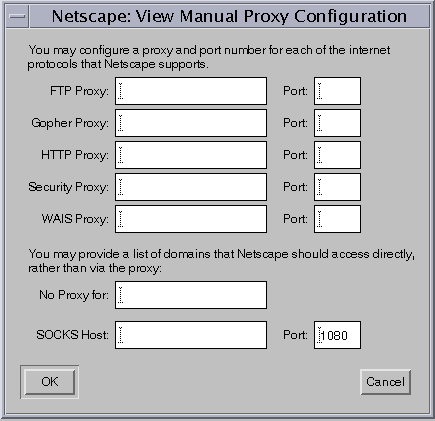
Enter the IP address in the HTTP Proxy field.
-
Type the number 80 as the number of the Port in the Port field for HTTP.
The HTTP proxy is fixed at port 80 in the current version of SunScreen.
You may, as desired, set the values for the FTP Proxy and/or Security Proxy to the same values just used for the HTTP Proxy. This will cause browser-initiated requests for ftp:// and/or SSL references to be handled by the HTTP proxy on the Screen. See "Proxies" in SunScreen 3.2 Administrator's Overview for details on HTTP Proxy Port Restrictions and HTTP Proxy Access for ftp://.
-
Click the OK button in the View Manual Proxy Configuration dialog box.
-
Click the OK button in the Preferences dialog box.
- © 2010, Oracle Corporation and/or its affiliates
