Writing and Editing Policy Rules for Proxies
Policy Rules are strictly ordered; they take effect in the order in which they are listed. You may either define policy rules in the order in which you want them to take effect or rearrange them after they are defined.
Basic Steps for Writing Policy Rules for Proxies
-
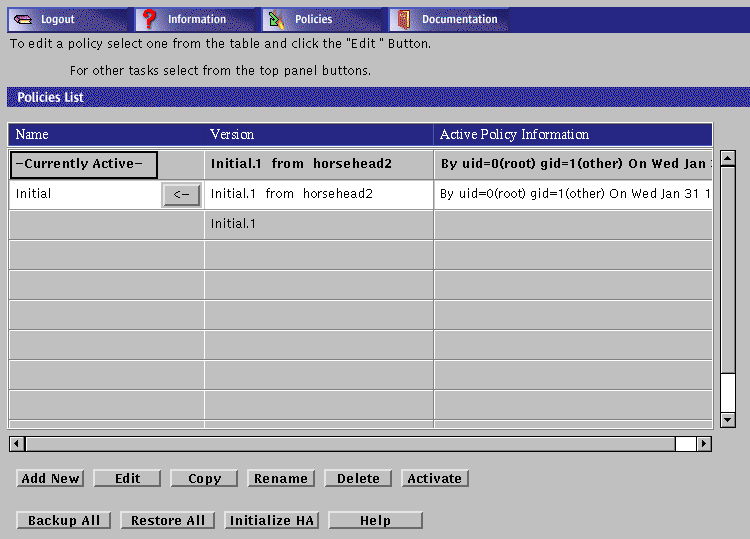
Choose the policy Initial in the Policies List page.
-
Click the Edit button.
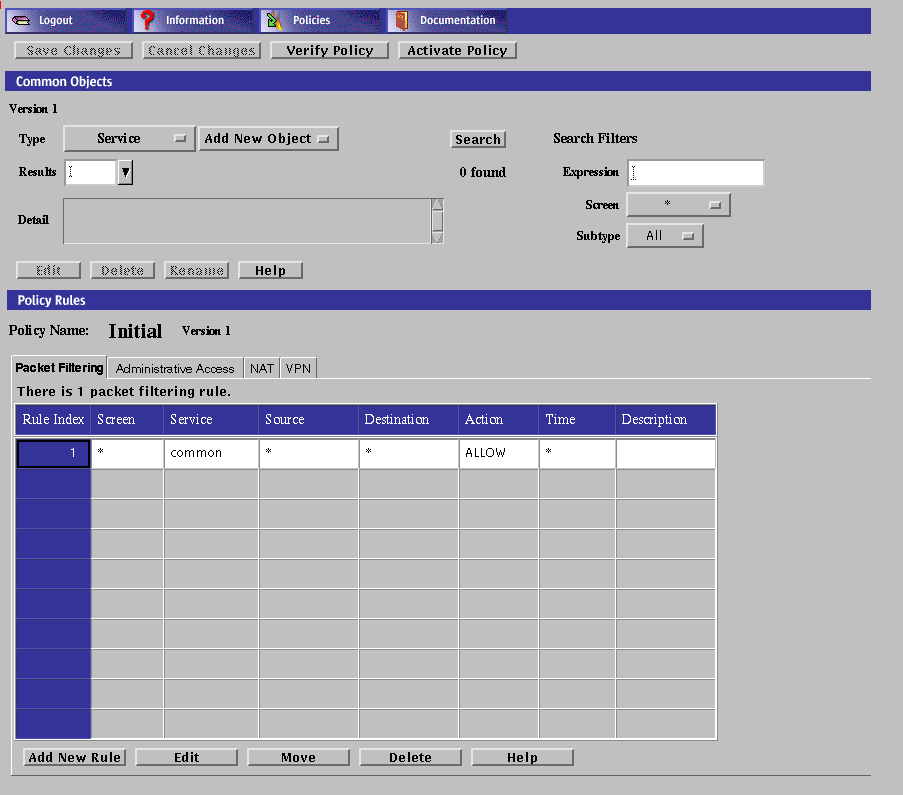
The Policy Rules page appears.
-
Select the Packet Filtering tab in the Policy Rules area.
Proxies are defined in the Packet Filtering page.
-
Click the Add New Rule button in the Packet Filtering area.
The Rule Definition dialog box for that policy is displayed.

In the Rule Definition dialog box, the Rule Index field is filled with the next available rule index.
-
(Optional) If a rule is valid only for a particular Screen, select that Screen only in the Common Objects area.
The default is for the rule to be valid for all Screens.
-
In the Services box in the panel, select one of the services that is valid for proxies, for example:
-
ftp
-
www
-
smtp
-
telnet
-
-
Select the source and destination address that you want for the Source and Destination Address fields.
Be sure you have defined these addresses on the Policy Rules page.
-
For a proxy rule, select ALLOW or DENY in the Action field.
These are the only valid actions for proxies. The Encrypt or VPN action to not apply to proxies.
-
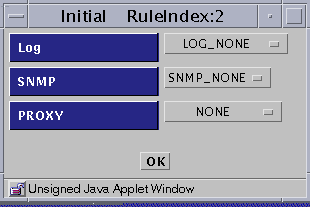
LOG
-
SNMP
-
PROXY
When you select ALLOW, a new dialog box appears:
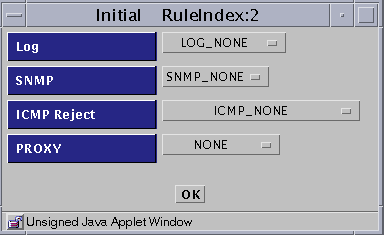
When you select DENY, a new dialog box appears:
-
LOG
-
SNMP
-
ICMP Reject
-
PROXY
-
To Write Policy Rules for the Proxies
-
Execute the steps in "Basic Steps for Writing Policy Rules for Proxies".
-
From the Proxy list, select the information that you want to put into the LOG and SNMP fields.
There are five items in the Proxy list:
-
NONE
-
PROXY_HTTP
-
PROXY_FTP
-
PROXY_SMTP
-
PROXY_Telnet
-
-
Select the name of the proxy service for which you are writing this policy rule for the Service field.
If you plan to use proxies, you must select the appropriate proxy service:
Table 6-2 Proxies and ServicesChoose This Service For This Proxy ftp PROXY_FTP www PROXY_HTTP smtp PROXY_SMTP telnet PROXY_TELNET Each choice requires slightly different steps, which are listed below under the four proxy types.
To Define PROXY_FTP
-
Execute the steps in "Basic Steps for Writing Policy Rules for Proxies".
-
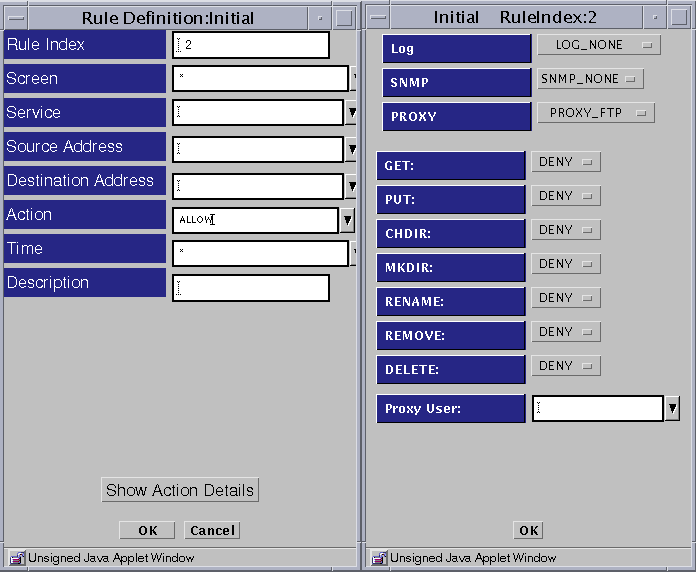
Select PROXY_FTP as the proxy
The Rule Definition Dialog Box for PROXY_FTP appears
-
Select PROXY_FTP from the Proxy list and eight fields appear below the Proxy field in the dialog box:
-
GET
-
PUT
-
CHDIR
-
MKDIR
-
RENAME
-
REMOVE
-
DELETE
-
Proxy User
-
-
Select an action for each field (GET, PUT, CHDIR, MKDIR, RENAME, REMOVE, and DELETE) or accept the default values. You can either allow (Allow) or disallow (Deny) use of these FTP commands based on the settings you choose.
-
Select the name of a defined proxy user in the PROXY USERS field.
-
Click the OK button in the dialog box.
-
Click the Save Changes button.
To Define PROXY_HTTP
-
Execute the steps in "Basic Steps for Writing Policy Rules for Proxies".
-
Select PROXY_HTTP as the proxy, click that name to put it into the Proxy field.
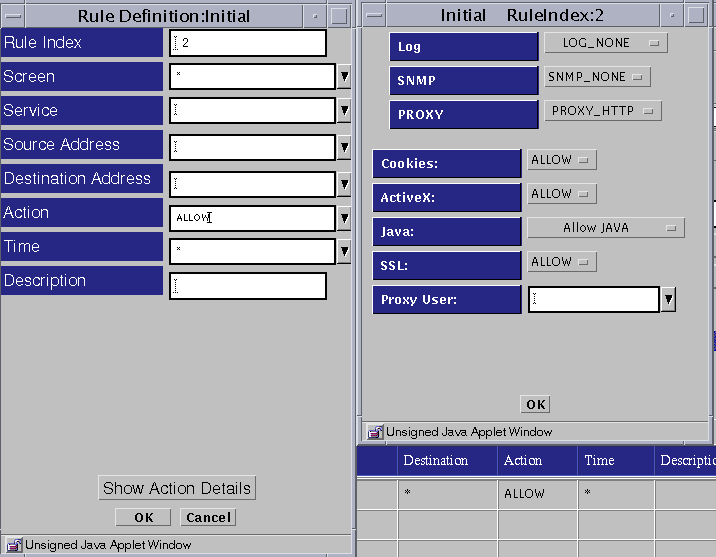
Five fields then appear below the Proxy field:
-
Cookies
-
ActiveX
-
Java
-
SSL
-
Proxy User
-
-
Set the action for each item.
-
For Cookies, ActiveX, and SSL, choose an action or accept the default under Proxy Details. You can either allow (Allow) or disallow (Deny) the use of cookies, ActiveX, or SSL based on the settings you choose for each field.
-
For the Java field, choose among the following under Proxy Details:
-
-
(Optionally) Select a proxy user or group to be allowed through the proxy.
-
Click the OK button in the dialog box.
-
Click the Save Changes button.
To Define PROXY_SMTP
-
Execute the steps in "Basic Steps for Writing Policy Rules for Proxies".
-
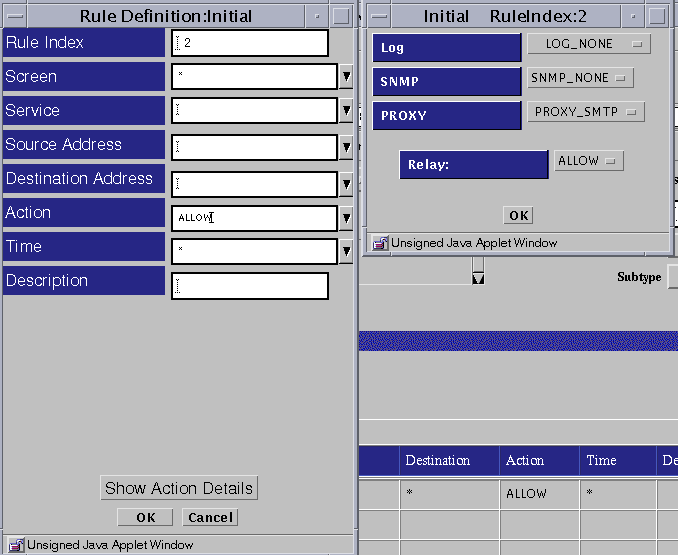
Select PROXY_SMTP as the proxy.
the Relay field appears below the Proxy field in the dialog box.
Note -For more information on relay control, see "SMTP Proxy" in SunScreen 3.2 Administrator's Overview.
-
Determine whether you want to allow relaying of mail messages through the proxy in the Proxy Details area.
-
If you want to allow all relaying, select the RELAY: ALLOW setting.
-
If you want to restrict the relaying, define the local domain name for the Screen or create a list of valid relay (domain) targets as described in the following 2 substeps and select the RELAY: RESTRICT setting.
-
Define the Local Domain Name
Create or edit the /etc/defaultdomain file to contain the domain suffix for the Screen.
Note -For this default domain to become active, you must either shut down and reboot the Screen or run the following command:
# domainname 'cat /etc/defaultdomain'
-
Create a List of Valid Relay Targets
Use the mail_relay feature of the ssadm command to create a list of valid relay (domain) targets (see "SMTP Proxy" in SunScreen 3.2 Administrator's Overview).
Note -The destination address in this rule should be the address of the SMTP server or servers that will spool and/or deliver email after it is restricted and filtered by the screen.
-
-
Click the OK button in the dialog box.
-
Click the Save Changes button.
To Define PROXY_Telnet
-
Execute the steps in "Basic Steps for Writing Policy Rules for Proxies".
-
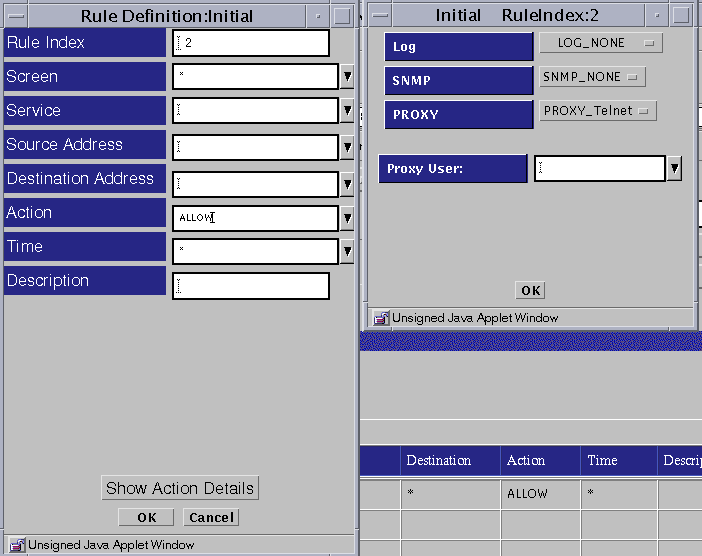
Select PROXY_Telnet as the proxy.
The Proxy Users field appears below the Proxy field on the right side of the Rule Definition dialog box.
-
Select the proxy user or group that is allowed through the proxy.
-
Click the OK button in the dialog box.
-
Click the Save Changes button.
- © 2010, Oracle Corporation and/or its affiliates
