Basic Encryption Configuration
This example presumes you have installed both screens in routing mode. The Screens used in this example are called sf-screen and hk-screen.
Note -
The IKE portion of this example uses certificates but you could substitute IKE preshared keys if appropriate. See REFERENCE for an example of using preshared keys; the example uses a Screen and a Windows 2000 system but the Screen portion is the same.
Create Address Objects on Both Screens
See the SunScreen Administration Guide for more information on creating Address objects.
-
Define an Address object on each Screen for the other Screen
In this example, on sf-screen you would create an Address object to represent hk-screen and vice versa.
In this example, both Screens are routing Screens, so the addresses of these objects are the IP addresses of their interfaces nearest the Internet (192.168.6.2) for hk-screen and 192.168.2.2 for sf-screen.
-
Define Address objects on each Screen for the systems using encryption.
In this example, you would create Address objects named sf-host1 and hk-host1 on each Screen.
Create a Certificate Object for Each Screen
-
Creating a SKIP certificate - If you installed your Screen with Remote Administration, you already have a SKIP certificate. If not, see the following steps for details on creating SKIP Certificate objects.
-
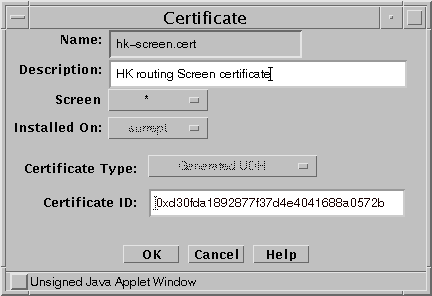
In the GUI Common Objects panel, select Certificate->Generate SKIP UDH. The Generate Certificate window appears.
-
Fill in the required fields and generate the certificate as shown in the following figure. For details on the screen fields , see the SunScreen Administrators Guide or the window online help.
Figure 5-2 SKIP Generate Certificate window
-
-
Creating an IKE certificate - use the following steps to generate an IKE Certificate object.
-
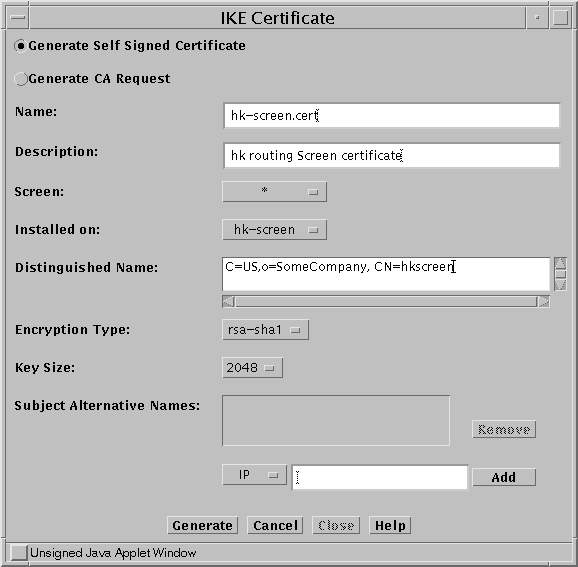
In the GUI Common Objects panel, select Certificate->Generate IKE certificate. The Generate Certificate window appears.
-
Fill in the required fields and generate the certificate as shown in the following figure. For details on the screen fields , see the SunScreen Administrators Guide or the window online help.
Figure 5-3 Generate IKE Certificate Window
-
-
(IKE Only) Export the IKE certificate.
-
In the GUI Common Objects panel, select Certificate, then click the Search button.
-
Select hk-screen.cert from the list of Certificate objects and click Edit
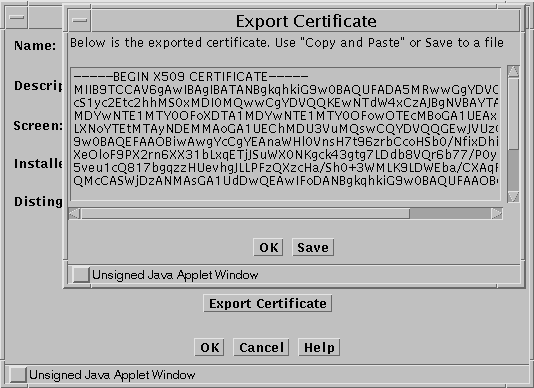
Figure 5-4 Export Certificate Window
-
When the Edit Certificate window appears, click Export Certificate
-
When the Export Certificate window appears, you have two choices:
-
Select the window contents and paste them into either a file or a mail message.
-
Save the contents into a file directly from this window. This method requires that you have a Java plug-in installed that supports local file operations.
-
-
Move the exported certificate file to the other Screen.
-
Install Each Screen's Certificate Object on the Other Screen.
-
Installing SKIP certificates
-
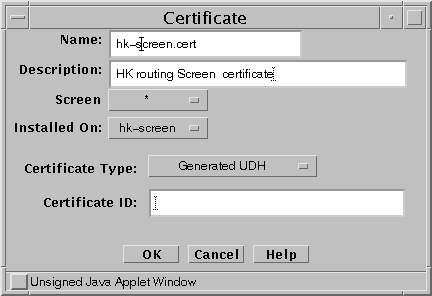
In the GUI Common Objects panel, select Certificate->Associate->SKIP Certificate. The Associate SKIP Certificate window appears.
-
Specify a name for the certificate and specify the certificate's MKID.
See
Note -Make sure that CDP is enabled on each Screen object.
Figure 5-5 Associate SKIP Certificate Window
-
-
Installing IKE certificates
-
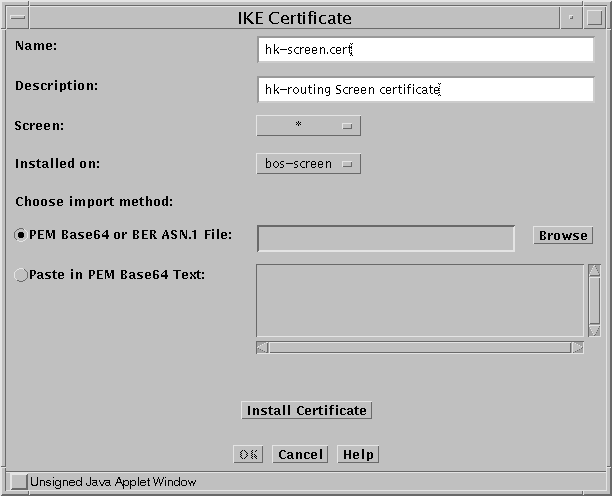
In the GUI Common Objects panel, select Certificate->Import IKE Certificate. The Import IKE Certificate window appears.
Figure 5-6 Import IKE Certificate Window
-
After filling in the Name field, you can either browse for the certificate file (requires Java plugin) or paste the file contents into the Screen.
-
When you have specified the file, click Install Certificate.
-
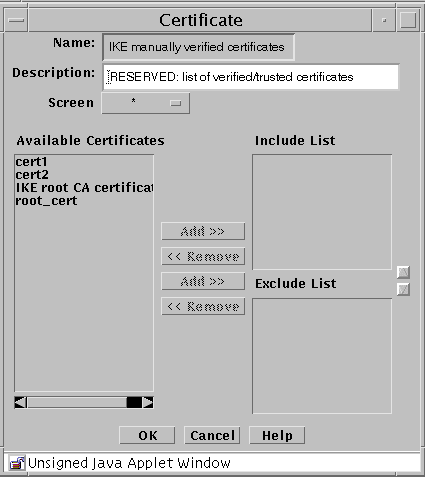
Add the new certificate to the appropriate verified IKE Certificates group.
There are reserved Certificate groups for trusted manually- generated ( IKE manually verified certificates) and CA-generated IKE (IKE root CA certificates) certificates. This example uses manually-generated IKE certificates so you would add the IKE certificate on each Screen to the IKE manually verified certificates group as shown in the following figure.
Figure 5-7 Adding IKE Certificate to Group
-
Create Packet Filtering Rules with the ENCRYPT action
On each Screen, add a Packet Filtering rule to encrypt traffic between the two Screens; Step 8 in the Advanced Encryption scenario shows you how to use the Rule Definition and Action Details windows. Note that one difference between the Advanced and Basic examples is that this Basic example does not use a tunnel address.
-
On each Screen, edit the active policy or create a new policy.
-
Click Add New Rule.
-
When the Rule Definition window appears, specify the Service, Source Address, Destination Address, and Action (ENCRYPT).
Go to the Action Details screen appropriate for the encryption method (SKIP or IKE).
-
When the Action Details window appears, choose the parameters that are appropriate for your encryption method (IKE or SKIP). These parameters must match on each Screen.
-
Specify the Source and Destination Certificates.
For example, the sf-screen certificate is the Source Certificate on sf-screen and the Destination Certificate on hk-screen.
-
For SKIP - Specify the Key, Data, and MAC algorithms.
Also, specify source and destination tunnel addresses if you are using them (for a Stealth Screen for example).
-
For IKE - Specify the ESP and/or the AH. Also specify the Encryption Algorithm, Hash Algorithm, and Oakley Group (also known as the DH Group). Specify the Authentication Method and make sure that it matches the certificate Encryption Type.
For example, if you selected rsa-sha1 or rsa-md5 as the certificate Encryption type the select RSA-SIGNATURES as the Authentication Method. Similarly, if you chose dsa-sha1 as the certificate Encryption type, use DSS-SIGNATURES as the Authentication Method.
-
For IKE -- On the Option tab specify Mode and related parameters.
Your choices are Tunnel or Transport mode. Tunnel mode encapsulates and encrypts the entire packet including the IP header for maximum security. Transport mode encapsulates and encrypts only the data portion of the IP packet resulting in smaller packets and potentially better throughput as the Screen is relieved of the overhead of decrypting the IP header.
-
-
When finished, click OK.
-
On each Screen, save and Activate the policy.
Note -SKIP Only - The Greenwich Mean Time (GMT as displayed by env TZ=GMT date) must be synchronized between SKIP peers. When Screens are located in different parts of the world, you should set the time for that part of the world. Also, set the TimeZone for that part of the world. That is, the local time that is corrected with the TimeZone must be the same on both machines. You can check the time using the date -u command.
- © 2010, Oracle Corporation and/or its affiliates
