Sun Fire Link Software Installation Guide Link Software Installation Guide
|
| Sun Fire Link Software Installation Guide
|
| C H A P T E R 4 |
|
Update Multiple Hosts Using Image Tool and Agent Update |
This chapter provides instructions for:
Sun Fire Link allows you to create an image of one, two, or all of the following Agent components:
|
Note - Before creating an image, the Sun Fire Link Server component must be installed on the server machine. |
The primary use of Agent Update for the Sun Fire Link add-on software is to distribute the Cluster Node component to multiple nodes simultaneously. Because of a Sun Management Center 3.5 limitation, all component setup questions are asked, even when you select a single component for the image.
Typically, as recommended, the Sun Fire Link Manager and Switch components are installed and set up on a single target host machine. However, when you want to image the Manager and Switch components (as shown in CODE EXAMPLE 4-1), three main setup options appear: l, u, and d. Options l and u correspond to the Sun Management Center load and unload agent module commands. Use option d to end the setup for both components.
The Agent Update setup for these components asks you to:
Enter the hostname of the node that this data will be applied.... |
This information is used to apply setup information to a specified target host, as shown in CODE EXAMPLE 4-1. The setup information for a specific target host, while contained in an image which will be distributed to multiple hosts, will be applied only to that target host; for example, if a manager component is imaged for distribution on hosts tara and jenny, and you only supply setup information for tara, that information is only applied to the setup on tara.
|
Note - Multiple instantiations of either component's agent module should not monitor the same Manager or Switch, from the same or different hosts. |
If an image contains a Manager component, and setup information is not supplied for target hosts when the component is installed for the first time, default directory information is used when setup is run on that host. The default directory is an area for Sun Fire Link Manager data:
/var/opt/FM_xxx |
where xxx represents date and time-specific values.
If a Manager component is included in an image to be applied to hosts in that scenario, setup information must be specified for the target hosts.
Once a Sun Fire Link image has been applied to a target host, regardless of the components that are contained with the image, another update is not allowed by Sun Management Center until an image with an updated version is presented, or the add-on software is removed through Sun Management Center tools.
Use the preceding information to perform this step correctly for Sun Fire Link add-on components. For additional information, refer to Chapter 8, "Post-Installation Tasks," in the Sun Management Center 3.5 Installation and Configuration Guide for detailed instructions about using either the Wizard or the CLI Image Tool.
 Create an Image File of the desired Sun Fire Link add-on components to be distributed to the desired agent machines using either es-gui-imagetool or es-imagetool, which are base Sun Management Center scripts.
Using the Agent Update process, you create an Image File of the add-on components to be distributed to the target machines, and then add a New Job to Manage Jobs Task list to be run when you specify.
The Agent Update process must be run from the Sun Management Center server machine. The target hosts must have only the Agent layer installed (the Console layer must not be present), and each target host must have the Sun Management Center Agent Update module running.
1. From your main Sun Management Center console window, select the Manage Jobs... option from the Tools menu.
The system displays the Manage Jobs panel (FIGURE 4-1), which allows you to distribute the Image File.
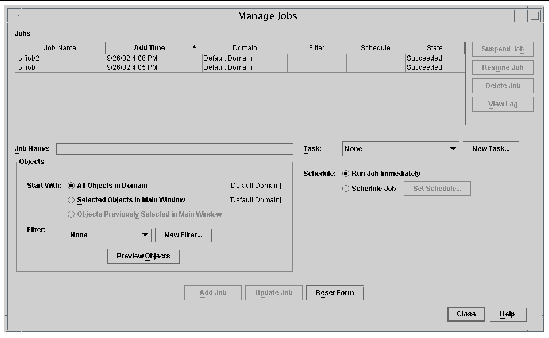
2. In the Manage Jobs panel, select the New Task... button.
The system displays the New Task panel (FIGURE 4-2), which allows you to specify the Agent Update Image File to distribute.
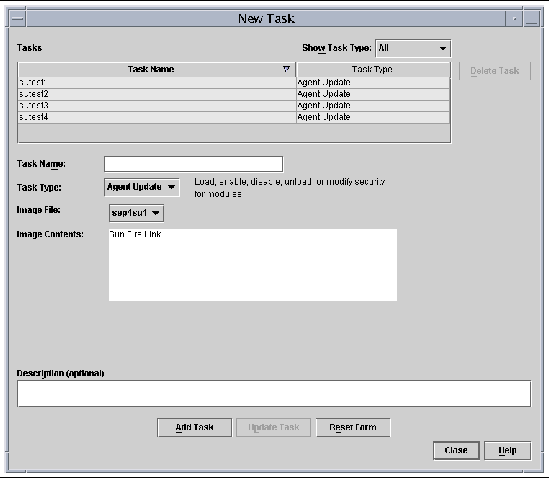
3. In the New Task panel (FIGURE 4-2), do the following:
a. Select Agent Update for the Task Type.
b. Select the Image File you created in Step 1.
4. In the Manage Jobs panel (FIGURE 4-1), do the following:
b. Select the Task you created in Step 4.
c. Do one of the following to schedule when you want the Task to run:
d. Do one of the following to select the objects (agent machines) to which you want to distribute the Image File:
e. Preview the objects (agent machines) you have selected and redo your selections if necessary.
The job starts and distributes the Image File to the objects (agent machines) you selected. When the job is running, it appears in the Job list of the Manage Jobs panel. The panel shows the status of the job when running and when complete.
| Sun Fire Link Software Installation Guide
| 817-0401-11 |
Copyright © 2003, Sun Microsystems, Inc. All rights reserved.
