Sun Fire Link Software Installation Guide Link Software Installation Guide
|
| Sun Fire Link Software Installation Guide
|
| C H A P T E R 3 |
|
Install, Set Up, and Uninstall Sun Management Center 3.5 Software Using the Wizards |
This chapter provides instructions for installing, setting up, uninstalling, starting, and stopping Sun Management Center 3.5 software, including the base software, the Fabric Manager, the RSM proxies, and Sun Fire Link agents on their respective hosts using the Sun Management Center 3.5 Wizards. Refer to the Sun Management Center 3.5 Installation and Configuration Guide for more information about installing, setting up, uninstalling, starting, and stopping Sun Management Center 3.5 base software.

|
Caution - Use the installation and setup scripts or Wizards provided with the Sun Management Center 3.5 software. Do not manually add packages or manually change configuration files. |
Your Sun Management Center 3.5 installation and setup scripts or Wizards may not display exactly the same messages in exactly the same sequence as the examples shown in this chapter. However, these examples show the basic messages you will receive in approximately the sequence you will receive them. Your actual installation and setup scripts depend on the add-on components you choose to install and other choices you make.
Sun Management Center software runs on top of the Sun Fire Link Manager and provides a convenient GUI interface for monitoring and managing the RSM network on a Sun Fire cluster.
The Sun Fire Link 1.1 software release provides support for Sun Fire 15K/12K and 6800 systems. Instructions for installing and setting up and lists of the Sun Management Center 3.5 packages for the Sun Fire 15K/12K and 6800 systems are provided in the Sun Management Center 3.5 Supplement for Sun Fire 15K/12K Systems and the Sun Management Center 3.5 Supplement for Sun Fire 6800/4810/4800/3800 Systems. TABLE 3-1 lists the Sun Management Center packages provided in the Sun Fire Link 1.1 release.
|
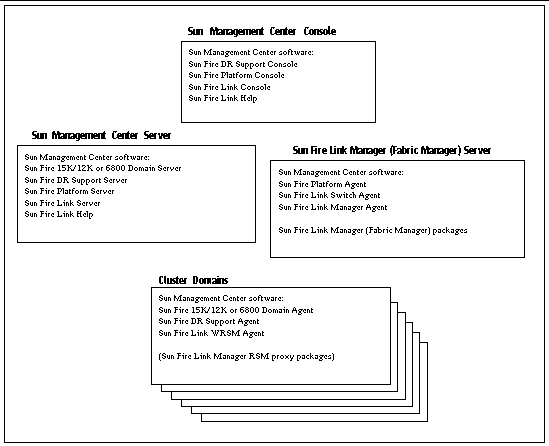
Sun Management Center console, server, FM Host, and RSM Domains |
||
|
Sun Management Center console, server, FM Host, and RSM Domains |
The following packages need to be installed on various systems:
The latter three roles might be filled by the same system or by two or three different systems. Most commonly, the administration server doubles as the Sun Management Center console, and a separate (usually larger) system acts as both Sun Management Center server and Sun Fire Link Manager server.
FIGURE 3-1 is a graphic representation of the system location requirements of the various packages.
|
|
1. Log in to each target system as superuser.
2. Run the Sun Management Center 3.5 Installation Wizard, es-guiinst, which walks you through the installation.
This section provides a summary of installing Sun Management Center 3.5 base software and Sun Fire Link add-on software using the Sun Management Center 3.5 Installation Wizard. Chapter 6, Installation and Setup, of the Sun Management Center 3.5 Installation and Configuration Guide, describes in detail how to install all the software.
1. As superuser, run the es-guiinst script as described in Chapter 6, "Installation and Setup," of the Sun Management Center 3.5 Installation and Configuration Guide.
After the base software is installed, the Select Add-on Product screen provides a selectable list of add-on products that you can install.
2. Select those add-ons that apply to Sun Fire Link systems, and click Next.
|
Note - The Sun Management Center 3.5 Setup Wizard starts automatically after all the software is installed. |
This section describes how to set up the Sun Fire Link add-on software using the Sun Management Center 3.5 Setup Wizard. The four Sun Fire Link add-on components are:
Generally, you would not be setting up all four components at once. Rather, you probably would be setting up one or two of the components on any single node. The Sun Management Center 3.5 Setup Wizard recognizes which components are installed and only displays panels that are relevant to setting up these installed components.
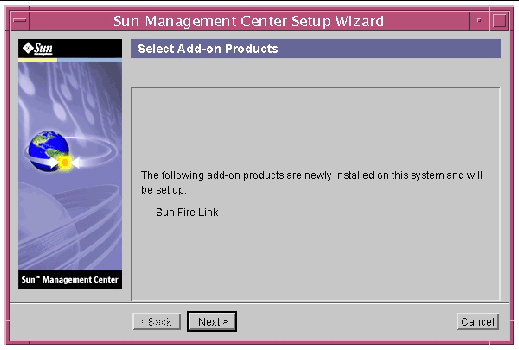
Once the Sun Management Center base software setup is complete, the Select Add-on Products panel appears listing the add-on products by platform installed on your system. In FIGURE 3-2 Sun Fire Link is the add-on product or platform installed.
2. Click Next to start the Sun Fire Link Setup.
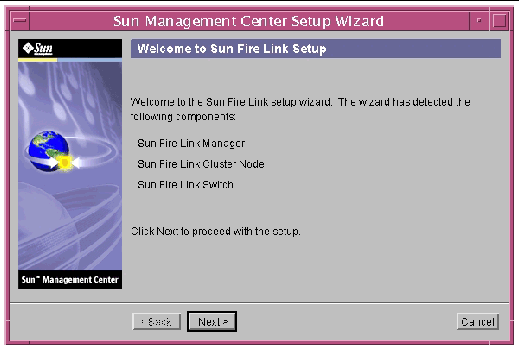
The Welcome to Sun Fire Link Setup panel appears listing the add-on components that are installed. In FIGURE 3-3 the Sun Fire Link Server was not installed.
3. Go to one of the following procedures, depending on what add-on component you are setting up first.
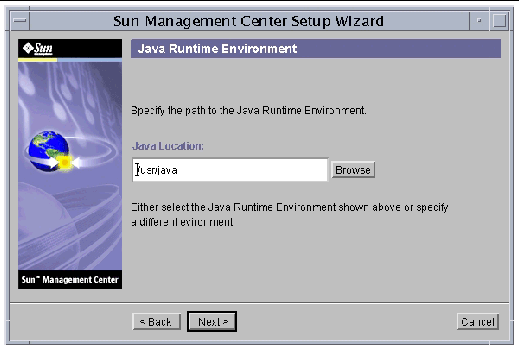
The Java Runtime Environment panel appears showing the default path to the Java Runtime Environment.
The Configuration Files panel appears allowing you to specify a directory for storing the configuration files.
The directory where you store configuration files should be a subdirectory of /var/opt/; for example, /var/opt/fab2data.

|
Caution - If there is a pre-existing configuration directory specified, do not change the setting, or you will invalidate all currently running fabrics and fabric data. |
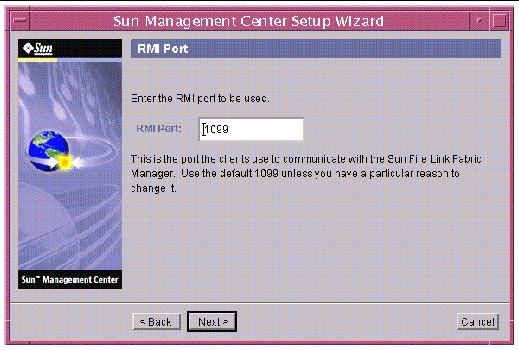
The RMI Port panel appears showing the default RMI port number.
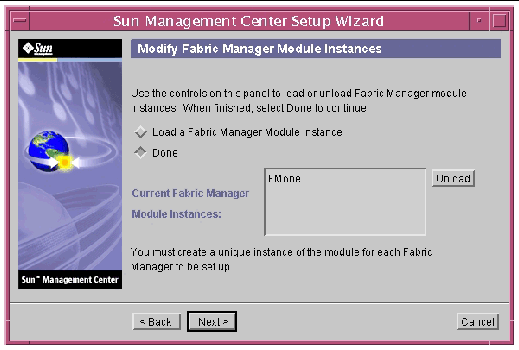
The Modify Fabric Manager Module Instances panel appears.
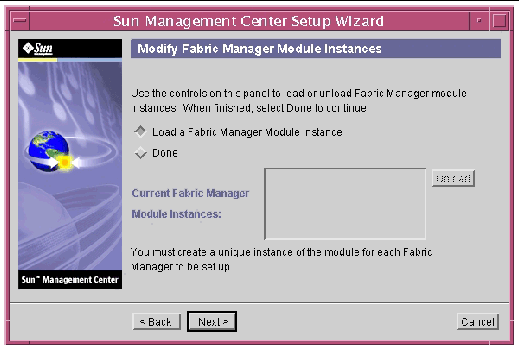
8. Click the button to the left of Load a Fabric Manager Module instance to create a new instance.
You must create a unique instance of the module for each Fabric Manager to be set up.
The Fabric Manager Module Instance Name panel appears.
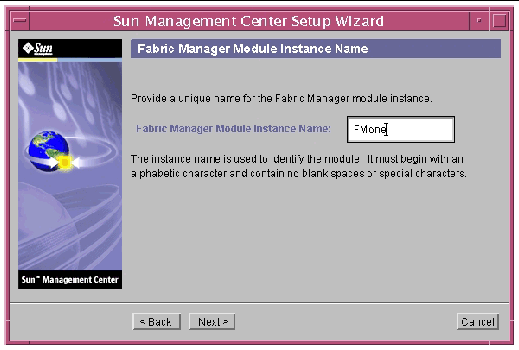
10. Enter a unique name for the Fabric Manager Module Instance.
The instance name identifies the module. It must begin with an alphabetic character and contain no blank spaces or special characters.
The Fabric Manager Module Description panel appears.
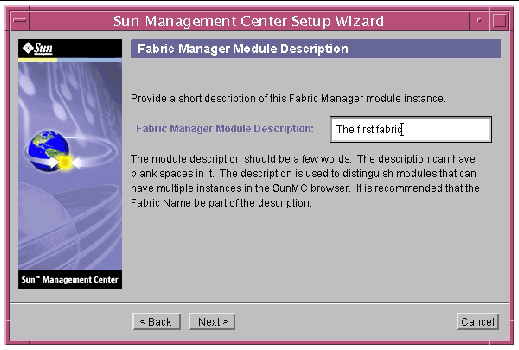
12. Enter a short description of this Fabric Manager module instance.
The description is used to distinguish modules that have multiple instances in the Sun Management Center console. Putting the Fabric Name as part of the description would be a distinguishing characteristic. Blank spaces are allowed.
The Fabric Name panel appears.
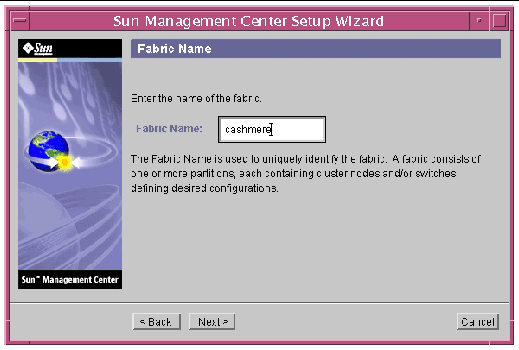
14. Enter the name of the fabric.
The Fabric Name identifies the fabric. A fabric has one or more partitions, each containing cluster nodes and/or switches, defining desired configurations.
The Confirmation panel appears.
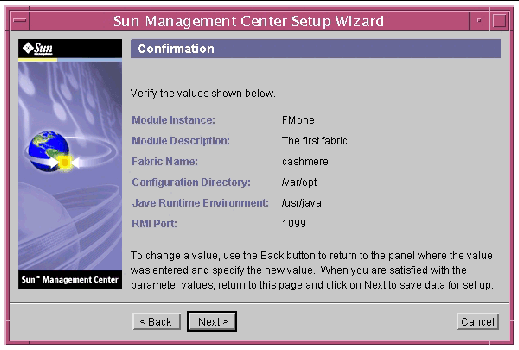
16. Verify the values on the panel. To change a value, click the Back button to return to the panel where the value was entered, and specify the new value.
17. When you are satisfied that all the values are correct, click Next on this panel (FIGURE 3-10) to save your data for the setup.
The Modify Fabric Manager Module Instances panel appears with the instances that have been created in the list box.
The Modify Switch Module Instances panel appears.

2. Click the button next to Load a Switch Module Instance.
You must create a unique instance of the module for each Switch being set up.
The Switch Module Instance Name panel appears.
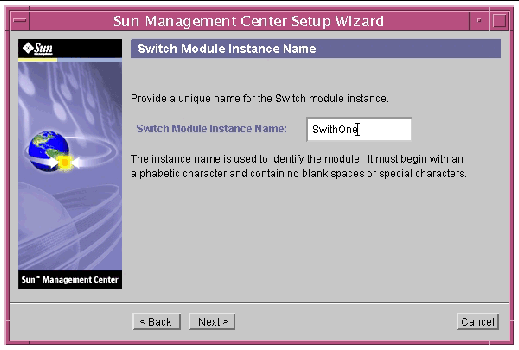
4. Enter a unique name for the Switch module instance.
The instance name identifies the module. It must begin with an alphabetic character and contain no blank spaces or special characters.
The Switch Module Description panel appears.
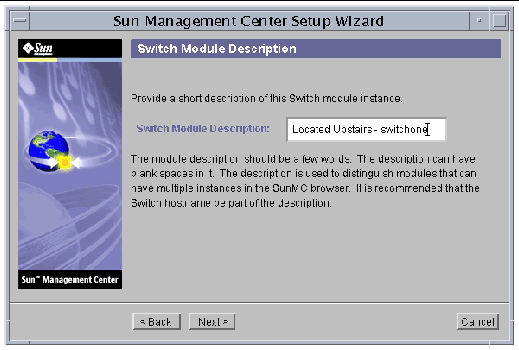
6. Enter a short description of this Switch module instance.
The description is used to distinguish modules that have multiple instances in the Sun Management Center console. Putting the Switch host name as part of the description would be a distinguishing characteristic. Blank spaces are allowed.
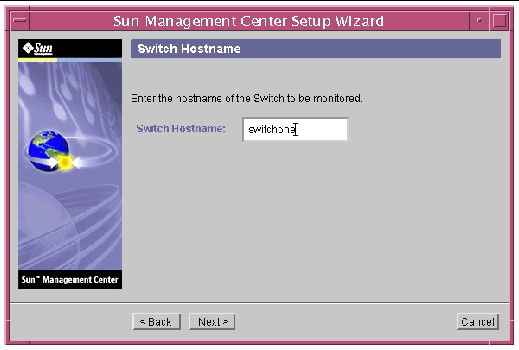
The Switch Hostname Panel appears.
8. Enter the host name of the Switch to be monitored.
The Public Community String panel appears.
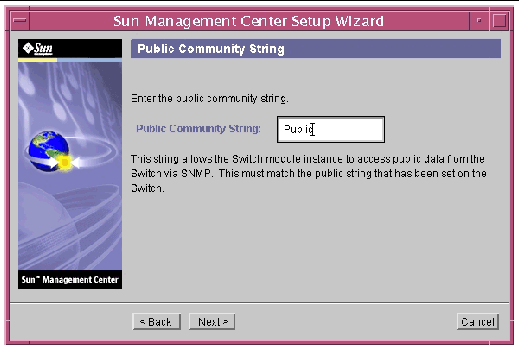
10. Enter the public community string, such as Public.
This string allows the Switch module instance to access public data from the Switch via SNMP. This must match the public string set on the Switch.
The Confirmation panel appears.
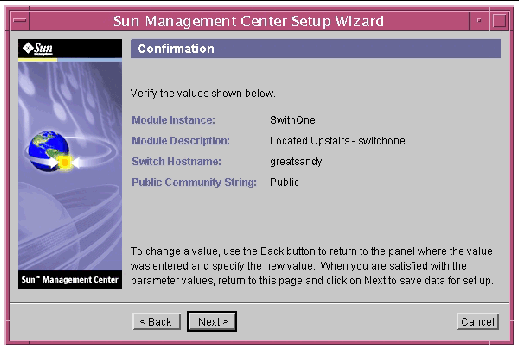
12. Verify the values on the panel. To change a value, click the Back button to return to the panel where the value was entered, and specify the new value.
13. When you are satisfied that all the values are correct, click Next on this panel (FIGURE 3-10) to save your data for the setup.
The Modify Switch Module Instances panel appears with the instances that have been created in the list box.

The Java Runtime Environment panel appears showing the default path to the Java Runtime Environment.

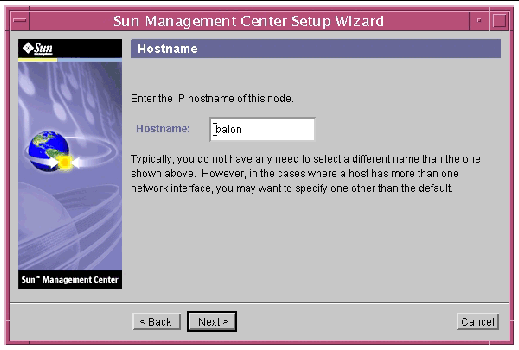
The Hostname panel appears showing the default IP host name of the node.
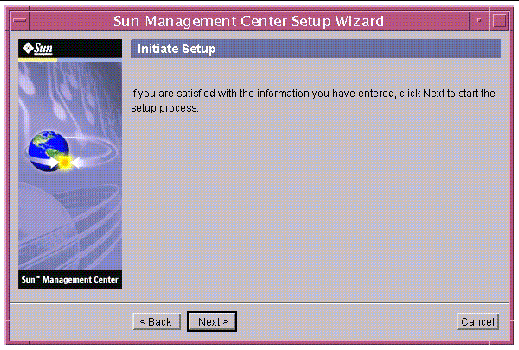
The Initiate Setup panel appears.
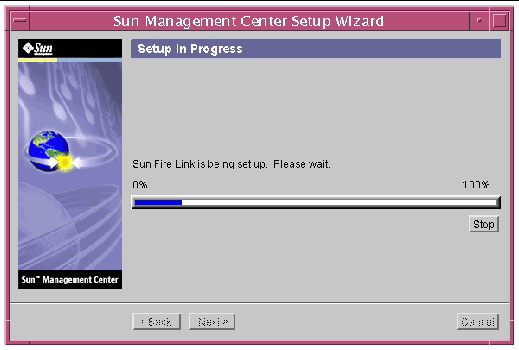
The Setup in Progress panel appears so you can monitor the progress of the setup.
The Summary panel appears with this message.
The Sun Fire Link has now been set up. Click Next to continue. |
You may receive another add-on setup panel or a panel asking whether you want to start the software, depending on what add-ons are left to set up or whether you are finished setting up add-ons.
When the Sun Fire Link add-on component is installed and set up during Sun Management Center 3.5 installation, all the Sun Fire Link packages are installed. You will need to set up security access for Sun Fire Link users once the Sun Fire Link add-on component is installed and set up.
1. On each RSM domain, establish security settings for Sun Fire Link user access.
Add a group named sfladmin and add the valid users to this group.
Add the users you listed in /etc/group to /etc/passwd.
c. Execute pwconv to update /etc/shadow.
d. Execute passwd to assign passwords to the new users.
2. On the Sun Fire Link Manager server, establish security settings for Sun Fire Link users.
Add a group named sfladmin and add the valid users to this group.
Add the users you listed in /etc/group to /etc/passwd.
c. Execute pwconv to update /etc/shadow.
d. Execute passwd to assign passwords to the new users.
You can use the Sun Management Center 3.5 Start Wizard, es-guistart, to start Sun Management Center software. Refer to Chapter 7, "Starting and Stopping Sun Management Center Software," in the Sun Management Center 3.5 Installation and Configuration Guide for detailed options and instructions.
You can use the Sun Management Center 3.5 Stop Wizard, es-guistop, to stop Sun Management Center software. Refer to Chapter 7, "Starting and Stopping Sun Management Center Software," in the Sun Management Center 3.5 Installation and Configuration Guide for detailed options and instructions.
You can use the Sun Management Center 3.5 Stop Wizard, es-guiuninst, to uninstall Sun Management Center software. Refer to Chapter 5, "Uninstalling Previous Versions of Sun Management Center Software," in the Sun Management Center 3.5 Installation and Configuration Guide for detailed options and instructions. See To Uninstall Individual Add-on Modules in this guide if you want to uninstall only one or two modules.
| Sun Fire Link Software Installation Guide
| 817-0401-11 |
Copyright © 2003, Sun Microsystems, Inc. All rights reserved.