| C H A P T E R 3 |
|
Getting Started With Sun MAT |
Before you can start using the administration tool, there are several tasks to perform, which are described in the following sections:
This chapter also contains instructions on removing regions and machines. See Removing Regions and Machines.
This section describes the procedures you must perform to access each of the regions you want to administer.
See Configuring and Starting Sun MAA.
See Starting Sun MAT.
3. Configure Sun MAT to access each system on which an agent (Sun MAA) is running.
See Configuring Sun MAT to Access an Agent System.
4. Register each region running on a system with the agent (Sun MAA) running on that system.
See Registering a Region With Sun MAA.
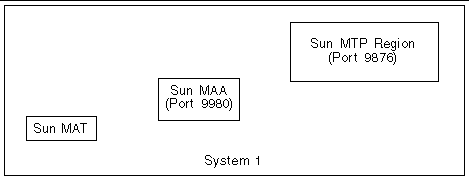
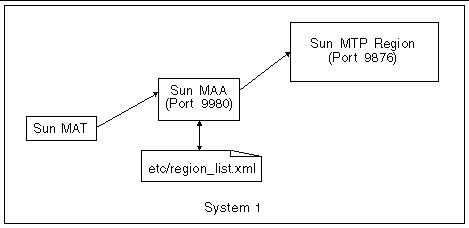
The example in this section uses a simple configuration like the one shown in the following figure. The procedure also applies to complex configurations.
In this example, Sun MAT is running on the same system as Sun MAA, although it need not be. Sun MAA has been started listening on the default port of 9980.
1. Make sure Sun MAA is started.
See Configuring and Starting Sun MAA
2. Make sure Sun MAT is started and the GUI is displayed.
See Starting Sun MAT.
3. On the GUI menu, choose File  Add Machine.
This option will make an agent known to Sun MAT. See FIGURE 3-2.

a. Type the name of the system on which the agent is running.
b. Verify the port number on which the agent is listening.
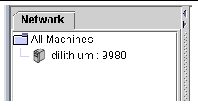
Sun MAT will contact the agent, and a machine entry will be displayed in the tree panel on the left side of the Sun MAT display. You might have to click the key icon next to the name to display the regions.
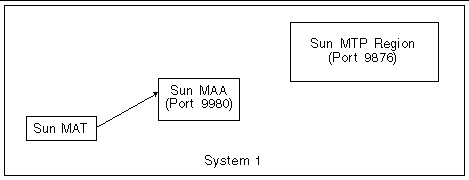
Communication is now established between Sun MAT and Sun MAA, as shown in FIGURE 3-4.
Before a region can be registered with an agent, the region must be started with the unikixadmin process enabled. The unikixadmin server is a daemon process that allows a region to be monitored by Sun MAT.
1. Make sure the LD_LIBRARY_PATH environment variable points to the location of the Java virtual machine (JVM).
2. Start the region using the -X option to unikixmain.
The -X option requires that you specify the port number to be used by unikixadmin. It must be a unique port number. For example:
When the unikixadmin server starts as part of region initialization, a message similar to the following is written to the unikixmain.log file:
The server advertises its startup with a message similar to the following:
2. In the left tree pane, select the machine where the region you want to register is located.
3. On the menu, choose File  Register Region.
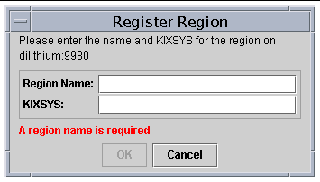
a. Type the name of the region as you want it to display on the screen.
b. Type the fully qualified directory name of the region's $KIXSYS directory.
The agent will determine the port number the unikixadmin daemon is listening on by accessing the $KIXSYS directory.
An entry representing the region appears beneath the machine name in the left pane of the Sun MAT GUI. You can now use Sun MAT to perform administrative functions on the region. You might have to click the key icon next to the machine name to display the region.
|
Tip - If you register a region, but it does not seem to be available, verify that the region is running. |

|
Note - Because the region is directly registered only with its agent, it immediately becomes visible to the user of any other instance of Sun MAT that has been configured to access the same agent. |
The details about the region are stored by the agent to a local disk file (etc/region_list.xml under the Sun MAA installation directory), so that they will be available even after the agent is stopped and restarted.
FIGURE 3-7 shows a region that is accessible to Sun MAT.
From time to time, your environment can change and you might want to deregister regions being monitored, or even remove a machine.
1. In the list panel, select the region you want to deregister.
2. On the menu bar, choose File  Deregister Region.
Or right-click the region name in the list panel and select Deregister Region from the context menu.
3. When the confirmation dialog box is displayed, click OK.
The region name is removed from the list pane and you can no longer monitor it.
1. In the list panel, select the system you want to remove.
2. On the menu bar, choose File  Remove Machine.
Or right-click the system name and select Remove Machine from the context menu.
3. When the confirmation dialog box is displayed, click OK.
The host is removed from the list pane and you are no longer able to monitor any regions running on it.
You can set the administration tool to control:
1. On the menu bar, choose Settings  Preferences.
The Preferences dialog is displayed.
2. Click the Polling tab to set a new polling interval.
3. Click the Start and Exit tab to change the default behaviors.
a. In the Start area, the default behavior is to show the saved window information.
If you want to open the tool with a clear main area, check the Start with no windows option.
b. In the Exit area, the default behavior is to save the windows displayed in the main area.
Deselect the check box to not save the windows.
The Save current layout button saves the layout currently displayed in the GUI and uses that layout the next time you open the tool, if you also selected Show saved window setup in the Start area of the dialog box.
Copyright © 2004, Sun Microsystems, Inc. All rights reserved.