| C H A P T E R 6 |
|
Using Intersystem Communications (ISC) |
The Sun Mainframe Transaction Processing Software Configuration Guide explains how to set up intersystem communications (ISC). This chapter describes the supported ISC functionality and provides instructions on configuring options to implement the functionality. It includes the following topics:
Transaction routing allows terminals connected to one system to run transactions on another Sun MTP or CICS system. The System Initialization Table (SIT) contains the local system identifier (SysId), which is used along with information in the Program Control Table (PCT) to determine whether to process the transaction locally or remotely.
Transaction routing also allows a transaction that is started by automatic transaction initiation (ATI), either by a START command or a transient data trigger level, to acquire a terminal that is owned by another region. The CRTE transaction can be used to route transactions to another Sun MTP or CICS region, and a region can accept transactions that are routed by CRTE.
Sun MTP transaction routing capabilities are a subset of those available in CICS. The following functionality is not supported:
The Terminal Control Table (TCT) user area and communication area are assumed to contain display usage data. These data areas are converted between ASCII and EBCDIC, as required, for interchange between Sun MTP regions or CICS. There is a user exit program that you can modify if the data in these areas does not need to be converted, or is non-display data. See Translation Routine for Transaction Routing for more information about this user exit program.
CRTE forces the routing of transactions to a remote system. Use CRTE when a transaction is run infrequently, or if the transaction required resides on many systems and uses the same name; for example, CEMT.
where sysid is the remote system identifier as defined on the local system in the TCT-System Entries table.
If the command executes correctly, all transactions typed at that terminal are routed to the remote system. To stop routing transactions, type the CANCEL command. CRTE displays a message that routing has terminated. If an error occurs when the connection is released or the remote system terminates, the CRTE session is automatically cancelled.
CANCEL only ends one CRTE session. Therefore, if you used CRTE to route transactions through many systems, type CANCEL for each system.
When in a CRTE session, the terminal cannot receive ATI requests. Those transactions are started on the terminal after the CRTE session ends.
No additional configuration is required to the local terminal definition. By default, all local terminals are defined as shippable.
|
1. Type CTBL on a blank transaction screen to open the Table Manager.
2. Press PF4 - Standard Tables, then PF6 - Program Control Table.
3. Press PF4 to display the insert screen.
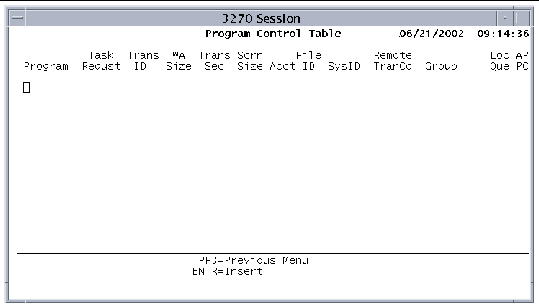
4. Enter the following information to define the remote transaction:
a. In the Trans ID field, type the name of the transaction on the local system.
b. In the SysID field, type the local identifier of the remote system.
This SysID must be defined in the TCT-System Entries table.
c. In the Remote TranCd field, type the name of the transaction on the remote system.
5. Press Enter to insert the data and return to the PCT screen.
6. Press PF2 to save the table.
7. Press PF3 to return to the Standard Tables menu.
9. On the SIT screen, you must specify an application name.
The application name is the network name of the local region. This field should contain the same value as the network name by which other Sun MTP or CICS regions know this region. To find this on a CICS system, look at the definition of the connection that CICS uses to route requests to a Sun MTP region. The network name is in the Netname field.
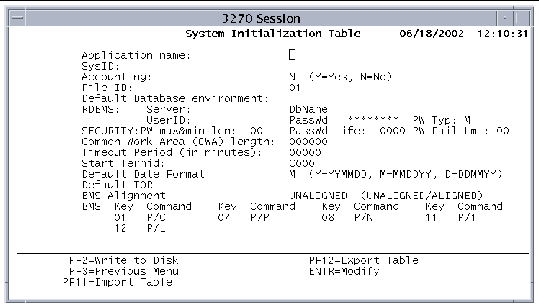
10. Press PF2 to save the table when you are done.
11. Press PF3 twice to return to the Table Manager menu.
12. You must shut down and restart the region for these changes to take effect.
To execute a transaction from a remote system, the region must have a definition of the terminal that made the request. The recommended method is to define all the terminals that route transactions to the region with a TYPETERM of shippable.
If you cannot define a terminal as shippable, or if two terminals with the same termid exist on remote systems that route transactions to the region, you must install a remote definition of the terminal in the TCT.
|
1. Type CTBL on a blank transaction screen to open the Table Manager.
2. Press PF4 - Standard Tables, then PF8 - Terminal Control Table.
3. On the TCT menu, press PF9 - 3270 Devices.
4. Press PF4 - Insert Entry and define the remote terminal on the Insert Screen using the following fields:
a. In the Term ID field, type the name assigned to the terminal.
b. In the SysID field, type the local identifier of the remote system that the terminal uses to route transactions to Sun MTP.
This SysID must be defined in the TCT-System Entries table.
c. In the Rem Name field, type the Terminal ID of the terminal on the remote system.
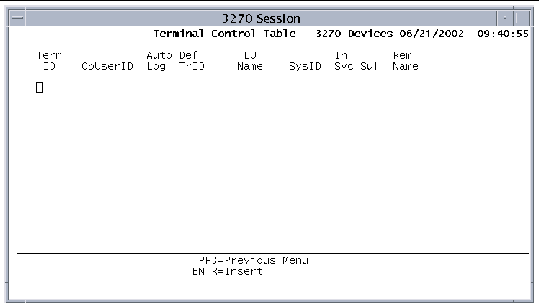
5. Press Enter to insert the data and return to the 3270 Devices screen.
6. If any information is required on the Host & Port screen, press PF9, specify the information and press Enter to return to the 3270 Devices main screen.
7. Press PF3 to return to the TCT menu screen.
8. Press PF2 to save the table.
9. Press PF3 to return to the Standard Tables menu.
10. Shut down and restart the region so your changes take effect.
When you perform an inbound transaction route, the Term ID is checked against the list of terminals that are already installed on the region. If the Term ID matches an installed terminal, the route request is rejected. In some cases, the Term ID may match the name of a Sun MTP default terminal. You can change the names of these default terminals with an entry in the SIT.
1. Press PF1 on the Table Manager - Standard Tables menu to open the SIT.
2. On the SIT screen, specify a Start Termid with a name that is different from any Term ID on the remote systems.
The Start Termid is the name of the first default Term ID. A value of 1 is added to all subsequent terminal names to make them unique.
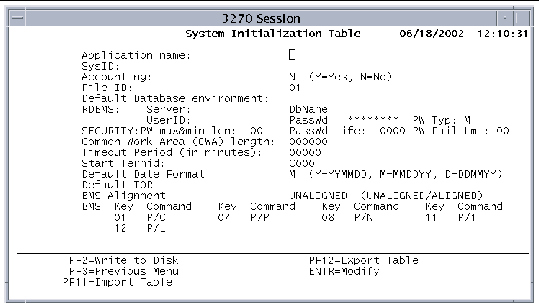
3. Press PF2 to save the table when you are done.
4. Press PF3 twice to return to the Table Manager menu.
5. You must shut down and restart the region for these changes to take effect.
Function shipping allows an application program to access or update resources owned by another region, enabling multiple systems to distribute and share resources. The resources can be VSAM files, transient data, or auxiliary temporary storage data.
The software provides the capability to translate between ASCII and EBCDIC, if needed.
Sun MTP function shipping capabilities are a subset of those available in CICS. The following features are not supported:
Function shipping is performed if either:
|
1. Open the FCT and select the dataset.
2. Press PF9 to display the Remote File Characteristics screen shown in FIGURE 6-5.
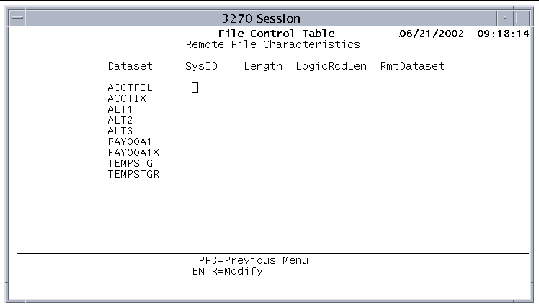
3. Specify information in the following fields:
a. In the SysID field, type the local identifier of the remote system.
The SysID must be defined in the TCT-System Entries table.
b. The value in the Length field depends on the type of VSAM file you are defining:
For KSDS files, type the length, in bytes, of the key of the file. This should match the key of the file on the system that is defined locally.
For ESDS and RRDS files, specify 0.
c. In the LogicRcdLen field, type the maximum record length, in bytes.
This should match the length of the file on the system where the file is owned.
d. In the RmtDataset field, type the name of the file on the remote system.
|
1. Open the DCT-Remote Destinations Screen.
2. Press PF4 to display the insert screen.
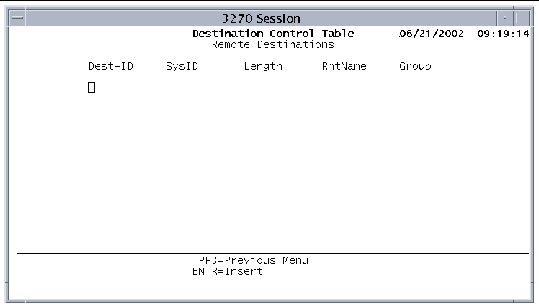
3. Specify information in the following fields:
a. In the Dest-ID field, type the name of the queue on the local system.
b. In the SysID field, type the local identifier of the remote system.
The SysID must be defined in the TCT-System Entries table.
c. In the Length field, type the maximum record length, in bytes.
This should match the length of the queue on the system where the file is owned.
d. In the RmtName field, type the name of the queue on the remote system.
4. Press Enter to insert the information.
5. On the DCT menu, press PF2 to save the table.
|
2. Press PF4 to insert an entry.
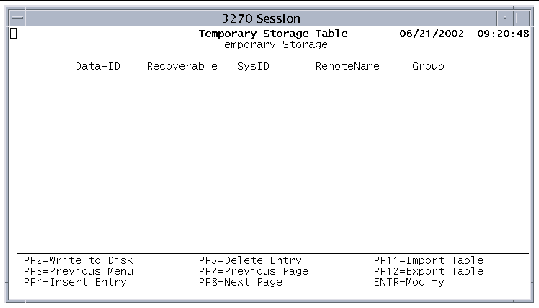
3. Supply the following information:
a. In the Data-ID field, type a generic name or the entire name of the temporary storage queue on the local system.
b. In the SysID field, type the local identifier of the remote system.
The SysID must be defined in the TCT-System Entries table.
c. In the RemoteName field, type a generic name or the entire name of the temporary storage queue on the remote system.
4. Press Enter to insert the entry.
5. On the main TST screen, press PF2 to save the table.
Function shipping inbound requires no special definition.
Data conversion might be necessary between a Sun MTP region and any EBCDIC system. For most data this is done automatically. However, because user data is passed between the systems, the Sun MTP region needs to know the format of the user data.
A screen-driven table generator enables the user to define record layouts for VSAM files. Function shipping, asynchronous processing, and DPL use the generated table when translating records transmitted between Sun MTP and CICS. The generator is the Data Conversion Templates Table (CVT), which is described in the Sun Mainframe Transaction Processing Software Reference Guide.
The function shipping conversations occur over an LU6.2 confirm-level session operating the CICS CVMI or CPMI mirror transaction.
Asynchronous processing distributes processing between systems by allowing a Sun MTP or CICS transaction to start a transaction on a remote system and to pass data to it. Sun MTP considers this form of ISC to be asynchronous, because the requests and replies between two transactions cannot be directly correlated.
Asynchronous processing applies to any application situation in which it is not necessary or desirable to block access to local resources while a remote request is being processed. The software supports bidirectional asynchronous processing.
You can perform asynchronous processing if either:
If an INTERVAL is specified on the command, the request is shipped to the remote system immediately, where it is queued until the interval expires.
Specify the NOCHECK parameter for START commands to remote systems to reduce the number of ISC data flows to perform the command. However, because no error response is passed back from the remote system to the local system, no recovery from errors on the remote system is possible.
|
2. Press PF4 to display the insert screen.
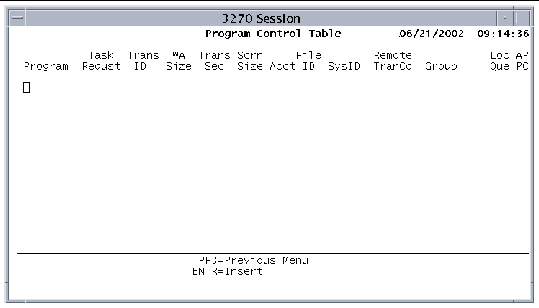
3. Define the remote transaction using the following fields:
a. In the Trans ID field, type the name of the transaction on the local system.
b. In the SysID field, type the local identifier of the remote system.
The SysId must be defined on the TCT-System Entries screen.
c. In the Remote TranCd field, type the name of the transaction on the remote system.
d. In the Local Queue field, specify whether or not to queue the request locally if a session is not immediately available to ship the request.
Y: Queues the request locally. You must use the NOCHECK parameter on the START command if the request is to be locally queued.
N: Do not queue the request locally.
Avoid local queueing for a time-dependent request, because the delay in sending the request to the remote system affects the time the transaction actually starts.
4. Press Enter to add the entry to the table.
5. On the main PCT screen, press PF2 to save the table.
Asynchronous processing inbound requires no special definition.
DPL enables a program on one Sun MTP or CICS region to synchronously link to a program on another. DPL enables a Sun MTP region to link to a mainframe program that can access BDAM, DB2 files and IMS, DL/I, and SQL databases. The software's DPL capability is bidirectional.
|
Note - This bidirectional feature is only supported in mainframe releases CICS/ESA 3.3 and later and CICS/VSE 2.2 and later, although it is possible for earlier releases to receive DPL requests. |
If the SYNCONRETURN parameter is coded on the LINK command, the linked-to program commits its resources before returning control to the linking program. A linked-to program can determine if it was started with SYNCONRETURN.
The ASSIGN command using the STARTCODE parameter returns a D if the program was started without SYNCONRETURN, and returns a DS if the program was started with SYNCONRETURN.
The linked-to program cannot access the terminal that originated the LINK request. This means that the terminal control and BMS CICS commands are not available to the linked-to program, and return an INVREQ code if executed.
To aid in the testing of DPL linking and linked-to programs on a single test system, define the linked-to program with APISet=D, which restricts the linked-to program from executing any of the DPL-restricted API.
The COMMAREA parameter is used to ship data from one system to another. If the programs use a large COMMAREA, but only a small area at the start of the COMMAREA is required to send to the linked-to program, you can shorten the transmission time by using the DATALENGTH parameter on the LINK command. Supply a DATALENGTH value that corresponds to the length of data you need to send. The linked-to program returns the entire COMMAREA.
You can perform DPL in either of two ways:
|
2. Press PF4 to display the insert screen.
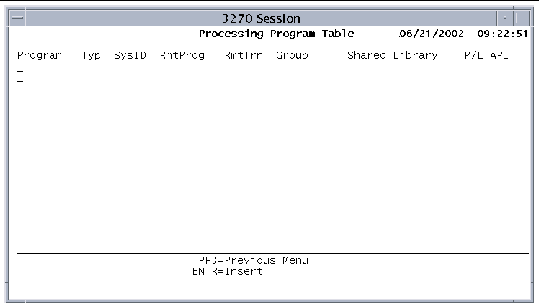
3. Define the remote program using these fields:
a. In the Program field, type the name of the program on the local system.
b. In the SysID field, type the local identifier of the remote system.
The SysID must be defined in the TCT-System Entries table.
c. In the RmtProg field, type the name of the program on the remote system.
d. In the RmtTrn field, type the name of the transaction that the program runs under on the remote system.
If blank, the program runs under the standard mirror transaction. You can use this field for accounting or security.
4. Press Enter to add the entry to the table.
5. On the main PPT screen, press PF2 to save the table.
For linked-to programs, add an entry to the PPT. If the LINK command specifies a TRANSID or the RmtTrn field is set in the PPT, the named transaction must be defined in the remote system and the program it runs must be that system's mirror program. This requires an entry in the PCT.
|
2. Press PF4 to display the insert screen.
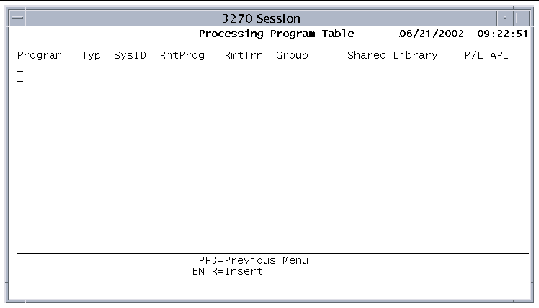
a. In the Program field, type the name of the program on the local system.
b. In the SysID field, type the local identifier of the remote system.
The SysID must be defined in the TCT-System Entries table.
c. In the RmtProg field, type the name of the program on the remote system.
d. In the RmtTrn field, type the name of the transaction that the program runs under on the remote system.
If blank, the program runs under the standard mirror transaction. You can use this field for accounting or security.
e. In the API field, specify one of the following values:
D: Allows a linked-to program to only execute the DPL-restricted API commands.
F: (Default) Allows a linked-to program running on the same region as the linking program to execute the full command set.
4. Press Enter to add the entry to the table.
5. On the main PPT screen, press PF2 to save the table.
6. Press PF3 to return to the Standard Tables Menu.
7. If you need to define the program in the PCT, press PF6 to display the PCT.
8. Press PF4 to open the insert screen.
a. In the Program field, type the program name KXFSMIRS.
b. In the TransID field, type the name of the transaction on the local system.
c. Confirm that the SysID field is blank.
10. Press Enter to insert the entry.
11. On the PCT main screen, press PF2 to save the changes to disk.
DTP enables a transaction on one region to start and converse with another transaction. The other transaction can be running on any system that supports the LU6.2 (APPC) protocol. DTP is useful for applications that:
DTP provides synchronous communication because the messages that pass between the transactions are directly correlated. Refer to the Sun Mainframe Transaction Processing Software Developer's Guide for descriptions of the DTP CICS command-level statements that are supported.
For outbound transactions, excluding transaction routing, you can turn on the Sun MTP Debug Facility for the terminal that is running the transaction. Any EXEC CICS commands are then debugged.
With transaction routing, because the transaction is to run on the remote system, you must invoke the Debug Facility on that system. Sun MTP allows the terminal user to use the CRTE transaction to force the routing of transactions to a remote system.
|
1. Type the CRTE transaction to connect to the remote system.
2. Type CEDF to turn on debugging on the remote system.
Refer to the Sun Mainframe Transaction Processing Software Developer's Guide for information about debugging and breakpoint processing.
The transaction executes on the remote system.
|
1. Type the CEDF command on the receiving system.
The sysid identifies the system sending the transaction. If you specify a termid, see the Note.
2. A transaction is received from the sysid, which activates the Debug Facility on the terminal that executed CEDF, allowing you to debug the transaction.
Any attached transactions using that connection while the debug terminal is busy will wait in the queue until the terminal is free.
For transaction routing, you can put the debug session into dual screen mode, if you use the sysid parameter to start CEDF. A terminal definition is not needed and you can use the COBOL Animator.
When one Sun MTP region supports both ISC and 3270 devices, the region looks like two remote systems to an IBM system and has two separate qualified network names.
The IBM system does not recognize that the 3270 devices and the ISC functions are taking place on the same system.
The Sun MTP region connects to the IBM network with two different logical connections. This usually requires two physical connections. For example, Sun MTP uses two SDLC lines, one supporting cross-domain traffic, and a second supporting independent logical units. In a token ring or Ethernet environment, these physical connections become one physical connection with two service access ports (SAPs).
Copyright © 2004, Sun Microsystems, Inc. All rights reserved.