 How to Move Data Between Labels
As on a Solaris system, you can move data between windows in Trusted Extensions. However, the data must be at the same label. When you transfer information between windows with different labels, you are upgrading or downgrading the sensitivity of that information.
Before You Begin
Your site's security policy must permit this type of transfer, the containing zone must permit relabeling, and you must be authorized to move data between labels.
Therefore, your administrator must have completed the following tasks:
You must be logged in to a multilevel session.
-
Create workspaces at both labels.
For details, see How to Add a Workspace at a Particular Label.
-
Confirm the label of the source file.
For details, see How to Determine the Label of a File.
-
Move the window with the source information to a workspace at the target label.
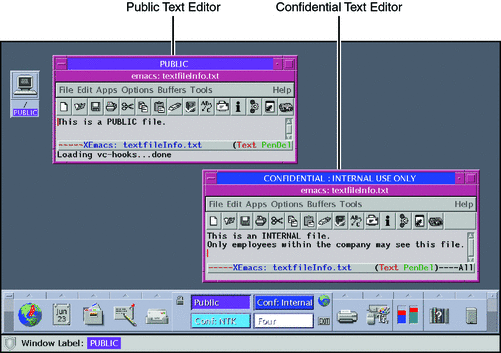
For details, see How to Move a Window to a Different Workspace. The following figure shows two editors at different labels in the same workspace.
Figure 3–10 Differently Labeled Applications in One Workspace

-
Highlight the information to be moved, and paste the selection in the target window.
-
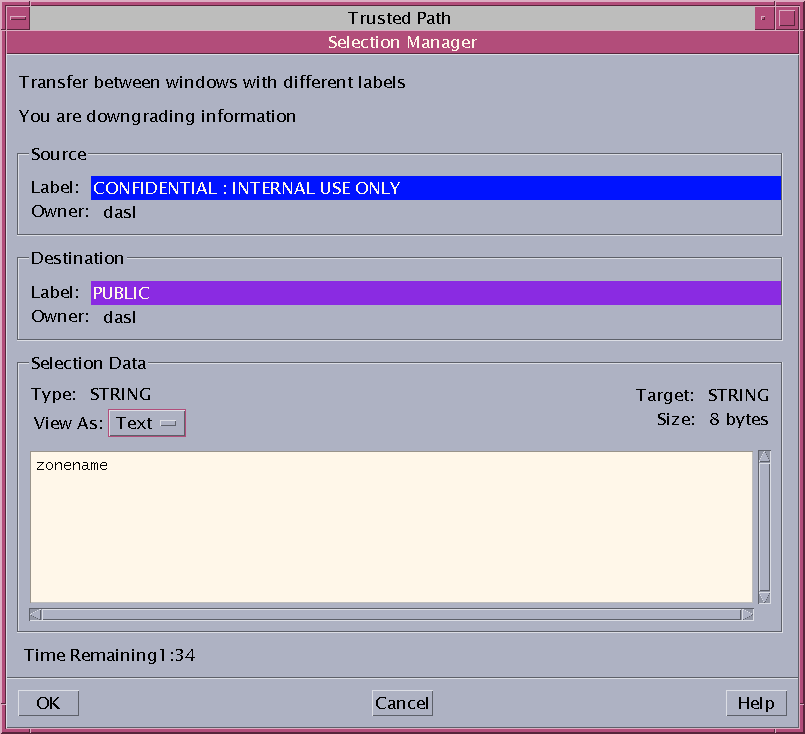
Review the Selection Manager Confirmation dialog box.
This dialog box:
-
Describes why confirmation of the transaction is needed.
-
Identifies the label and the owner of the source file.
-
Identifies the label and the owner of the destination file.
-
Identifies the type of data that was selected for transfer, the type of the target file, and the size of the data in bytes. By default, the selected data is visible in text format.
-
Indicates the time that remains for you to complete the transaction. The amount of time and the use of the timer depends on your site's configuration.
Figure 3–11 Selection Manager Confirmation Dialog Box

-
-
(Optional) In the View As menu, choose how to view the source information.
-
Confirm that you want the label of the data to change.
- © 2010, Oracle Corporation and/or its affiliates
