 To Start an Installation or Upgrade of the Solaris
OS on an x86 Laptop
Before You Begin
Before installing or upgrading the Developer release, see Solaris Express Developer Edition System Requirements for a complete list of system requirements and critical preparatory information.
Review the following default settings that are used for the Developer release.
-
This release installs a Solaris system that is automatically networked by using DHCP with DNS name resolution.
-
The NWAM daemon is enabled by default when you perform an initial installation of the Solaris Express Developer Edition release. For more information, see NFSv4 Domain Name Configurable During Installation in Solaris Express Installation Guide: Planning for Installation and Upgrade.
-
IPv6 is disabled.
-
The DNS domain and server IP addresses are retrieved from the DHCP server.
-
The NFSv4 domain is dynamically derived.
-
Kerberos is disabled.
-
Insert the DVD in your system.
-
Boot the system by shutting it down and then turning it off and on.
-
If you need to manually set the BIOS to boot from DVD, type the appropriate key sequence to interrupt your system boot process. See your hardware documentation for instructions.
Note –One of the following key sequences are commonly used to interrupt boot:
-
Ctrl+Alt+S
-
Ctrl+Alt+Esc
-
Ctrl+Alt+Ins
The BIOS usually displays a prompt, such as “Press F2 to enter Setup.”
Modify the boot priority in the BIOS, and exit the BIOS to return to the installation program.
Note –Many system enable you to specify a one-time boot without altering the BIOS.
A memory test and hardware detection are executed. The screen is refreshed. The GRUB menu is displayed.
-
-
In the GRUB menu, select the Solaris Express Developer Edition option for a quick installation or upgrade that provides all the developer tools.
GNU GRUB version 0.95 (631K lower / 2095488K upper memory)
+-------------------------------------------------------------------------+
| Solaris Express Developer Edition                                       |
| Solaris Express                                                         |
| Solaris Express Serial Console ttya                                     |
| Solaris Express Serial Console ttyb (for lx50, v60x and v65x)           |
+-------------------------------------------------------------------------+
Use the ^ and v keys to select which entry is highlighted.
Press enter to boot the selected OS, 'e' to edit the
commands before booting, or 'c' for a command-line.
The GRUB menu includes the following four choices.
- Solaris Express Developer Edition
-
This option is a quick x86 laptop installation or upgrade with developer tools. This installation is the default and if you wait, it automatically starts. This guide describes this laptop installation procedure.
- Solaris Express
-
This alternate installation option provides SPARC and x86 system administrators with the necessary choices to set up servers and clients during the installation process. Because of these configuration choices, this installation requires more time. This GUI installation option does not include the developer tools.
- Solaris Express Serial Console ttya and ttyp
-
These alternate installation options provide SPARC and x86 text-mode installations that can operate with less than 768 MB of memory. Serial Console installations include server and client configuration choices, and, therefore, require more time to install. These installation options do not include the developer tools.
For more information about the alternate installation options, see Solaris Express Installation Guide: Planning for Installation and Upgrade.
A second screen is displayed.
-
To install the Developer release, type 1 in the following screen, then press Enter.
+--------------------------------------------------------------+
| Select the type of installation you want to perform:         |
|                                                              |
|        1 Solaris Interactive (default)                       |
|        2 Apply driver updates                                |
|        3 Single user shell                                   |
|                                                              |
| Enter the number of your choice.                             |
+--------------------------------------------------------------+
The system configures the devices and interfaces and searches for configuration files.
If the operating system cannot locate a self-identifying keyboard, the following screen is displayed:
-
In the following screen, select the desired keyboard layout by highlighting the desired option, then press Return.
Configure Keyboard Layout
+---------------------------------------------------------------------------+
|   Please specify the keyboard layout from the list below.                 |
|                                                                           |
|   To make a selection, use the arrow keys to highlight the option and     |
|   press Return to mark it [X].                                            |
|                                                                           |
|            Keyboard  Layout                                               |
|            -----------------------                                        |
|       [  ] Serbia-And Montenegro                                          |
|       [  ] Slovenian                                                      |
|       [  ] Slovakian                                                      |
|       [  ] Spanish                                                        |
|       [  ] Swedish                                                        |
|       [  ] Swiss-French                                                   |
|       [  ] Swiss-German                                                   |
|       [  ] Taiwanese                                                      |
|       [  ] TurkishQ                                                       |
|       [  ] TurkishF                                                       |
|       [  ] UK-English                                                     |
|       [ X] US-English                                                     |
|                                                                           |
|    F2_Continue      F6_Help                                               |
+---------------------------------------------------------------------------+
-
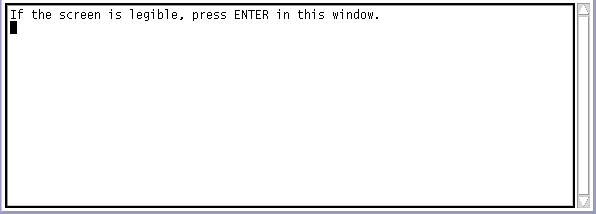
In the following panel, move the cursor into the screen and press Enter.
Starting Solaris Interactive (graphical user interface)
Installation
+------------------------------------------------------------+
| You must respond to the first question within 30 seconds   |
| or the installer proceeds in a non-window environment      |
| (console mode).                                            |
|                                                            |
| If the screen becomes blank or unreadable the installer    |
| proceeds in console mode.                                  |
|                                                            |
| If the screen does not properly revert to console mode,    |
| restart the installation and make the following selection: |
|                                                            |
|      Solaris Interactive Text (Console session)            |
|                                                            |
| Press Enter to continue.                                   |
-------------------------------------------------------------+
Note –If your system has insufficient memory, the program exits and displays an error message. To install with the Developer release, you must have enough system memory to display a graphical user interface (GUI). You can upgrade your system's memory and restart the installation.
-
Restart the installation.
-
On the GRUB menu, select one of the Solaris Express Serial Console options instead of the Solaris Express Developer Edition option.
This alternative provides a text-mode installation that requires additional configuration input. This option does not include the developer tools.
To use less memory to install, follow these steps:
Progress messages are displayed.
-
-
Move your cursor into the following text screen and press Enter.

-
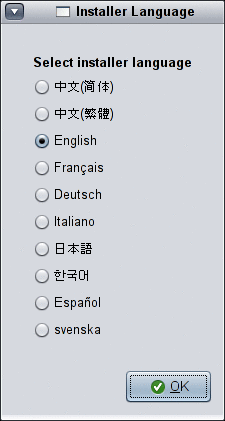
In the following panel, select a language for the installer, then click OK.

Note –Starting at this point in the installation, you can open a terminal window at any time by pressing Alt-Tab on your keyboard.
-
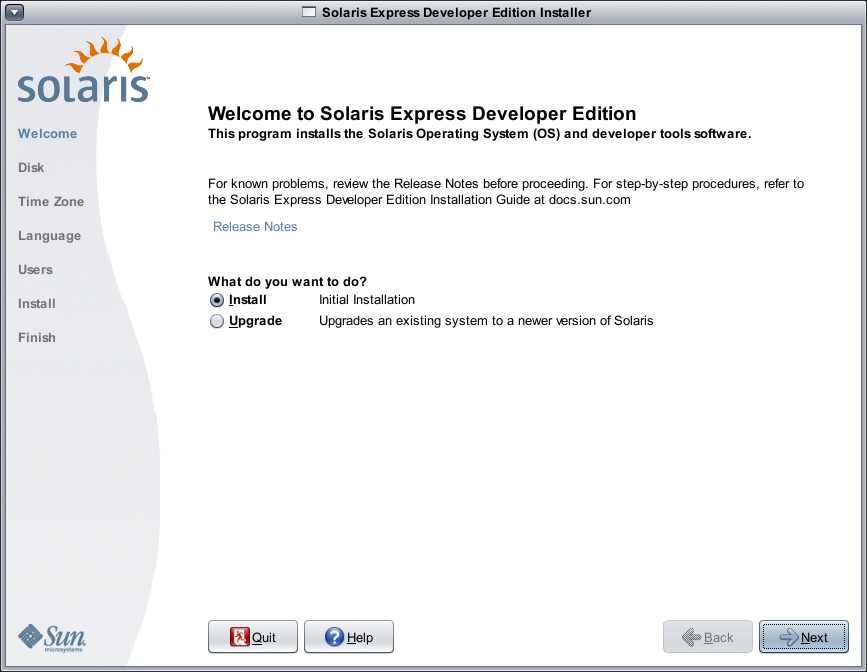
In the following panel, click either Initial or Upgrade, then click Next.

By clicking Install, you perform an initial installation of the Solaris OS which overwrites the existing Solaris file system with the new version of the Solaris OS. If your system is not running the Solaris OS, you must perform an initial installation.
CAUTION: Note the following important considerations:
-
On x86 systems, the installation overwrites the whole disk layout if one of the following is true:
-
The disk table cannot be read.
-
The disk was not previously partitioned.
-
-
If an existing Solaris partition is on the disk, and the user makes no modifications to the partitions, the installation overwrites the Solaris partition only. Other existing partitions are not changed.
An upgrade of the Solaris OS merges the new version of the Solaris OS with the existing files on the system's disk or disks. An upgrade saves as many modifications as possible that you have made to the previous version of the Solaris OS. If you select Upgrade, an upcoming panel displays all available operating systems and identifies which ones can be upgraded.
Additional options in the Welcome panel include the following:
-
You can choose to end the installation on any panel by selecting the Quit button.
-
If you click the Quit button, a dialog box asks you to confirm cancellation of the installation. On confirmation, a terminal window is opened where you can enter commands. Command options include:
-
To reboot the system:
% reboot
-
To restart the installer:
% install-solaris
-
-
-
Depending on whether you selected an upgrade or an initial installation, proceed as follows:
-
If you selected an initial installation, see To Complete an Initial Installation of a Solaris OS on an x86 Laptop
-
If you selected an Upgrade, see To Complete an Upgrade of a Solaris OS on an x86 Laptop.
-
- © 2010, Oracle Corporation and/or its affiliates
