2.5.2 What to Do
-
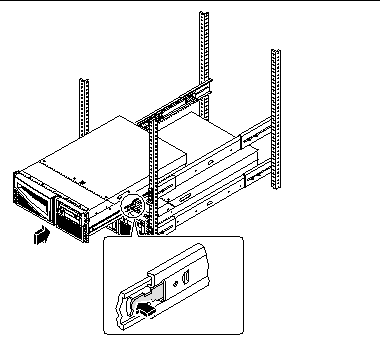
Release the two flat spring catches that lock the system into its current position.
Press in on both spring catches to free the system glides. One flat spring catch is attached to each inner glide on the system chassis, as shown in the following figure

-
Slide the system chassis evenly into the rack enclosure until the system comes to a complete stop.
-
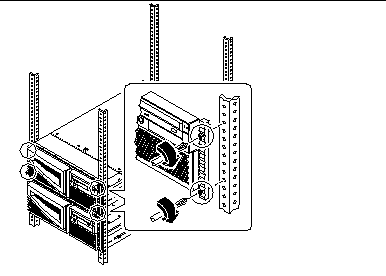
Secure the system to the left and right vertical rails at the front of the rack.
Use a Phillips #2 screwdriver to tighten the four captive screws that secure the system in the rack enclosure. These screws are in recessed access holes in the decorative panels affixed to the system's front panel.

-
Reconnect all external cables that were attached to the back panel of the system.
Examine each disconnected cable for information indicating the cable's origin and its terminating connection.
-
Replace, close, and lock the rack enclosure door(s), as appropriate.
- © 2010, Oracle Corporation and/or its affiliates
