This chapter explains how to attach all the cords and cables needed to get the server up and running. Where software is involved, this chapter explains some of what you need to do, and points you to the appropriate software manuals for the rest of the information.
Complete the following tasks to finish setting up your system:
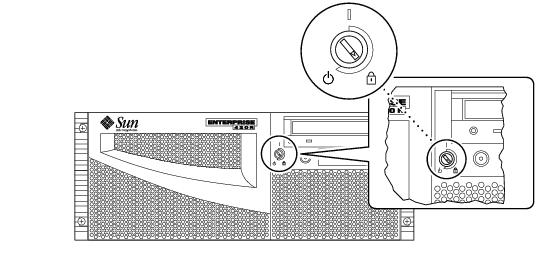
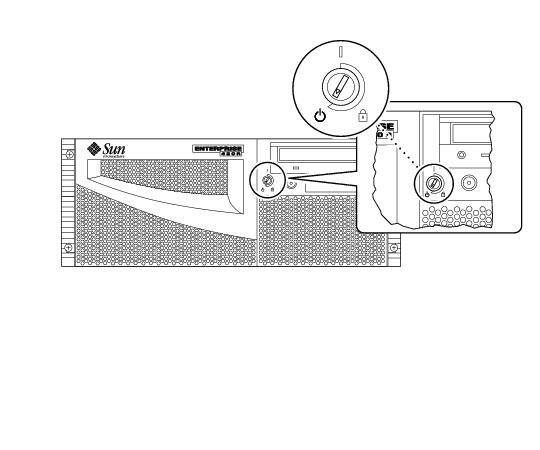
If you need to power off your system, see:
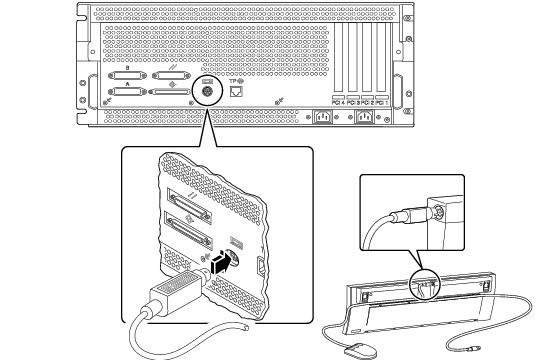
Note - If your server includes a second power supply, connect the second AC power cord to the left power inlet labeled 2. You may connect the second power supply to the same AC circuit as the first supply. However, for increased system redundancy, you should connect the two power supplies to separate circuits.
Note - This system is suitable for use with IT Power Systems.
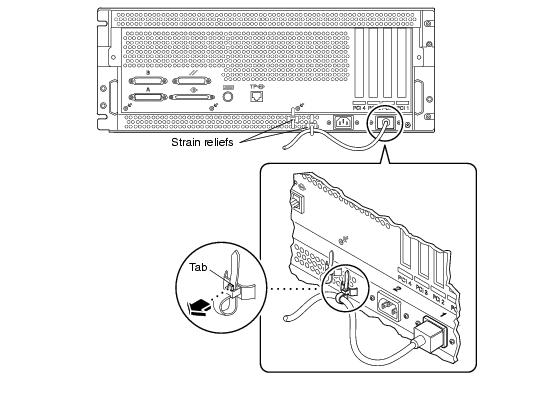
The Sun Enterprise 420R server is shipped with two strain reliefs attached to the back panel. A strain relief is a plastic tie-wrap on a base that is inserted into the back panel of the system. Use these reliefs to manage the power cords when you slide the system in and out of the rack enclosure.
To tie-wrap a power cord, wrap the loose end of the tie-wrap around the cord and insert it into the opening on the base of the strain relief. Pull the end to tighten the tie-wrap.
- To release the tie-wrap from the cord, press down the tab on the strain relief base and loosen the tie wrap.
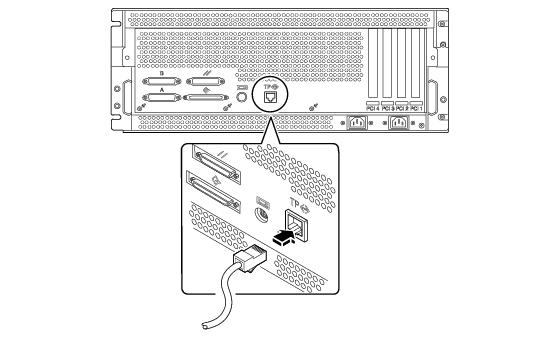
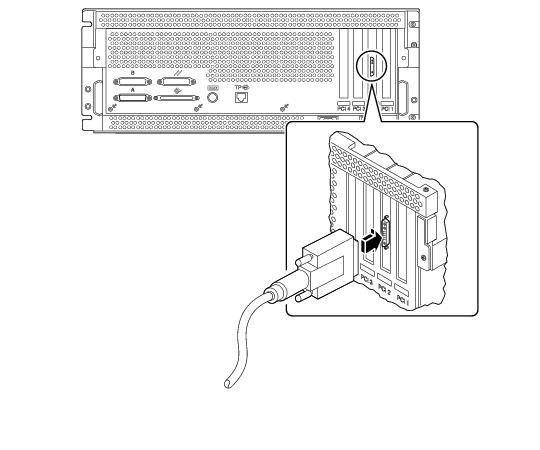
Connect a twisted-pair Ethernet (TPE) cable to the standard Ethernet port on the back of your system.
Many of the options ordered with your system may have been pre-installed at the factory. For information about how to install other options, see the Sun Enterprise 420R Server Service Manual or contact your qualified Sun service provider. For information about installing an additional internal disk drive, see the Sun Enterprise 420R Server Owner's Guide.
To install the server software, or to diagnose a problem, you need some way to enter system commands and view system output. You can do one of the following:
For information about establishing a tip connection, see the Sun Enterprise 420R Server Owner's Guide.
To install a local graphics console you need a PCI-based graphics card, a monitor, and a Sun-compatible keyboard, mouse and mouse pad. These components are not shipped with your system. See the Sun Enterprise 420R Server Owner's Guide for more information.
See the instructions provided with your rack enclosure to complete these steps.
Caution - Never move the system when the system power is on. Movement can cause catastrophic disk drive failure. Always power off the system before moving it.
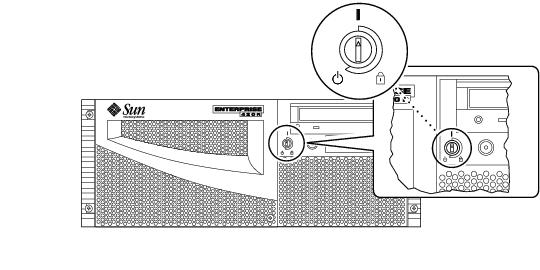
Caution - Before you power on the system, make sure that the cover is properly installed.
Note - The system may take anywhere from 30 seconds to two minutes before video is displayed on the system monitor or the OK prompt appears on an attached terminal. This time depends on the level of power-on self-test (POST) diagnostics being performed.
Note - If you need to power off the system, see the Sun Enterprise 420R Server Owner's Guide for more information.
If you are installing the Solaris 7 or later operating environment, refer to the documentation accompanying your SolarisTM software and see the Sun Enterprise 420R Server Owner's Guide for installation information.
If you are installing the Solaris 2.6 Hardware 5/98 operating environment, you must use the Operating Environment Installation CD included with your system. During the installation process, this CD installs certain software upgrade patches that support Solaris releases running at the 450 MHz CPU speed.
This CD does not provide the content of the Solaris releases. You need to have the Solaris media kit for the Solaris 2.6 Hardware 5/98 operating environment in order to install the Solaris software itself. At the appropriate point in the installation process, the Operating Environment Installation CD prompts you to install the Solaris software.
This CD is not required if you are using the Solaris 7 or later operating environment.
For installation instructions, see the document included with Operating Environment Installation CD.
Refer to the documentation accompanying your Solaris software and the Sun Enterprise 420R Server Owner's Guide for installation information.
The documentation kit contains a CD-ROM disc with online documentation that describes how to use, service, and maintain your system. Refer to the documents supplied with the CD-ROM disc for installation instructions.