| C H A P T E R 4 |
|
Installing a Server Into a Chassis |
This chapter describes how to install a Netra CT server into a chassis.
|
1. Use the box handles to lift the Netra CT server and place it on a large, flat, secure surface.
2. Lift the lid of the box straight up to remove the lid (FIGURE 4-1).
|
Note - The following figure shows a Netra ct 800 server being removed from a box. The procedure is the same for the Netra CT 810 and Netra CT 410 servers. |
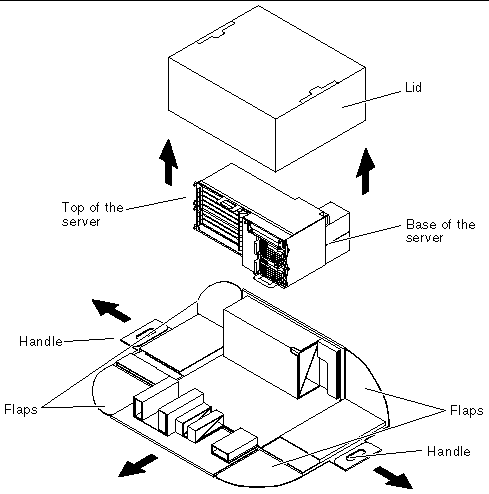
3. Grasp one of the handles and pull the handle down and away from the box until both flaps come completely free from the box sides (FIGURE 4-1).
Repeat this step for the handle on the opposite side of the box.
4. Press down on the remaining sides of the box so that all four sides are flattened down.
5. Grasp the top of the server and tip the server up until it is resting on its base (FIGURE 4-1).

|
Caution - Use extreme caution in the rest of this procedure to avoid touching the midplane. The pins on the midplane are very sensitive and could be damaged if handled improperly. |
6. Carefully remove the plastic wrapping from the Netra ct server and, using the handle at the top of the server, lift it up and completely away from the box.
7. If there are covers over the midplane at the rear of the server, carefully remove the covers from the midplane.
|

|
Caution - If any slots are left unfilled in the chassis, an energy hazard is present. |
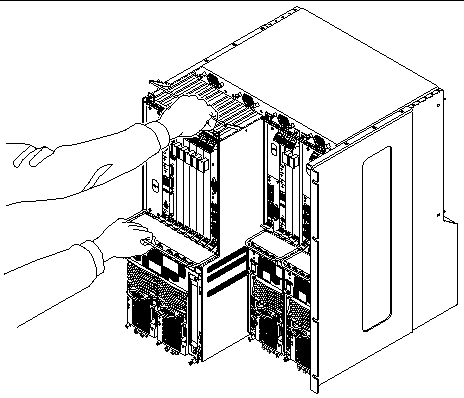
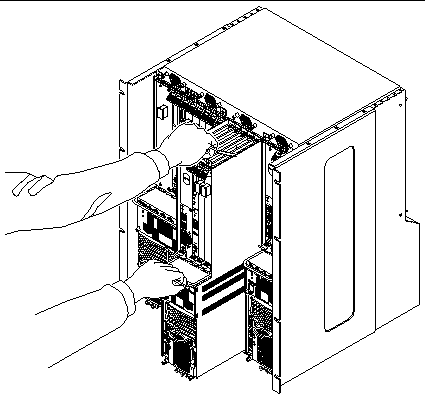
1. With your left hand, grasp the server bar in front.
2. With your right hand, grasp the purple server handle at the top of the server and insert the server into the chassis.
FIGURE 4-2 shows how to insert a Netra CT 810 server into the chassis and FIGURE 4-3 shows how to insert a Netra CT 410 server into the chassis.
3. Push the purple server handle at the top of the server down and gently push the server the remaining distance into the chassis.
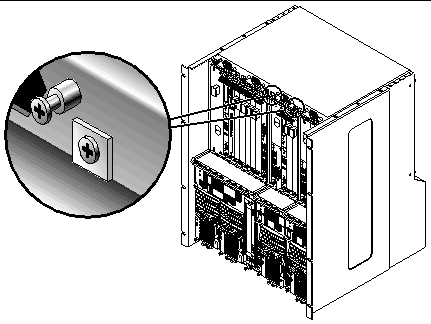
4. Using a No. 2 Phillips screwdriver, tighten the black captive screws at the top of the server.
Tighten the screws on the server to a torque of 0.45 - 0.68 N.m (4 - 6 in.-lb.).
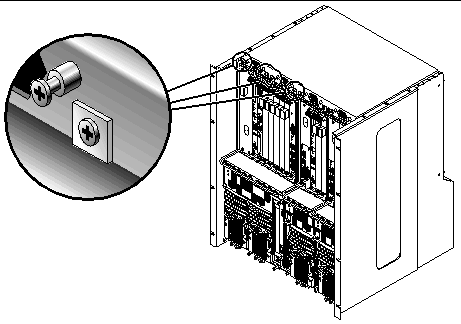
5. Using a No. 2 Phillips screwdriver, tighten the black captive screws at the bottom of the server.
Tighten the screws on the server to a torque of 0.45 - 0.68 N.m (4 - 6 in.-lb.).
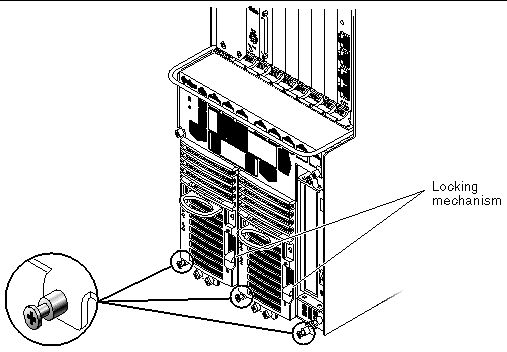
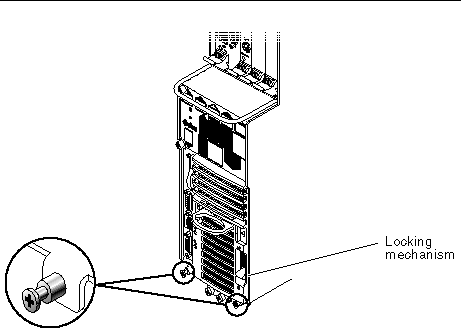
6. Push the power supply unit locking mechanism(s) down into the locked ( ) position.
FIGURE 4-6 shows the location of the two power supply unit locking mechanisms on the Netra CT 810 server, and FIGURE 4-7 shows the location of the single power supply unit locking mechanism on the Netra CT 410 server. Make sure you lock both power supply units if you are replacing a Netra CT 810 server.
7. If you have a rear-access model server, reseat all the rear transition cards into the server that you just installed.
8. Repeat Step 1 through Step 7 for every server that you need to install into the Netra CT chassis.
9. Determine if you have additional cards to install in the Netra CT server.
Every Netra CT server comes with a host CPU card and an alarm card installed by default. If you ordered additional cards (for example, I/O or satellite CPU cards), then you will have to install them into the Netra CT server separately.
Copyright © 2004, Sun Microsystems, Inc. All rights reserved.