Creating an Account Image By Using Snapshot
There are three different image archive types.
-
A Disk Image is a byte level archive of the contents of a disk.
-
A Flash Image is a file system level archive of contents of a disk as created by Solaris Flash archive mechanism.
-
A JumpStart Image, in contrast with other two archive types (disk image and flash image) cannot be used with the Snapshot option.
Before you begin the snapshot process, build the image to the desired specification.
 How To Create an Account Image By Using Snapshot
Steps
-
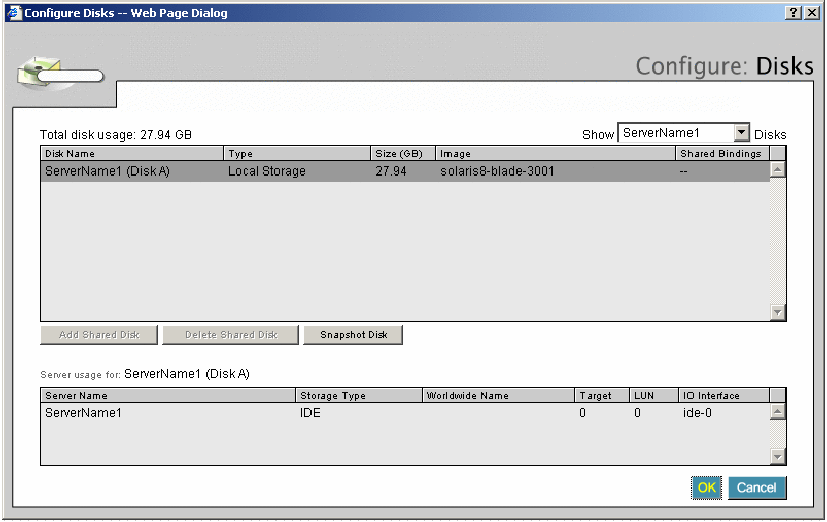
Open an active farm in the Editor, and right-click the server and select Snapshot Image.

-
The Configure: Disks dialog appears.

-
In Show, select the server to be used to create the image from the list.
-
Select the disk for which you wish to create a snapshot.
-
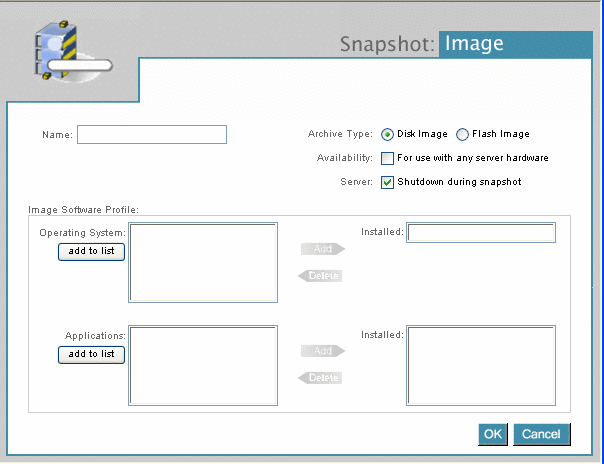
The Snapshot: Image dialog box appears.

-
In Name, enter a unique image name that does not include backslash, apostrophe, double quote, or angle bracket characters.
-
In Archive Type, select the archive radio button to indicate the type of image to snapshot.
-
In Availability, select For Use With Any Server Hardware to indicate that any architecture is allowed at the time of deployment. This might be used with raw disk data that is server independent.
-
In Server, select Shutdown During Snapshot to indicate whether that you want the software to automatically reboot the server.
Note –If you click this option, the software performs a shutdown during a snapshot. The server is removed from monitoring an, shut down. A snapshot of the specified disk is made, the server is rebooted and the server is re-registered with monitoring.
If you do not want to let the software do the shutdown, the software just takes the snapshot of the disk.
-
-
Configure the Image Software Profile to describe the content of the snapshot.
Note –This action is a way to catalog the contents of the image and does not affect the actual data content of the snapshot image.
-
In Operating System, select the operating system name that best describes the OS contained on the image from the list and click the Add arrow to display it in the installed section.
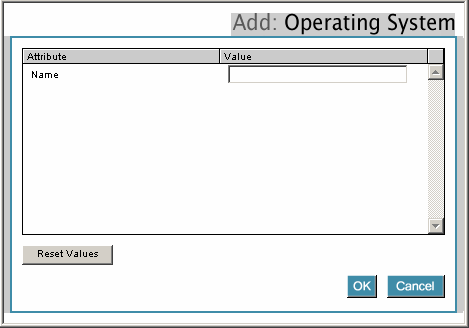
If the appropriate operating system is not included in the list, click the Add to List button to display the Add: Operating System dialog as shown in Figure 5–5.
Figure 5–5 Add: Operating System Screen

-
Click to select an attribute and enter a value that is appropriate for this attribute.
When you have entered all values, click OK to save your changes and close the window. Attributes can be customized, so your list might vary from the one shown in Figure 5–5.
-
In Application List, select the name of the application from the list and click the Add arrow to display the application in the installed section.
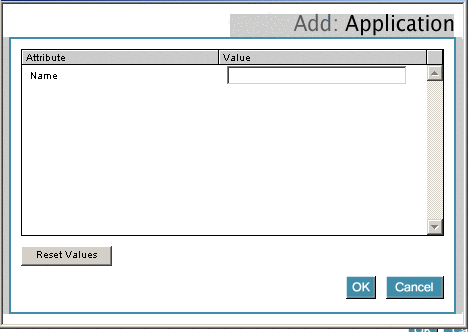
Continue adding applications as necessary to reflect the actual software contained on the image. If the appropriate applications are not included in the list, click the Add to List button to display the Add: Application dialog as shown in Figure 5–6.
Figure 5–6 Add: Application Screen

-
Click to select an attribute and enter the value that is appropriate to this attribute.
When you have entered all values, click OK to save your changes and close the window. Attributes can be customized, so your list might vary from the one shown in Figure 5–6.
-
Click OK to validate the information and submit the request, or click Cancel to abort.
If the software is shutting down your server, a message displays that informs you that the server will be shut down during the snapshot process and prompts whether you want to proceed.
-
Click OK to proceed and create the image.
After the software image is created, the image is available as part of a library of account images that you can deploy on any server in farms within the account.
Note –You might not see the snapshot you just created in the list of images in the server group if the snapshot is still in progress. You can check your request status by following the instructions in the section Viewing Farm Details.
After the software image is created, the image is available to deploy on any server in farms within the account.
- © 2010, Oracle Corporation and/or its affiliates
