How to Add Support for a JavaStation Client
The high-level steps in this procedure are:
-
Add system information about the JavaStation client.
-
Boot the JavaStation client.
Note -This procedure assumes the system providing the services (the file server) has already been configured as a Java OS server.
-
Start Host Manager from the Solstice Launcher and select the name service, if not done already.
See "How to Start Host Manager" for more information.
-
Select Add from the Edit menu on the Host Manager main window.
The Add window is displayed.
-
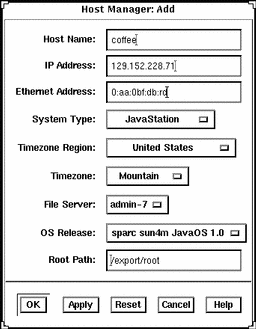
Fill in the system information, selecting JavaStation as the system type.
The system information includes all the fields from the host name through the timezone. If you need information to complete a field, click on the Help button to see field definitions for this window.
-
The File Server defaults to the current host. Select Other from the Install Server menu to specify another host as the install server.
-
Select the sparc sun4m JavaOS 1.0 OS Release.
In order to select this OS release you must have JavaOS services installed on your server. Refer to "How to Add JavaOS Services to an OS Server" for more information about adding JavaOS services.
-
Click on OK on the Add window.
Example of a Completed Add Window for a JavaStation Client

- © 2010, Oracle Corporation and/or its affiliates
