| Sun StorageTek RAID Manager Software User’s Guide |
| C H A P T E R 4 |
|
Building a Storage Space |
Once you have logged into the Sun StorageTek RAID Manager software, you can begin to build storage space by creating logical drives. (For more information, see Understanding Logical Drives.) This chapter describes how to start building your storage space.
| Note - You must be logged in as an Administrator to complete the tasks described in this chapter. |
The chapter contains the following sections:
The Sun StorageTek RAID Manager software has a wizard to help you build (or configure) logical drives, and offers two configuration methods to choose from, depending on your needs:
Use the express method when you want to use all available disk drives in the most efficient manner. For instructions, see Express Configuration: Building the Easy Way.
Use the custom method when you want to create specific logical drives with any or all available disk drives. For instructions, see Custom Configuration (Advanced).
When you use express configuration, the Sun StorageTek RAID Manager software automatically creates logical drives by grouping together same-sized physical disk drives, and assigns RAID levels based on the number of physical disk drives in a logical drive:
| Note - To create a logical drive with any other RAID level, you must use the custom method, as described in Custom Configuration (Advanced). See Selecting the Best RAID Level for more information about RAID levels. |
By default, logical drive size is set by the Sun StorageTek RAID Manager software and automatically maximizes the capacity of the disk drives. However, you can choose to specify a size for a logical drive, if required.
|
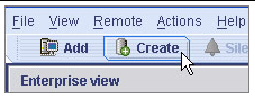
1. In the Enterprise View, select the HBA you want.
2. On the toolbar, click Create.
3. When the wizard opens, select Express configuration..., then click Next.
4. Review the information that is displayed.
FIGURE 4-1 Configuration Summary

To exclude specific disk drives, specify a size for the logical drives, or to make other changes to the configuration, click Modify logical devices. See Step 6 for more information.
| Note - Some operating systems have size limitations for logical drives. Before you save the configuration, verify that the size of the logical drive is appropriate for your operating system. |
5. Click Apply, then click Yes.
The Sun StorageTek RAID Manager software builds the logical drive(s), indicated by a magnifying glass moving across the new logical drive icon in the Logical Devices View. The configuration is saved on the Sun StorageTek SAS RAID HBA and on the physical drives.
FIGURE 4-2 Logical Device Icons

FIGURE 4-3 Stopping Current Task

6. Repeat Step 1 to Step 5 for each HBA on your system.
7. If you want to assign hot-spares to the logical drives, see Working With Hot-Spares.
8. Continue with Partitioning and Formatting Logical Drives.
The logical drives you create are displayed as physical disk drives on your operating system. You must partition and format these logical drives before you can use them to store data.
| Note - Logical drives that have not been partitioned and formatted cannot be used to store data. |
Refer to your operating system documentation for more information.
| Note - The Sun StorageTek RAID Manager software must be installed on every system that will be part of your storage space. |
If you have installed Sun StorageTek SAS RAID HBAs on more than one system, to continue building your storage space do the following:
The maximum number of supported RAID HBAs varies depending on your operating system. See Sun StorageTek SAS RAID HBA Support for more information.
To continue, see Managing Your Storage Space.
Custom configuration helps you build your storage space manually by stepping you through the process of creating logical drives, setting RAID levels, and configuring other settings.
|
1. In the Enterprise View, click the HBA you want.
Note how many available disk drives are connected to the HBA; this information will be helpful as you create logical drives.
2. On the toolbar, click Create.
3. When the wizard opens, select Custom configuration..., then click Next.
The most common RAID levels are listed first; advanced RAID levels are available by clicking Advanced settings.
FIGURE 4-5 Selecting a RAID Level

| Note - To build a RAID Volume, see Building a RAID Volume. See Selecting the Best RAID Level for more information about RAID levels. |
6. In the Physical Devices panel, select the disk drives you want to use in the logical drive.
The Sun StorageTek RAID Manager software prompts you to select the correct number of disk drives. For example, the following figure illustrates disk drives installed in a system.
FIGURE 4-6 Selecting Physical Devices for Logical Drive

The following figure illustrates disk drives installed in two enclosures.
FIGURE 4-7 Determining Number of Drives Required

By default, the Sun StorageTek RAID Manager software automatically sets the size of the logical drive and maximizes the capacity of the disk drives you select. (To set a custom size for the logical drive, see Step 8.)
7. (Optional) If you want to assign hot-spares to the logical drives, see Working With Hot-Spares.
A plus sign (+) is displayed to indicate that the selected drive will be designated as a hot-spare, as shown below. To remove a hot-spare designation from a disk drive, control-click it again.

See Working With Hot-Spares for more information.
8. (Optional) Adjust the Advanced Settings:
9. If you have no other available disk drives, skip to Step 11.
If you have available disk drives and want to create additional logical drives, click Add logical device to open a new tab in the wizard.
FIGURE 4-9 Tab for the Second Logical Drive

10. Repeat Step 4 to Step 9 for each logical drive that you want to create on the HBA.
11. Click Next, then review the logical drive settings.
This example shows two logical drives with RAID 5 are ready to be created.
FIGURE 4-10 Review Logical Drive Settings

12. Click Apply, then click Yes.
The Sun StorageTek RAID Manager software builds the logical drive(s), indicated by a magnifying glass moving across the new logical drive icon in the Logical Devices View. The configuration is saved on the Sun HBA and on the physical drives.
FIGURE 4-11 Logical Device Icons

13. Repeat Step 1 to Step 12 for each HBA on the system.
14. Partition and format the logical drives.
See Partitioning and Formatting Logical Drives for more information.
If your storage space comprises one or more HBAs on a single system, building is complete. Continue with Managing Your Storage Space.
If you have installed HBAs on more than one system and wish to add them to your storage space, continue with Including More Systems In the Storage Space.
| Note - The Sun StorageTek RAID Manager software must be installed on every system that will be part of your storage space. |
If you have installed HBAs on more than one system, to continue building your storage space:
The maximum number of supported Sun StorageTek SAS RAID HBAs varies depending on your operating system. See Sun StorageTek SAS RAID HBA Support for more information.
When your storage space is complete, continue with Managing Your Storage Space.
A RAID Volume comprises two or more logical drives connected end-to-end. The logical drives in a RAID Volume must meet the following requirements:
|
1. Create two or more logical drives that meet the requirements listed at the beginning of this section, and wait for them to build and initialize.
For instructions, see Express Configuration: Building the Easy Way or Custom Configuration (Advanced).
The following figure shows two example RAID 5 logical drives.
FIGURE 4-12 RAID 5 Logical Drives

2. On the toolbar, click Create.
3. When the configuration wizard opens, select Custom configuration..., then click Next.
4. Click Advanced settings, select RAID Volume, then click Next.
5. In the Logical Devices panel, select the logical drives you want to use in the RAID Volume.
The Sun StorageTek RAID Manager software prompts you to select the correct number of logical drives.
FIGURE 4-13 Required Number of Logical Drives

6. Modify the Advanced Settings, if required.
See Fine-Tuning Logical Drives for more information.
7. Click Next to review the RAID volume settings.
The following figure shows an example RAID volume ready to be created.
FIGURE 4-14 RAID Volume Configuration Summary

8. Click Apply, then click Yes.
The Sun StorageTek RAID Manager software builds the RAID Volume. The configuration is saved on the Sun StorageTek SAS RAID HBA and on the physical drives. The Sun StorageTek RAID Manager software replaces the individual logical drives with a single RAID Volume in the Logical Devices View.
FIGURE 4-15 Logical Devices View

9. Partition and format your RAID Volume.
See Partitioning and Formatting Logical Drives for more information.
The maximum number of Sun StorageTek SAS RAID HBAs supported by the Sun StorageTek RAID Manager software varies, depending on your operating system:
| Note - For the most recent operating system support information, visit http://support.intel.com/support/go/sunraid.htm. |
Once your storage space is built, you can add systems, HBAs, and disk drives to meet your changing needs, then create logical drives by repeating the steps in this chapter.
To customize the Sun StorageTek RAID Manager software and make managing your storage space easier and more effective, continue with Customizing the Software.
To learn how to monitor, manage, and modify your storage space, see these chapters in the rest of this document:
To find the most commonly asked-about information, see Frequently Asked Questions.
For help identifying features of the Sun StorageTek RAID Manager software, see Buttons and Icons At-a-Glance.
| Sun StorageTek RAID Manager Software User’s Guide | 820-1177-13 |
Copyright © 2009 Sun Microsystems, Inc. All rights reserved.
 To Build a Storage Space With the Express Method
