Audio Video Conferencing
The example program o1k_conf is a point-to-point audio and video conference written in C++ using XIL and the SunVideo Plus audio API. It supports CellB, JPEG, and H261 video formats and various audio formats.
The o1k_conf Command
The following shows the command-line syntax for the o1k_conf example:
hostname% o1k_conf options
The following table describes command options and the default setting.
Table 4-12 o1k_conf Options|
Legal Options |
Description and Values |
Default |
|---|---|---|
|
-u %s |
user@host |
NULL |
|
-t |
Disables XIL molex (Sol;airs 2.6 only) |
|
|
-p |
For receiving PAL format. |
|
|
-D %s |
Name of SunVideo Plus device |
/dev/olk0 |
-
XIL 1.2 in Solaris 2.5.1 is not multithreading safe. The conference example uses multiple threads that access XIL. The threads lock out each other before they make XIL calls. This is not efficient, but required due to XIL 1.2. In Solaris 2.6, XIL 1.3 is multithreading safe. The -t option is used to disable the locking used by the conference application.
-
The -p option should be used if you know the call will be sent by PAL format. If you do not use this option if sending PAL formats, errors will occur.
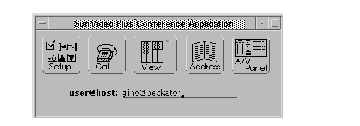
The following figure shows the main conference panel:
Figure 4-3 o1k_conf Main Conference Panel

This allows for configuration of audio/video parameters and provides an address book for storing information about users you want to connect.
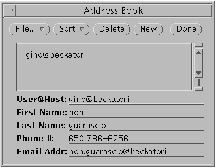
To open the address book, click the Address button. The following figure shows the Address Book.
Figure 4-4 Address Book

A user is added by selecting the New button. The most important information is the User@Host field. This is used to contact another person when placing a conference call. The other information in the Address Book is optional. After filling in the user information, click on the Add button (which is only displayed after the new button is selected). To save your address book, select Save in File menu. To select a user for a conference, select the user in the list, and then click the Done button. This closes this pop-up window and places the User@Host name in the Main Conference Panel (Figure 4-3).
Only the user calling the conference needs to configure the Main Conference Panel because when a conference is called, the far end is told of the caller's configuration. The default configuration for olk_conf is
-
Video: H261, QCIF, 10fps, 256 Kbits/sec
-
Audio: ulaw, 8 KHz, mono
To change the conference configuration, click Setup, and proceed through the menus and pop-up window directions.
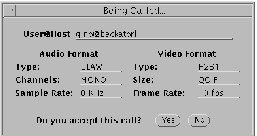
When called by an another user, a pop-up window opens that informs you who is calling and the parameters of the call (see figure below). You may then decide if you care to join the conference.
Figure 4-5 Being Called Window

During the conference, you can monitor status information, like audio and video bit rates and frame rates and network packet activity, by View from the Main Conference Panel. Then select A/V Panel for audio and video parameters that you can change in the audio/video panel.
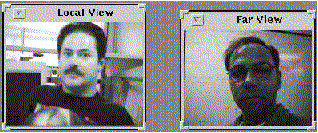
During a conference call, you will have two windows on your display, a Local View and a Far View (the person you are conferencing). The figure below shows these two windows.
Figure 4-6 Local View and Far View Windows

With H.261, a picture-in-a-picture is possible on the Far View window, with your view inlayed in the top-left corner. To reduce CPU use, you can switch your local view to an icon. This is advisable during an H261 conference.
When you have completed your conference call, click HangUp. The HangUp button is displayed on the Main Conference Panel after a call is placed.
- © 2010, Oracle Corporation and/or its affiliates
