Installing the HL7 Binding Component Only
The following procedure describes how to install just the HL7 Binding Component using the Healthcare Pack Installer. Before installing the HL7 BC, review the information under Installing the Healthcare Pack With Custom Configuration, which explains what is installed.
Note –
When installing HL7 on UNIX systems, such as Solaris machines, you need to set the DISPLAY variable to install in GUI mode. For more information, see Installing the Healthcare Pack With Custom Configuration.
 To Install the HL7 Binding Component
Before You Begin
Before you can install the HL7 BC, GlassFish ESB v2.2 must be installed.
-
Exit from all programs prior to beginning the installation.
You can cancel the installation at any time during the process.
-
Locate the Healthcare Pack Installer file on your installation media.
The file is named healthcarepack-v2.2-installer.jar.
-
To start the installation, double–click the healthcarepack-v2.2-installer.jar file or run the following command from a command line:
java -jar healthcarepack-v2.2-installer.jar
The Healthcare Pack Installer wizard appears.

-
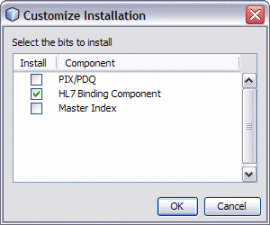
On the installer Welcome window, click Customize.
The Customize Installation dialog box appears.

-
Deselect PIX/PDQ and then select HL7 Binding Component. Click OK.
-
On the installer Welcome window, click Next.
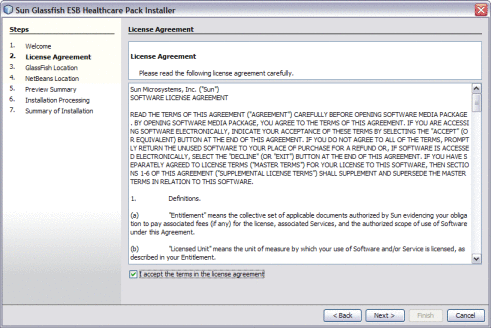
The License Agreement window appears.

-
Accept the License Agreement and then click Next.
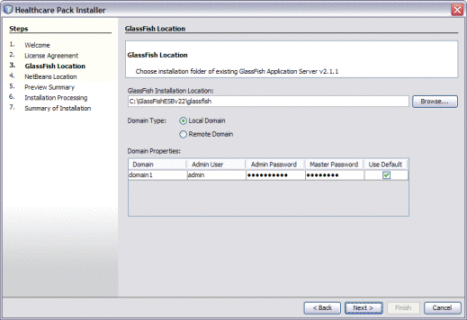
The GlassFish Location window appears.

-
Accept the default values for the following properties, or modify them as needed:
-
The path to the GlassFish server.
-
Whether you are installing to a remote or local domain.
-
The connection and login properties for the administrator user.
Note –The default admin password is adminadmin and the default master password is changeit. If you need to change the master password, run the following command:
asadmin change-master-password new-password
Substitute the actual password for new-password.
-
-
Click Next.
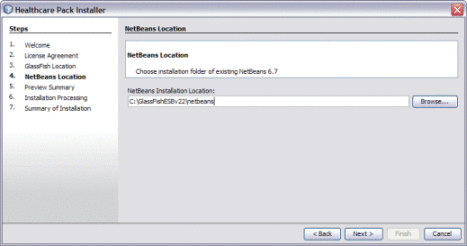
The NetBeans Location window appears.

-
Accept or modify the location for the NetBeans home directory.
Note –When installing on Mac OS, the path to select is GlassFishESB_Home/netbeans.app/Contents/Resources/netbeans.
-
Click Next.
The Preview Summary window appears.

-
Review your installation selections. If you have any changes, use the Back and Next buttons to navigate back through the wizard.
-
If you do not want the installer to stop the GlassFish server after installation, deselect Stop GlassFish Server After Installation.
Note –If you deselect this option, be sure to restart the server once installation is complete.
-
When you are ready, click Install.
The Installation Processing window appears, and displays the progress of the installation.
-
When the installation is complete, the Summary of Installation window appears, and displays a message letting you know whether or not the installation was successful.

- © 2010, Oracle Corporation and/or its affiliates
