Installing the Healthcare Pack With Default Configuration (Quick Start)
The following procedure describes how to install Healthcare Pack quickly and with minimal configuration. This type of installation allows you get quickly up and running with the PIX/PDQ projects, and is good for test environments.
Before installing the Healthcare Pack, review the information under Installation Overview, which explains what is installed. When installing the Healthcare Pack on UNIX systems, such as Solaris machines, you need to set the DISPLAY variable to install in GUI mode. For more information, see Installing the Healthcare Pack With Custom Configuration.
 To Perform a Default Installation
Before You Begin
If you are performing a complete installation and you want the installer to create the database automatically, you must have a running installation of MySQL 5.1. To perform the installation with no configuration, the database needs to use port 3306. These instructions also assume that your GlassFish ESB environment is using the default port numbers. If your GlassFish ESB installation is configured with custom port numbers, follow the instructions under Installing the Healthcare Pack With Custom Configuration.
Before you can install any components of this pack, GlassFish ESB v2.2 must be installed.
-
Exit from all programs prior to beginning the installation.
-
Locate the Healthcare Pack Installer file on your installation media.
The file is named healthcarepack-v2.2-installer.jar.
-
To start the installation, either double-click the healthcarepack-v2.2-installer.jar file or run the following command:
java -jar healthcarepack-v2.2-installer.jar
The Healthcare Pack Installer wizard appears.

-
On the installer Welcome window, click Next.
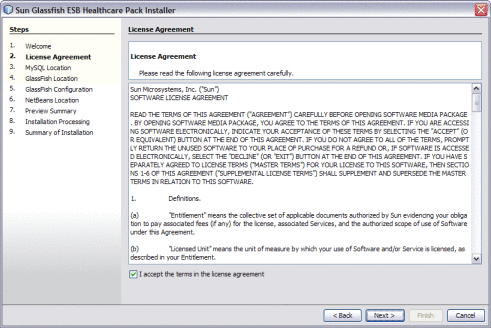
The License Agreement window appears.
-
Accept the License Agreement and then click Next.
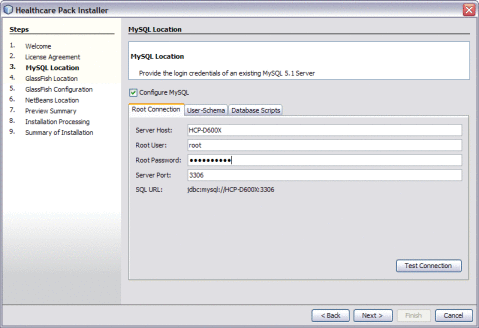
The MySQL Location window appears.
-
On the Root Connection tab of the MySQL Location window, enter the root password. Click Test Connection to verify the values.
Tip –If you do not want to create the MySQL database, deselect Configure MySQL. If you already have an existing MySQL schema named midm or arrdb, they will be overwritten unless you deselect Configure MySQL.
-
Click Next.
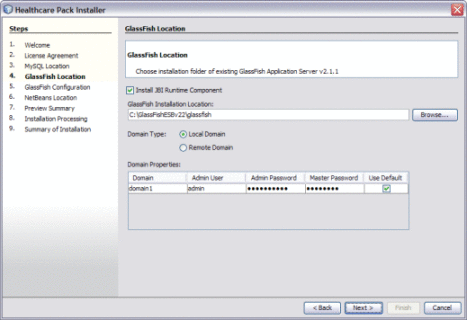
The GlassFish Location window appears.
-
On the GlassFish Location window, accept or modify the default values.
Note –The default admin password is adminadmin and the default master password is changeit. If you need to change the master password, run the following command:
asadmin change-master-password new-password
Substitute the actual password for new-password.
-
Click Next.
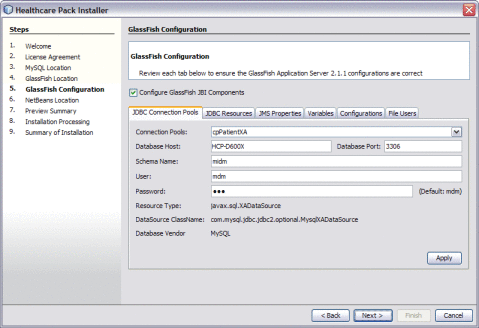
The GlassFish Configuration window appears.
-
Click Next to accept the default values.
The NetBeans Location window appears.
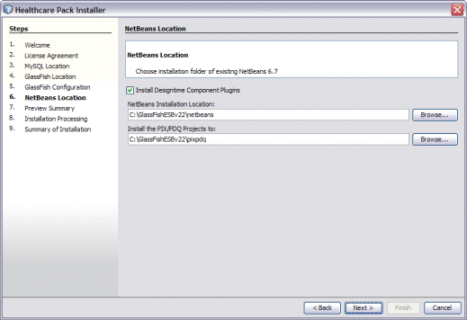
Note –When installing on Mac OS, the path to select is GlassFishESB_Home/netbeans.app/Contents/Resources/netbeans.
-
Accept or modify the default values, and then click Next.
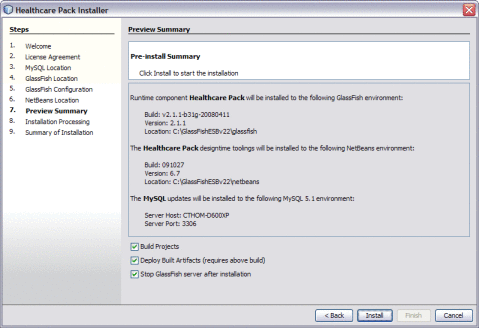
The Preview Summary window appears.
-
Click Install.
Note –Unless you deselect the options at the bottom of the page, the PIX/PDQ projects will all be built and deployed following installation. By default, the GlassFish server is shut down after the installation is complete. If you select Stop GlassFish Server After Installation, be sure to restart the server when the installation is done.
-
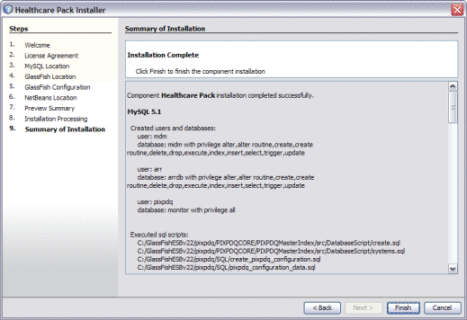
When the installation is complete, click Finish.
- © 2010, Oracle Corporation and/or its affiliates
