Using the Default Worklist Manager Console
This topic provides instructions for using the default Worklist Manager Console provided with the WLM SE. This console is provided primarily for testing and development purposes, but you can customize it to fit your needs. You can also create a custom console for handling the Worklist Manager tasks using the client API. For more information, see Creating a Custom Worklist Manager Console.
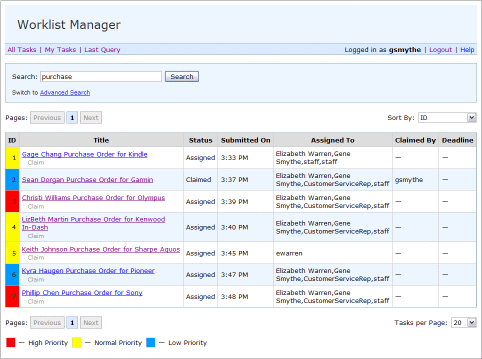
The default Worklist Manager Console displays a search box below which any tasks that match a search are displayed. By default, tasks are ordered by their ID number (which is also the order in which the tasks were submitted). The worklist shows the task ID, title, status, submission date, users and groups to which it is assigned, the user who has claimed the task, and the deadline for completion.
Task IDs are highlighted based on the task priority.
-
Red indicates a high priority (8–10).
-
Yellow indicates a normal priority (4–7).
-
Blue indicates a low priority (1–3).
Typical steps for completing a task are searching for the task, claiming the task, and then marking it as complete. The last two steps can be combined into one. Perform any of the following procedures to manage worklist tasks:
Installing and Deploying the Worklist Manager Console Sample
The WLM SE includes several sample projects that you can use to quickly get started using Worklist Manager projects. One of the samples defines a Worklist Manager Console. You can download and use this sample, or customize it to fit your needs. By default, when you install the WLM SE, this sample is already deployed and ready to run.
 To Install and Deploy the Worklist Manager
Console Sample
-
Right-click in the NetBeans Projects window, and select New Project.
The New Project Wizard appears.
-
Under Categories, expand Samples and then select SOA.
-
Under Projects, select WLM Console.
-
Click Next.
-
Enter a name for the project, and then click Finish.
Two new projects appear in the projects tree. One is the Worklist Manager Console web project, and the other is the composite application for the console.
-
Make any necessary security changes to the console.
For more information, see Defining Worklist Manager Console Security.
-
Clean and build the web project and then the composite application project.
-
Deploy the composite application project.
Logging In to the Worklist Manager Console
You can log in to the default Worklist Manager Console either by launching the console from the GlassFish Admin Console or by entering the URL directly into a web browser.
 To Launch the Worklist Manager Console From
a Browser
-
Open a web browser, and enter one of the following URLs:
-
To launch the console that is automatically deployed by the WLM SE:
http://localhost:8080/wlm-sample
-
To launch the console that is manually deployed from the WLM Console sample projects:
http://localhost:8080/wlm
-
-
Enter one of the user names and passwords you defined in Defining Worklist Manager Console Security.
 To Launch the Worklist Manager Console From
the GlassFish Admin Console
-
From a web browser, launch the GlassFish Admin Console.
The default URL for the console is http:/localhost:4848.
-
In the left navigation panel, click Web Applications.
-
In the list that appears, click Launch next to one of the following web applications:
-
To launch the console that is automatically deployed by the WLM SE:
WLMConsoleCompApp-WLMConsoleWeb with the /wlm context root.
-
To launch the console that is manually deployed from the WLM Console sample projects:
WLMConsoleCompApp-WLMConsoleWeb (or whatever you named your Worklist Manager project and composite application) with the /wlm-sample context root.
The Login page of the Worklist Manager Console appears.
-
-
Enter one of the user names and passwords you defined in Defining Worklist Manager Console Security.
Searching for Tasks
The WLM SE supports full-text and keyword searches or Worklist Manager tasks.
 To Search for Tasks
-
To perform a basic search, enter a search term into the Search field and then click Search.
Any tasks that contain the search criteria and that do not have a status of Completed appear in the task list.
-
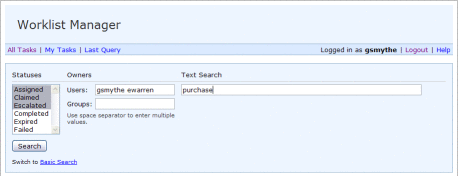
To perform an advanced search, do the following:
-
In the Search box, click Advanced Search.
The Advanced Search fields appear.
-
Enter any of the following information for the search:
-
Task Statuses: Select one or more of the following: Assigned, Claimed, Escalated, Completed, Expired, and Failed. Use the Ctrl and Shift keys to select multiple statuses.
-
Task Owners: Specify the names of users and groups who own the tasks you want to find. If you specify more than one user or group, separate the names with a space.
-
Text Search: Enter a word or words by which to search.
-
-
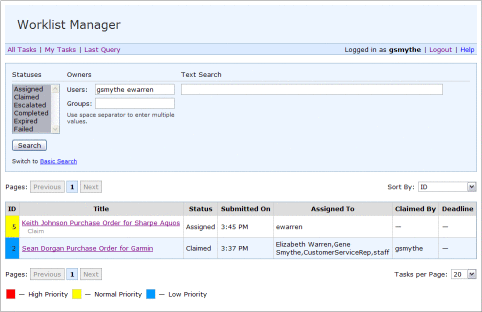
When you have entered all of your criteria, click Search.
Any tasks matching the criteria appear in the task list.
-
-
Once you perform a search, you can do any of the following:
-
To repeat the previous query, click Last Query above the Search box.
-
To view all tasks, click All Tasks above the Search box.
-
To view only the tasks you have claimed, click My Tasks above the Search box.
-
To re-sort the results of a search, click in the Sort By field and then select the column by which you want to sort.
-
To navigate back and forth through the worklist, use the Previous and Next buttons or the button corresponding to the page you want to view.
-
To change the number of tasks display on each page, select a new value from the Tasks per Page field.
-
Claiming a Task
Once a task you want to complete appears in the task list, you can claim the task. You can only complete tasks you have claimed, and you can claim and complete the task at the same time that you claim it.
 To Claim a Task
-
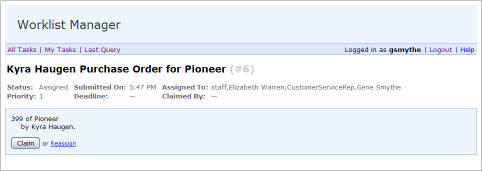
In the task list, select the task you want to claim.
The page changes to show the task information.
Note –The page you see may be different from the image below, depending on how the Worklist Module project was implemented.
-
Click Claim.
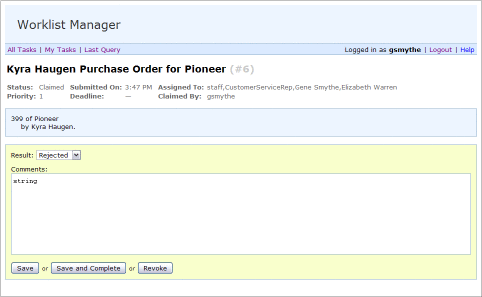
Additional information for the task appears on the page, the Claimed By property changes to your user name, and the task status changes to Claimed.
-
Do one of the following:
-
To modify the task output without completing the task, make the necessary changes and then click Save.
Any changes you made to the output are saved.
-
To complete the task, make the necessary changes to the task output and then click Save and Complete.
The status for the task changed the Completed.
-
If you do not want to claim the task after all, click Revoke.
The Claimed By property is cleared and the task status changes back to Assigned.
-
Completing a Claimed Task
If you did not complete a task at the time you claimed it, you can return to the task and update the required information to complete the task.
 To Complete a Task
-
In the task worklist, click on a task you have claimed (the task status will be Claimed).
-
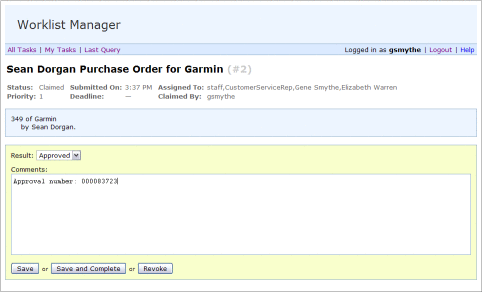
In the response section of the window, modify any necessary information in the message.
Note –The page you see may be different from the image below, depending on how the Worklist Module project is implemented.
-
Click Save and Complete.
The status for the task changes to Complete.
Note –The task remains in the Worklist Manager database, and can be viewed by searching for tasks with a status of Complete.
Reassigning a Task
At times it might be necessary to reassign a task to someone other than yourself. This can only be done before a task is claimed.
 To Reassign a Task
-
Perform a search for the task to reassign.
-
In the worklist, select the task to reassign.
-
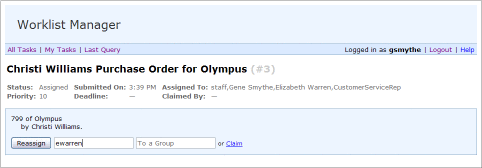
Click Reassign.
Two fields appear so you can reassign the task to a user or a group.
-
Enter the user or group name to which the task should be reassigned.
-
Click Reassign again.
The task's Assigned To properties change to user or group names you entered, and the task worklist reappears.
- © 2010, Oracle Corporation and/or its affiliates
