|
|
| 1. |
These buttons allow you to highlight and
adjust items in the menu.  |
| 2. |
Use this button to Exit the active menu or
the OSD (On-Screen Display). |
| 3. |
Use this button to open the OSD and
activate a highlighted menu item. |
| 4. |
Use this button for auto adjustment direct
access,when
the menu system is not active. |
|
|
| |
|
 |
Brightness/Contrast |
|
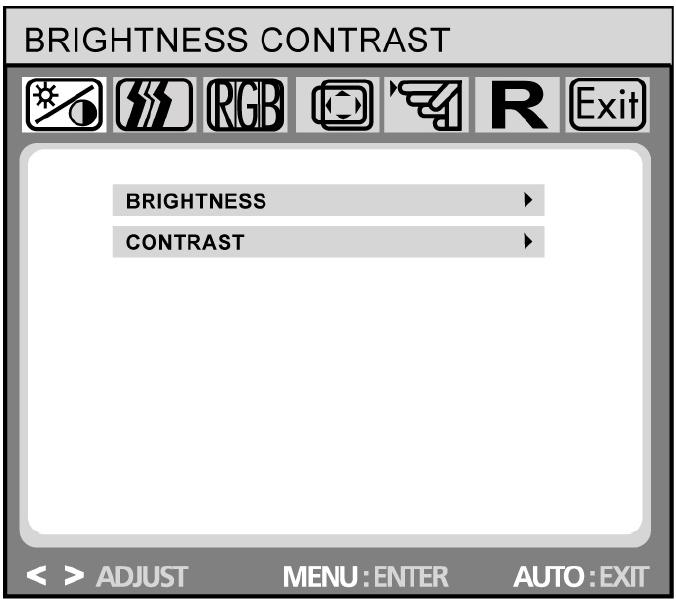 |
| Brightness: Adjusts brightness
by using the buttons < or > (
and
). |
| Contrast: Adjusts screen
contrast by using the buttons < or > (
and
). |
|
|
|
|
|
Image Control |
|
 |
(not available in DVI digital mode)
Auto Adjustment:
Automatically selects the optimal settings for
image parameters
(image position, phase, etc.) by using the
button MENU (
). |
| H. Position: Controls the
picture’s horizontal position. |
| V. Position: Controls the
picture’s vertical position. |
| Clock: Sets up the
internal clock. Larger values make the displayed
image appear wider;
ccccc smaller values make it appear
compressed. |
| Phase: Adjusts the
internal clock’s time lag in order to optimize
the screen image. |
| Sharpness: Controls image
sharpness (only for resolutions less than 1280 ×
1024 pixels). |
|
|
|
|
|
Color |
|
|
|
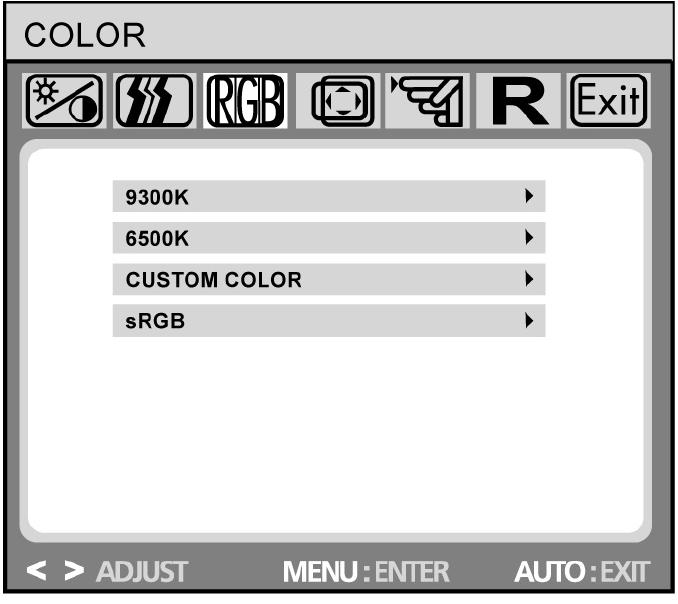
| This menu lets you select a
preset color temperature (9300K, 6500K or sRGB)
by pressing the OSD buttons < or > (
and
). Changes to the color temperature take
immediate effect on screen. If you wish to set
individual color values, select the Custom Color
option. Then press the MENU button (
)
to select the red, green and blue settings and
set the desired value using the OSD buttons < or
> (
and
).The current settings are automatically saved
when you return to the previous level or exit
the OSD menu. |
|
|
|
|
|
OSD Control |
|
|
|
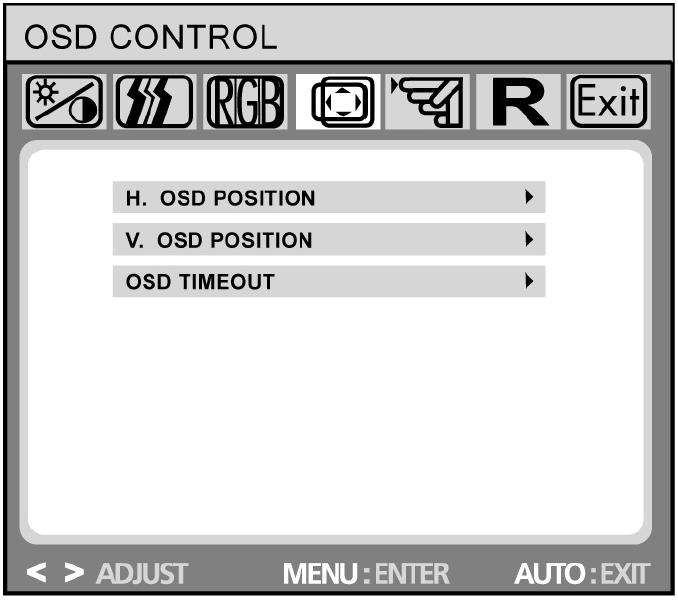
| H. OSD Position: Controls
the OSD menu’s horizontal position. |
| V. OSD Position: Controls
the OSD menu’s vertical position. |
| OSD Timeout: Determines how
long (in seconds) the OSD menu waits before closing
cc
automatically after no action has been performed. |
|
|
|
|
|
Other |
|
|
|
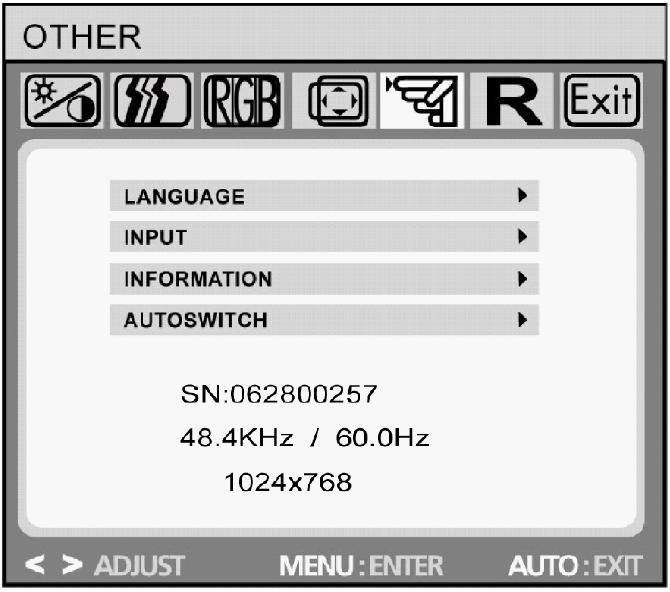
| 1. |
Push the Menu button. |
| 2. |
Push the [-] button or [+] button until the Position screen is displayed. |
| 3. |
Push the Menu button and then press the [-] button or [+] button to open the H-Position screen. |
| 4. |
Push the Menu button again and use the [-] button or [+] button to change the horizontal position of the monitor's viewing area. |
| Note: |
Not Available
This function doesn't work in Digital input. |
|
|
|
|
|
Reset |
|
|
|
| Yes: Resets the monitor to
original factory settings. |
| No: Exits the reset function
without changing the settings. reset |
| |
|
|
| |
| |