| C H A P T E R 6 |
|
Tutorial--Section 1.3 Test Run the Login Page |
This chapter describes how to run your Web Application Framework application.
1. Select the Application Name folder.

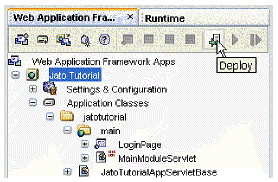
2. Click the Deploy button on the Web Application Framework toolbar at the top of the Explorer window.
This compiles the entire Web application (those classes that need to be compiled) and deploys it to the Sun Java System Application Server in one step.
If you followed all of the tutorial instructions, the Web application compiles and deploys without error. See the IDE's Output window for error messages.
This deployment step is required for any change you make to any of the resources in your Web application when running it in the Sun Java System Application Server (Application Server).

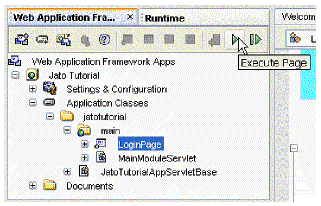
2. Click the Execute Page button located on the Web Application Framework toolbar at the top of the Explorer window.
A default browser starts the application.
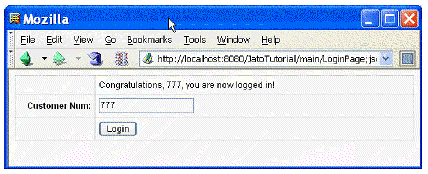
1. Enter a valid login (for example, 1, 777, or 410 are valid (hard-coded) customer numbers).
The login page should refresh displaying the success message.

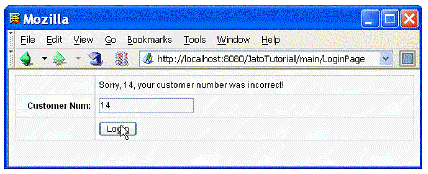
1. Enter an invalid login name (for example, foo, 8, or 14 - anything other than the valid, hard-coded customer numbers described above).
The login page should refresh displaying the failure message

1. If you prefer to test run you application outside of the IDE, compile and package your application into a WAR file and place the WAR file in the webapps directory (this varies from container to container, but most call it webapps).
2. You need to add the PointBase driver file to the servlet container's classpath. The driver can be found in the installation directory of the IDE, as follows:
<studio-install-dir>\AppServer7\pointbase\client_tools\lib\pbclient42RE.jar for Windows.
<studio-install-dir>/AppServer7/pointbase/client_tools/lib/
pbclient42RE.jar for Solaris/Linux.
The easiest way to accomplish this is to copy this driver to your application's WEB-INF/lib directory.
3. Open a browser and run it with the URL appropriate to the servlet container.
The only possible variation is the page name (LoginPage) at the end of the URL.
Apache Tomcat or Caucho Resin servlet containers: http://localhost:8080/JatoTutorial/main/LoginPage
|
Note - You might find it necessary to refer to this task again during this tutorial. |
Copyright © 2004, Sun Microsystems, Inc. All Rights Reserved.