SPARC: To Install the Solaris 8 Software
-
On the Solaris Interactive Installation dialog box, click Initial, Continue, or Upgrade.
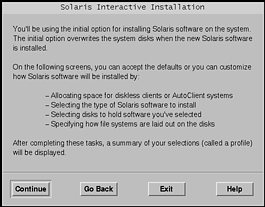
If you selected Initial, additional information is displayed on the Solaris Interactive Installation dialog box:
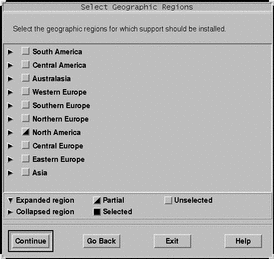
If you selected Continue or you selected Upgrade and you are not installing a Solaris 8 Update, the Select Geographic Regions dialog box is displayed:
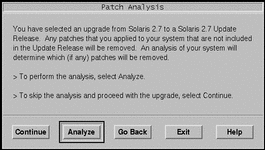
If you selected Upgrade and you are installing a Solaris 8 Update, the Patch Analysis dialog box is displayed:
-
In the previous step, did you select Initial, Continue, or Upgrade?
-
Are you installing a Solaris 8 Update?
-
If no, go to Step 9.
-
If yes, do you want to perform a patch analysis?
-
If no, click Continue and go to Step 9.
-
If yes, click Analyze.
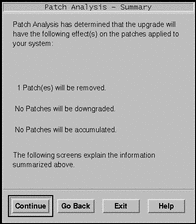
The Solaris 8 Interactive Installation Program analyzes your system to determine which patches (if any) will be removed. When it is finished, the Patch Analysis - Summary dialog box is displayed:
-
-
-
Click Continue.
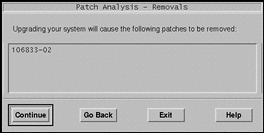
The Patch Analysis - Removals dialog box is displayed:
-
Click Continue until you're finished listing all the patches that will be downgraded, accumulated, or obsoleted.
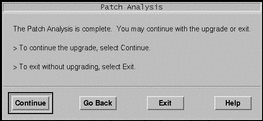
When you're finished, the Patch Analysis dialog box is displayed with new information:
-
Do you want to continue the upgrade or exit either to manage the patches currently on your system or to apply patches only (and consequently stop the upgrade)?
-
If continue, click Continue and go to Step 9.
-
If exit, click Exit.
A warning dialog box that states you can restart the Solaris 8 Interactive Installation Program from the console window is displayed.
-
-
On the Warning dialog box, click Exit.
-
Do you want to manage the patches currently on your system or apply updated patches only (and consequently stop the upgrade)?
-
If manage patches currently on your system, do what you need to do with the patches, and when you're finished, select Restart Install on the Install Workspace menu and resume or restart the installation.
-
If apply updated patches only, use the Solaris 8 Maintenance Update to apply the Maintenance Update patches to your system.
Note -The Solaris 8 Maintenance Update is located on the Solaris 8 Maintenance Update CD, which is included with the Solaris 8 Update release. Instructions for applying patches are provided in the Maintenance Update Release Notes.
-
-
On the Select Geographic Region dialog box, select the geographic region or regions you want to use in the Solaris 8 user interface and click Continue.
Note -English (United States, en_US) is installed by default.
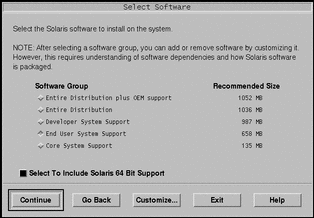
The Select Software dialog box is displayed:
-
Select the software group you want to install.
-
Do you want to modify the composition of the software group you selected in the previous step by adding or removing software clusters or packages?
-
If no, go to the next step.
-
If yes, click Customize and use the Customize Software dialog box to add or remove the software clusters or packages you want.
-
-
Click Continue.
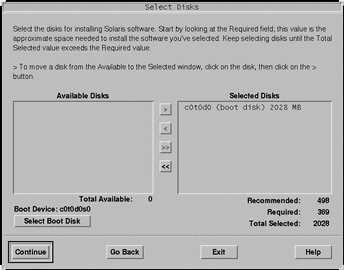
The Select Disks dialog box is displayed:
-
If the disk you want isn't already shown in the Selected Disks window, highlight the disk you want in the Available Disks window and click the > button.
The disk you highlighted is moved to the Selected Disks window.
-
Click Continue.
If the disk does not contain data, the Automatically Layout File Systems? dialog box is displayed:

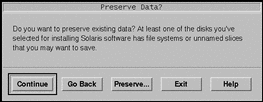
If the disk you selected already contains data, the Preserve Data? dialog box is displayed:
-
Is the Preserve Data? dialog box displayed?
-
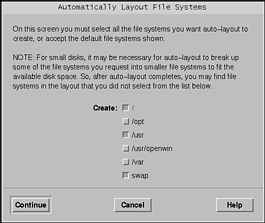
Do you want the Solaris 8 Interactive Installation Program to lay out file systems for you automatically?
-
If yes, click Auto Layout.
The Automatically Layout File Systems dialog box is displayed:
-
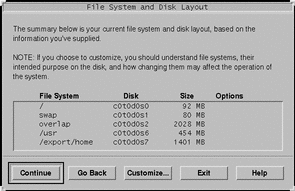
If no, click Manual Layout.
The File System and Disk Layout dialog box is displayed:
-
-
Did you select Auto Layout or Manual Layout?
-
If Manual Layout, go to the next step.
-
If Auto Layout, select the file systems you want to create, if any, and click Continue.
The File System and Disk Layout dialog box is displayed.
-
-
Do you want to customize the file system and disk layout?
-
If yes, click Customize and follow the directions on the dialog boxes that follow.
-
If no, click Continue.
The Mount Remote File System dialog box is displayed:

-
-
Do you want to mount software from a remote file server?
-
If yes, click Remote Mounts and follow the directions on the dialog boxes that follow.
-
If no, click Continue.
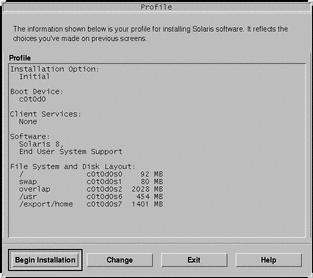
The Profile dialog box is displayed:
-
-
Click Begin Installation.
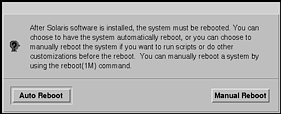
A dialog box with two buttons on it is displayed: Auto Reboot and Manual Reboot:
-
Click Auto Reboot or Manual Reboot.
The Installing Solaris Software - Progress dialog box is displayed:
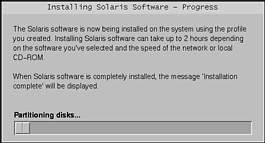
When the Solaris 8 Interactive Installation Program is finished installing the Solaris software, the system reboots automatically or prompts you to reboot manually.
After installation is finished, a log of how the Solaris 8 software was installed on the system is saved in a file.
Table 5-5 SPARC: Installation Log LocationsIf the system was installed using the
The location of the log file is
Initial installation option
-
Before the system reboots: /a/var/sadm/system/logs/install_log
-
After the system reboots: /var/sadm/system/logs/install_log
Upgrade option
-
Before the system reboots: /a/var/sadm/system/logs/upgrade_log
-
After the system reboots: /var/sadm/system/logs/upgrade_log
-
- © 2010, Oracle Corporation and/or its affiliates
