SPARC: Using the Solaris 8 Interactive Installation Program
SPARC: To Get Started
-
Check Table 5-4 to make sure the system on which you intend to install Solaris 8 is prepared for an interactive installation.
Table 5-4 SPARC: Task Map: Setting Up a System for an Interactive InstallationTask
Description
For instructions, go to
Back up existing Solaris 1.x (SunOS 4.x) files
If a previous Solaris 1.x release (SunOS 4.x) is installed on the system, you can convert or merge some Solaris 1.x files into Solaris 8 files. You can use begin and finish scripts to convert or merge the files.
Check if the system is supported
Check the hardware documentation to see if the system is supported in Solaris 8.
Decide how to upgrade the system if a previous version of Solaris is installed on it
If the system has a previous release of Solaris installed, you need to determine how to upgrade the system. Make sure you know what to do before and after you upgrade a system.
"SPARC: Upgrading a System" in this chapter
Check if the system has enough disk space for the Solaris 8 software
Optional. There are many considerations when planning disk space, such as deciding which software group you want to install.
Preconfigure system configuration information
Optional. You can use the sysidcfg file or the name service to preconfigure installation information (for example, locale) for a system so you won't be prompted to supply the information during the installation.
Set up the system to install over the network
For network installations only
To install a system from a remote Solaris 8 Software SPARC Platform Edition CD image, you need to set up the system to boot and install from an install or boot server.
Chapter 9, Preparing to Install Solaris Software Over the Network
-
If the system is part of a network, make sure an Ethernet connector or similar network adapter is plugged into your system.
-
Do you intend to install the Solaris software on a system through a tip(1) line?
-
If no, go to the next step.
-
If yes, make sure your window display is at least 80 columns wide and 24 rows long.
Note -To determine the current dimensions of your tip window, use the stty(1) command.
-
-
Do you intend to use the system's CD-ROM drive to install the Solaris 8 software on the system?
-
If no, go to the next step.
-
If yes, insert the CD labeled Solaris 8 Software 1 of 2 SPARC Platform Edition into that system's CD-ROM drive.
-
-
Boot the system:
If your system is
Then
New, out-of-the-box
Turn on the system.
Existing
Display the ok prompt (by typing halt as superuser or by pressing both the Stop and A keys at the same time), and type:
ok boot cdrom
to boot from the local CD, or type:
ok boot net
to boot from an install server on a network.
Information similar to this is displayed:
Boot device: /sbus/espdma@e,8400000/esp@e,8800000/sd@6,0:f  File and args:
SunOS Release 5.8 Version Generic 32-bit
Copyright 1983-2000 Sun Microsystems, Inc.  All rights reserved.
Configuring /dev and /devices
Using RPC Bootparams for network configuration information.
le0: No carrier - cable disconnected or hub link test disabled?
After a few seconds, a menu of languages is displayed.
-
Type the number that corresponds to the language in which to display prompts, messages, and other installation information.
A menu of locales is displayed.
-
Type the number that corresponds to the locale you want to use for the installation.
The OpenWindowsTM desktop starts. An empty desktop and the Solaris Install Console window are displayed with the message:
The system is coming up. Please wait.
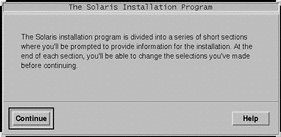
The Solaris Installation Program dialog box is displayed:
-
Click Continue.
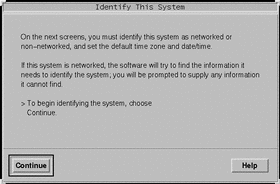
The Identify This System dialog box is displayed:
SPARC: To Identify the System
-
On the Identify This System dialog box, click Continue.
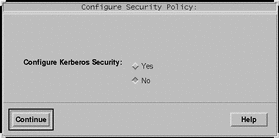
The Configure Security Policy dialog box is displayed:
-
Do you want to configure Kerberos security for the system?
-
If yes, select Yes and click Continue.
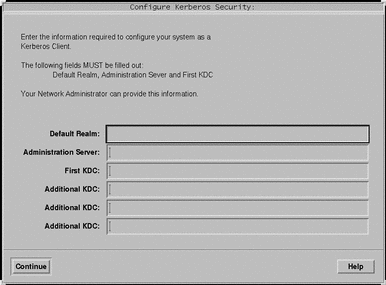
The Configure Kerberos Security dialog box is displayed:
-
If no, select No and click Continue.
The Confirm Information dialog box is displayed.
-
-
Did you choose to configure Kerberos security in the preceding step?
-
If no, go to the next step.
-
If yes, fill in the Configure Kerberos Security dialog box and click Continue.
The Confirm Information dialog box is displayed.
-
-
On the Confirm Information dialog box, click Continue.
-
If your system is already networked or you have preconfigured the system configuration (as described in Chapter 4, Preconfiguring System Configuration Information) and the Solaris 8 Interactive Installation Program is able to identify your system completely, the Solaris Interactive Installation dialog box is displayed.
-
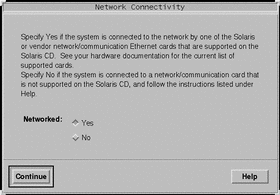
If your system is not currently networked or it cannot identify your system completely, the Solaris 8 Interactive Installation Program displays the dialog boxes that enable you to provide the information, starting with the Network Connectivity dialog box:
-
-
Was the Solaris 8 Interactive Installation Program able to identify your system completely?
-
If yes, go to Step 1.
-
If no, go to the next step.
-
-
-
If no, on the Network Connectivity dialog box, select No, click Continue, and go to Step 9.
-
If yes, select Yes and click Continue.
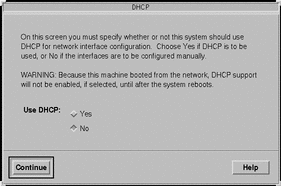
The DHCP dialog box is displayed:
-
-
Do you want to use DHCP for the network interface configuration?
-
If no, select No, click Continue, and go to Step 9.
-
If yes, select Yes and click Continue.
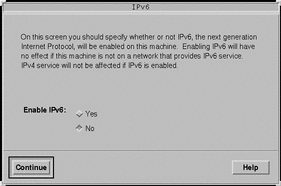
The IPv6 dialog box is displayed:
-
-
On the Host Name dialog box, type the host name you want and click Continue.
If your system is networked (that is, you selected Yes on the Network Connectivity dialog box in Step 6), the IP Address dialog box is displayed:
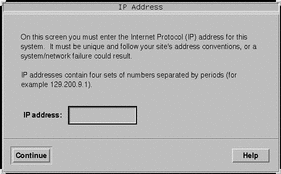
If your system is not networked, the Confirm Information dialog box is displayed.
-
-
If no, go to Step 19.
-
If yes, did you specify that you want DHCP used for the network interface configuration (that is, did you select Yes on the DHCP dialog box in Step 7)?
-
If yes, go to Step 12.
-
If no, on the IP Address dialog box, type the IP address of your networked system and click Continue.
-
The IPv6 dialog box is displayed.
-
-
-
If yes, select Yes and click Continue.
-
If no, select No and click Continue.
The Confirm Information dialog box is displayed.
-
-
Is the information shown on the Confirm Information dialog box correct?
-
If no, click Change and repeat the preceding steps starting from Step 6 until the information is correct.
-
If yes, click Continue.
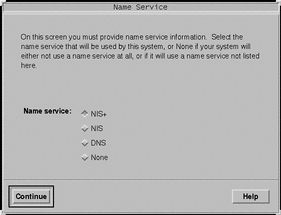
The Name Service dialog box is displayed:
-
-
On the Name Service dialog box, select the name service the system will use or None, and click Continue.
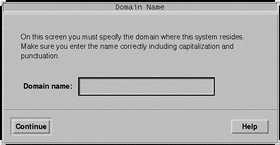
If you selected NIS, NIS+, or DNS, the Domain Name dialog box is displayed:
If you selected None, the Confirm Information dialog box is displayed.
-
Did you select None in Step 13?
-
If yes, go to Step 19.
-
If no, on the Domain Name dialog box, type the name of the domain in which the system is located and click Continue.
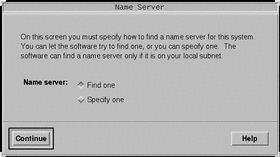
If you selected NIS+ or NIS, the Name Server dialog box is displayed:
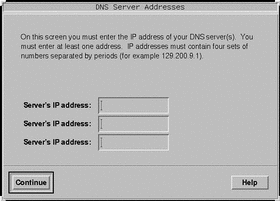
If you selected DNS, the DNS Server Addresses dialog box is displayed:
-
-
Are you using NIS+/NIS or DNS?
-
If NIS+ or NIS, select "Find one" or "Specify one" and click Continue.
-
If you selected "Find one," the Confirm Information dialog box is displayed.
-
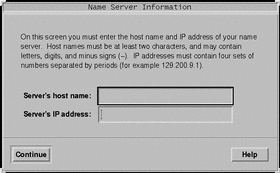
If you selected "Specify one," the Name Server Information dialog box is displayed:
-
-
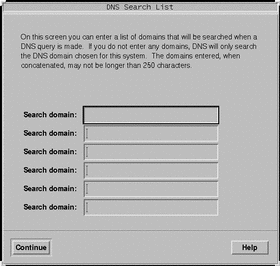
If DNS, type the IP address of the DNS server or servers you want and click Continue.
The DNS Search List dialog box is displayed:
-
-
Are you using NIS+/NIS or DNS?
-
If NIS+ or NIS, did you select "Specify one" or "Find one" in the previous step?
-
If "Find one," go to Step 19.
-
If "Specify one," type the server's host name and IP address, and click Continue.
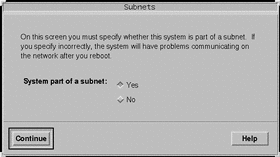
The Subnets dialog box is displayed:
-
-
If DNS, type the name of the domain or domains you want searched when a DNS query is made, if any, click Continue, and go to Step 19.
-
-
Is the name server you specified part of a subnet?
-
If yes, select Yes and click Continue.
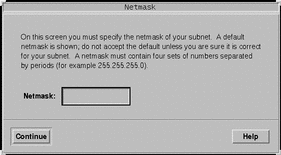
The Netmask dialog box is displayed:
-
If no, click Continue and go to Step 19.
-
-
Type the netmask you want and click Continue.
The Confirm Information dialog box is displayed.
-
Is the information shown on the Confirm Information dialog box correct?
-
If yes, click Continue.
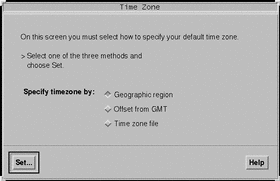
The Time Zone dialog box is displayed:
-
On the Time Zone dialog box, select how you want to set your default time zone and click Set.
The Geographic Region, Offset From GMT, or Time Zone File dialog box is displayed, depending on the method you chose.
-
Use this decision table to determine what to do next:
If you chose
Then
Geographic Region
Select the region you want in the left window and the time zone in the right, and click Continue.
Offset From GMT
Drag the slider toward the left (for west of Greenwich, England) or right (for east of Greenwich, England), and click Continue.
Time Zone File
Specify the name of a file in /usr/share/lib/zoneinfo, or click Select to choose a file in this directory, and click Continue.
The Date and Time dialog box is displayed.
-
If necessary, correct the date and time and click Continue.
The Confirm Information dialog box is displayed.
-
Is the information shown on the Confirm Information dialog box correct?
-
If no, click Change and repeat the steps starting from Step 20 until the information is correct.
-
If yes, click Continue.
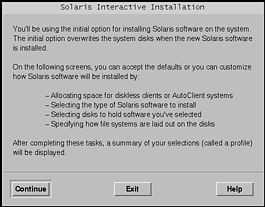
If the Solaris operating environment is not installed on the system, this version of the Solaris Interactive Installation dialog box is displayed:
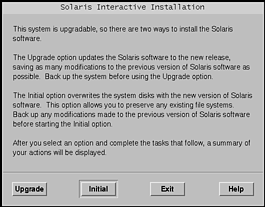
If the Solaris operating environment is already installed on the system, this version of the Solaris Interactive Installation dialog box is displayed (if not, see Chapter 12, Troubleshooting):
-
SPARC: To Install the Solaris 8 Software
-
On the Solaris Interactive Installation dialog box, click Initial, Continue, or Upgrade.
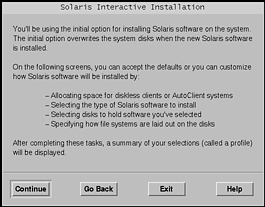
If you selected Initial, additional information is displayed on the Solaris Interactive Installation dialog box:
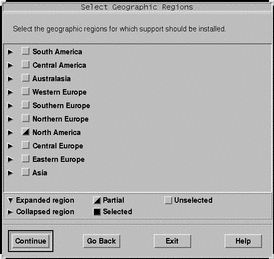
If you selected Continue or you selected Upgrade and you are not installing a Solaris 8 Update, the Select Geographic Regions dialog box is displayed:
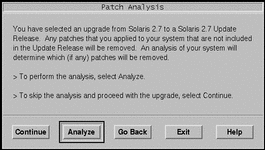
If you selected Upgrade and you are installing a Solaris 8 Update, the Patch Analysis dialog box is displayed:
-
In the previous step, did you select Initial, Continue, or Upgrade?
-
Are you installing a Solaris 8 Update?
-
If no, go to Step 9.
-
If yes, do you want to perform a patch analysis?
-
If no, click Continue and go to Step 9.
-
If yes, click Analyze.
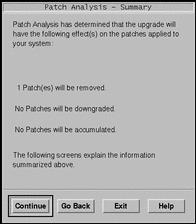
The Solaris 8 Interactive Installation Program analyzes your system to determine which patches (if any) will be removed. When it is finished, the Patch Analysis - Summary dialog box is displayed:
-
-
-
Click Continue.
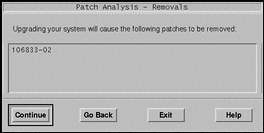
The Patch Analysis - Removals dialog box is displayed:
-
Click Continue until you're finished listing all the patches that will be downgraded, accumulated, or obsoleted.
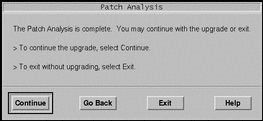
When you're finished, the Patch Analysis dialog box is displayed with new information:
-
Do you want to continue the upgrade or exit either to manage the patches currently on your system or to apply patches only (and consequently stop the upgrade)?
-
If continue, click Continue and go to Step 9.
-
If exit, click Exit.
A warning dialog box that states you can restart the Solaris 8 Interactive Installation Program from the console window is displayed.
-
-
On the Warning dialog box, click Exit.
-
Do you want to manage the patches currently on your system or apply updated patches only (and consequently stop the upgrade)?
-
If manage patches currently on your system, do what you need to do with the patches, and when you're finished, select Restart Install on the Install Workspace menu and resume or restart the installation.
-
If apply updated patches only, use the Solaris 8 Maintenance Update to apply the Maintenance Update patches to your system.
Note -The Solaris 8 Maintenance Update is located on the Solaris 8 Maintenance Update CD, which is included with the Solaris 8 Update release. Instructions for applying patches are provided in the Maintenance Update Release Notes.
-
-
On the Select Geographic Region dialog box, select the geographic region or regions you want to use in the Solaris 8 user interface and click Continue.
Note -English (United States, en_US) is installed by default.
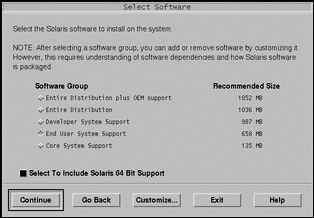
The Select Software dialog box is displayed:
-
Select the software group you want to install.
-
Do you want to modify the composition of the software group you selected in the previous step by adding or removing software clusters or packages?
-
If no, go to the next step.
-
If yes, click Customize and use the Customize Software dialog box to add or remove the software clusters or packages you want.
-
-
Click Continue.
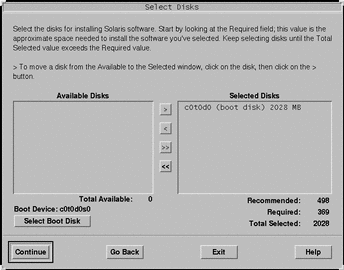
The Select Disks dialog box is displayed:
-
If the disk you want isn't already shown in the Selected Disks window, highlight the disk you want in the Available Disks window and click the > button.
The disk you highlighted is moved to the Selected Disks window.
-
Click Continue.
If the disk does not contain data, the Automatically Layout File Systems? dialog box is displayed:

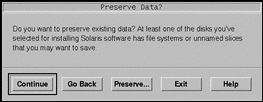
If the disk you selected already contains data, the Preserve Data? dialog box is displayed:
-
Is the Preserve Data? dialog box displayed?
-
Do you want the Solaris 8 Interactive Installation Program to lay out file systems for you automatically?
-
If yes, click Auto Layout.
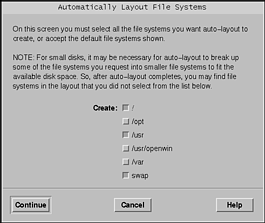
The Automatically Layout File Systems dialog box is displayed:
-
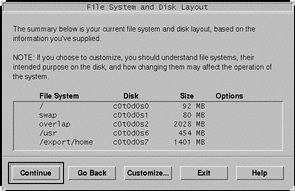
If no, click Manual Layout.
The File System and Disk Layout dialog box is displayed:
-
-
Did you select Auto Layout or Manual Layout?
-
If Manual Layout, go to the next step.
-
If Auto Layout, select the file systems you want to create, if any, and click Continue.
The File System and Disk Layout dialog box is displayed.
-
-
Do you want to customize the file system and disk layout?
-
If yes, click Customize and follow the directions on the dialog boxes that follow.
-
If no, click Continue.
The Mount Remote File System dialog box is displayed:

-
-
Do you want to mount software from a remote file server?
-
If yes, click Remote Mounts and follow the directions on the dialog boxes that follow.
-
If no, click Continue.
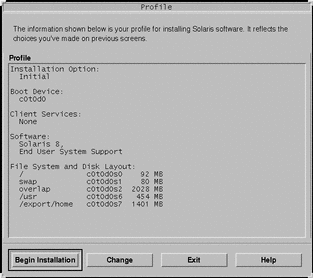
The Profile dialog box is displayed:
-
-
Click Begin Installation.
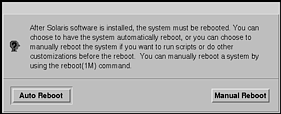
A dialog box with two buttons on it is displayed: Auto Reboot and Manual Reboot:
-
Click Auto Reboot or Manual Reboot.
The Installing Solaris Software - Progress dialog box is displayed:
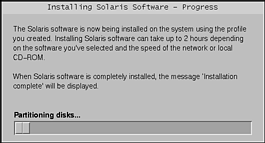
When the Solaris 8 Interactive Installation Program is finished installing the Solaris software, the system reboots automatically or prompts you to reboot manually.
After installation is finished, a log of how the Solaris 8 software was installed on the system is saved in a file.
Table 5-5 SPARC: Installation Log LocationsIf the system was installed using the
The location of the log file is
Initial installation option
-
Before the system reboots: /a/var/sadm/system/logs/install_log
-
After the system reboots: /var/sadm/system/logs/install_log
Upgrade option
-
Before the system reboots: /a/var/sadm/system/logs/upgrade_log
-
After the system reboots: /var/sadm/system/logs/upgrade_log
-
SPARC: To Add a Software Package With pkgadd
-
Do you want to add individual software packages to the Solaris 8 software you already installed?
-
If no, stop, you're done.
-
If yes, go to the next step.
-
-
Log in to the system on which you installed the Solaris software and become superuser.
-
Insert the CD that contains the packages you want to add into the system's CD-ROM drive.
Solaris Volume Manager automatically mounts the CD.
-
Use the pkgadd(1M) command to add the package or packages you want:
# /usr/sbin/pkgadd -d device_name pkgid
where device_name is the path to the CD that contains the software you want to add to the installed system and pkgid is the name of the software package you want to add to the installed system (SUNWaudio, for example).
-
Verify that the package was installed correctly:
# /usr/sbin/pkgchk -v pkgid
If the package was installed correctly, a list of installed files is displayed. If not, an error message is displayed.
SPARC: Example
This example shows how to add and check the installation of the SUNWaudio package:
# /usr/sbin/pkgadd -d /cdrom/sol_8_sparc/Solaris_8/Product SUNWaudio. . . Installation of <SUNWaudio> was successful. # pkgchk -v SUNWaudio /usr /usr/bin /usr/bin/audioconvert /usr/bin/audioplay /usr/bin/audiorecord # |
SPARC: To Clean Up After Upgrading
After you finish upgrading a system, you might need to clean it up. When you upgrade, the Solaris 8 Interactive Installation Program merges local software modifications of the existing system with the new Solaris software; however, in some cases, merging is not possible.
-
See the contents of the following file to determine whether you need to fix local modifications that the Solaris 8 Interactive Installation Program could not preserve:
/a/var/sadm/system/data/upgrade_cleanup
 Caution -
 Check all the contents of upgrade_cleanup carefully. Your system might not boot if you don't fix the unpreserved local modifications.
-
If necessary, fix any unpreserved local modifications.
-
Reboot the system:
# reboot
Note -
If you've upgraded a heterogeneous operating system server, clients of that server are automatically upgraded only if their platform (SPARC or IA) and platform group (for example, sun4m or i86pc) are supported by the Solaris 8 Software 1 of 2 and Solaris 8 Software 2 of 2 CDs.
For example, if you upgrade a SPARC platform server using the CDs labeled Solaris 8 Software 1 of 2 SPARC Platform Edition and Solaris 8 Software 2 of 2 SPARC Platform Edition, only SPARC clients that share the platform group on the CDs are upgraded as well.
To upgrade clients of different platforms and platform groups, you must use the server_upgrade(1M) command.
- © 2010, Oracle Corporation and/or its affiliates
