Menus and Pushpins
A menu lists the choices you can make from the Workspace or window. For instance, to start an application, you move the pointer to any location on the Workspace background and press the MENU button. This displays the Workspace menu, which includes Programs, Utilities, Properties, Workstation Info, Help, and the option to Exit the OpenWindows environment. Figure 1-8 shows the Workspace menu.
Figure 1-8 Workspace Menu

Using the Workspace Menu
There are two ways to display the Workspace menu.
-
You can click the MENU mouse button quickly in the Workspace. The Workspace menu will pop up and stay up until you make a selection or dismiss the menu by clicking SELECT elsewhere.
-
You can press and hold MENU in the Workspace to display the Workspace menu and then slide the pointer onto an item. With this method the Workspace menu is dismissed when you release the mouse button.
Using Submenus
When you display the Workspace menu, the first two items--Programs and Utilities--each have a hollow triangle next to them, pointing to the right. This means that there is a submenu of additional choices. To display a submenu, keep pressing MENU as you drag the pointer to the right at one of the arrows. Figure 1-9 shows the Programs submenu.
Figure 1-9 Programs Submenu
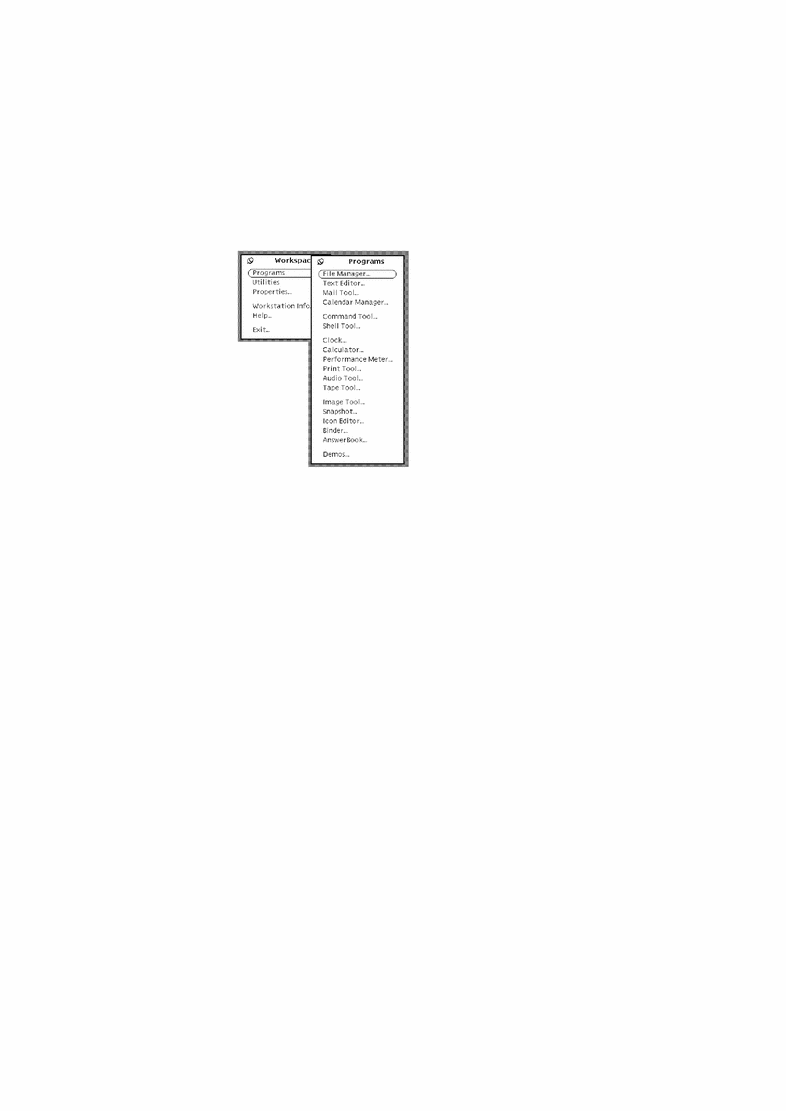
If you continue to press MENU and drag to the right at Programs, the Programs submenus is displayed containing a list of default applications (called DeskSet) available for the OpenWindows environment. To choose an item from the Programs submenu, press MENU and drag the pointer over to your choice. When the choice is highlighted, release the mouse button. In a moment, the application you chose appears on the Workspace. At some point you may want to customize the order and entries on your programs menu. For information on how to do this refer to Chapter 17, Customizing the Solaris Environment.
Pinning a Menu
You can use the pushpin in the upper left corner of the menu to "pin" the Workspace menu to the Workspace and keep it there indefinitely. Note that these instructions apply to any menu or window with a pushpin.
Figure 1-10 shows the Workspace menu pinned to the Workspace.
Figure 1-10 Menu Pinned to the Workspace

To pin the menu, press MENU to display the Workspace menu and keep the button pressed down as you drag the pointer over the pushpin. The pushpin moves into the hole and the menu stays up.
Choosing from a Pinned Menu
To choose an item from a pinned menu, you position the pointer on the item and click SELECT.
Dismissing a Pinned Menu
To unpin a menu, just click SELECT on the pushpin again.
Using Window Menus
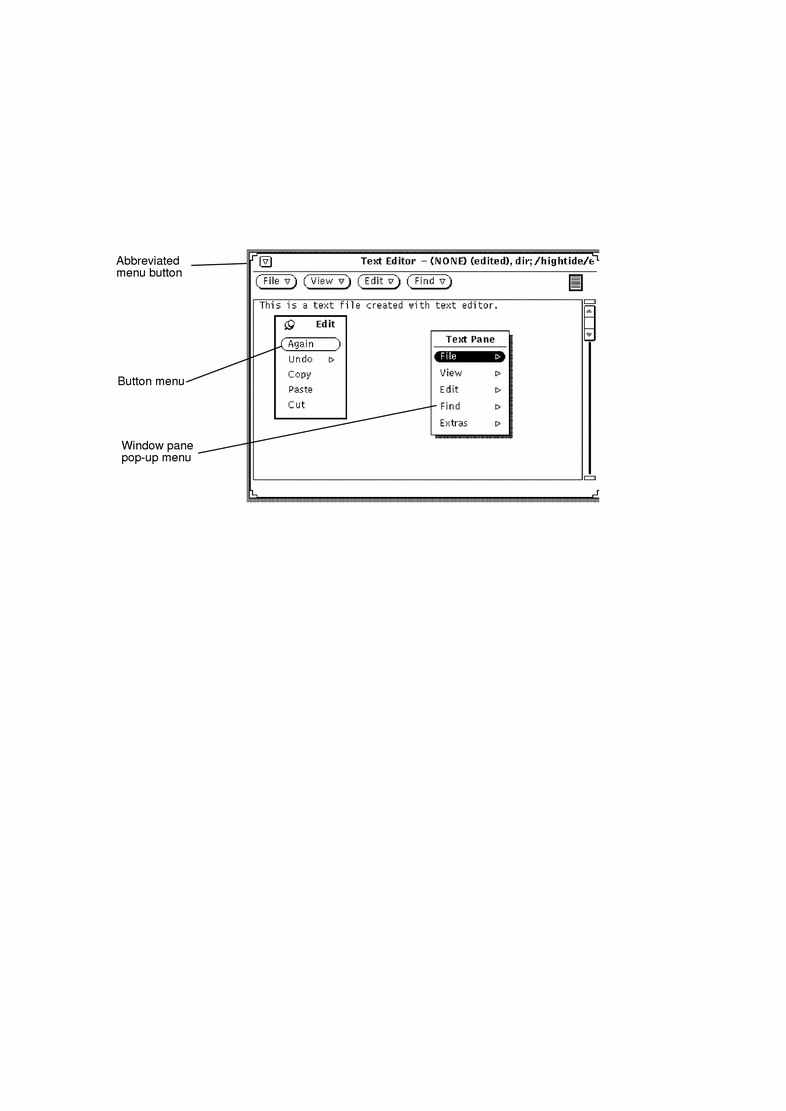
Windows can have three kinds of menus. Examples of each of the following menu types are shown in Figure 1-11.
-
The Window menu that you access from an abbreviated menu button in the window header or from the window border.
-
A button menu that you access from a menu button in the window control area--the portion of a window that contains menu buttons and other controls.
-
A pop-up menu available from the window pane (the bordered area where window data are displayed).
Figure 1-11 Three Kinds of Window Menus
Using Window Menus
To choose a menu item:
-
Position the pointer on one of the three window areas:
-
A window header's abbreviated menu button (or the header itself)
-
A menu button
-
A window pane
-
-
Press MENU, and drag the pointer down to the right to highlight the item of your choice.
-
Release MENU.
Choosing Menu Defaults
Most of the menus in the Workspace and windows have default choices. A default menu item is usually the first item in the menu. It is encircled with a small black line. The default choice on the Workspace menu, as shown in Figure 1-12, is the Programs submenu.
Figure 1-12 Default Choice on the Workspace Menu

All menus and submenus have default choices. The default choice under the Programs submenu is File Manager. When you choose Programs from the Workspace menu, the File Manager is displayed.
Changing the Menu Default
If you find that you often make a menu choice other than the default, you might want to define that item as the default choice. To change the default choice:
-
Display the menu to be modified.
Press MENU, and drag the pointer to display that menu.
-
Position the pointer on the default choice and press MENU again.
-
Press the Control key on your keyboard while pressing MENU.
-
Drag the pointer up or down until the new default menu item is highlighted.
-
Release the Control key.
-
Release the mouse button.
When you click SELECT on that menu, your chosen application is the default.
Window Controls
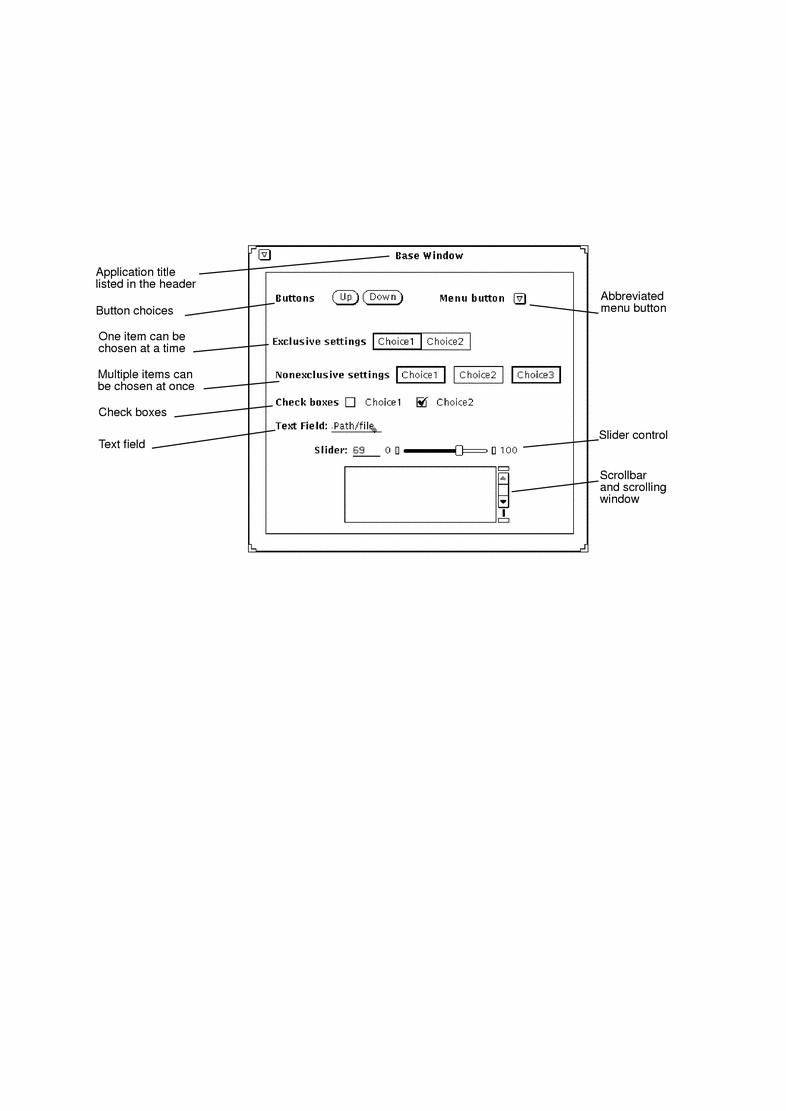
The basic controls for an application are displayed in control areas within the base window. An application can have a single control area in a single base window, or may have additional control areas elsewhere in the base window or subwindows.
Figure 1-13 shows the variety of controls possible for window applications.
Figure 1-13 Window Controls
Scrollbars
Some windows contain scrollbars that enable you to scroll though lists or see previous commands. The Text Editor is an example of a scrolling window. By default, most scrollbars appear on the right side of scrolling windows, although you can move them to the left side. See Chapter 17, Customizing the Solaris Environment, for information.
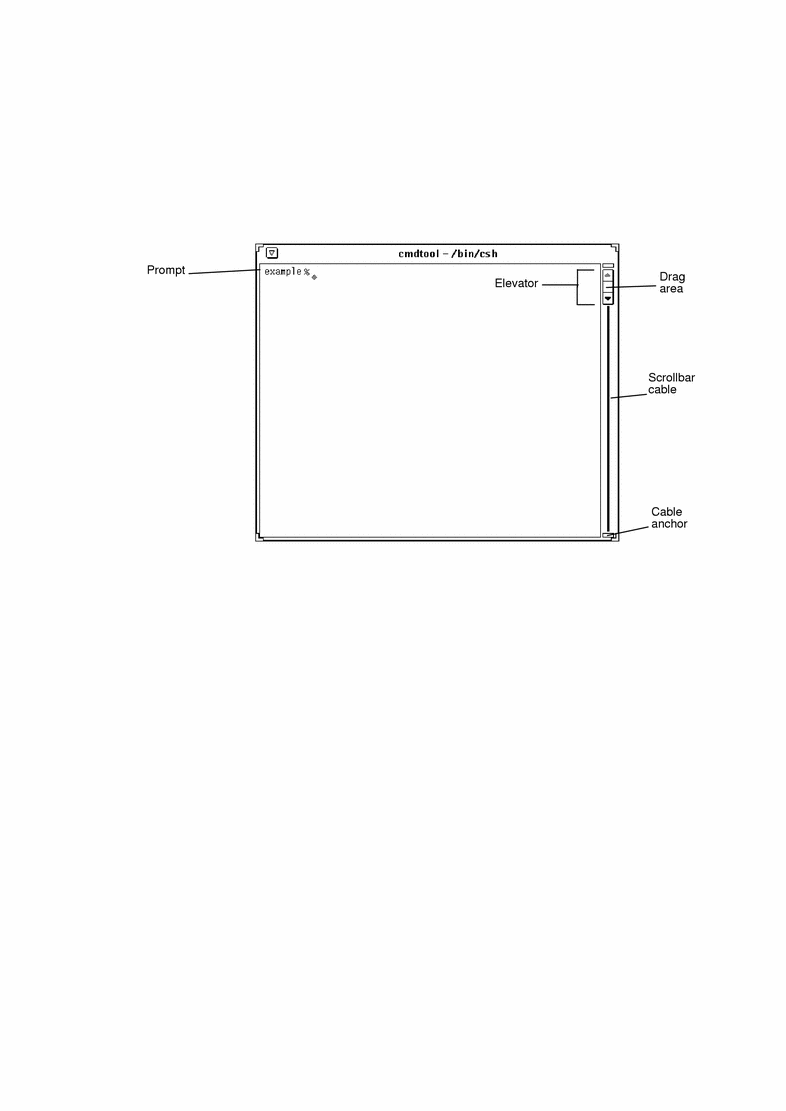
You scroll up incrementally to view previous commands by placing the pointer on an up arrow in the Scrollbar elevator and clicking SELECT. You can scroll down again by placing the pointer on the down arrow and clicking SELECT. You can also press SELECT on the drag area and slide the elevator up or down. Figure 1-14 shows Command Tool's scrollbar and its elements.
Figure 1-14 Command Tool's Scrollbar
By contrast, the Shell Tool is a nonscrolling window. If you type a long series of command lines in a nonscrolling window, you cannot see lines that scroll above the top of the window.
Button Menus
Button Menus or Window buttons appear in the control areas of many applications. Some window buttons provide a single option, and others provide menus of choices. The Edit submenu in the Text Editor application, for instance, provides editing options for cutting, copying, and pasting text, as well as repeating or undoing an edit. Text Editor's abbreviated menu button, in the upper left corner, displays options common to most DeskSet applications, such as Open/Close, and Quit. The Text Editor menu buttons are shown in Figure 1-15.
Figure 1-15 Text Editor's Menu Buttons
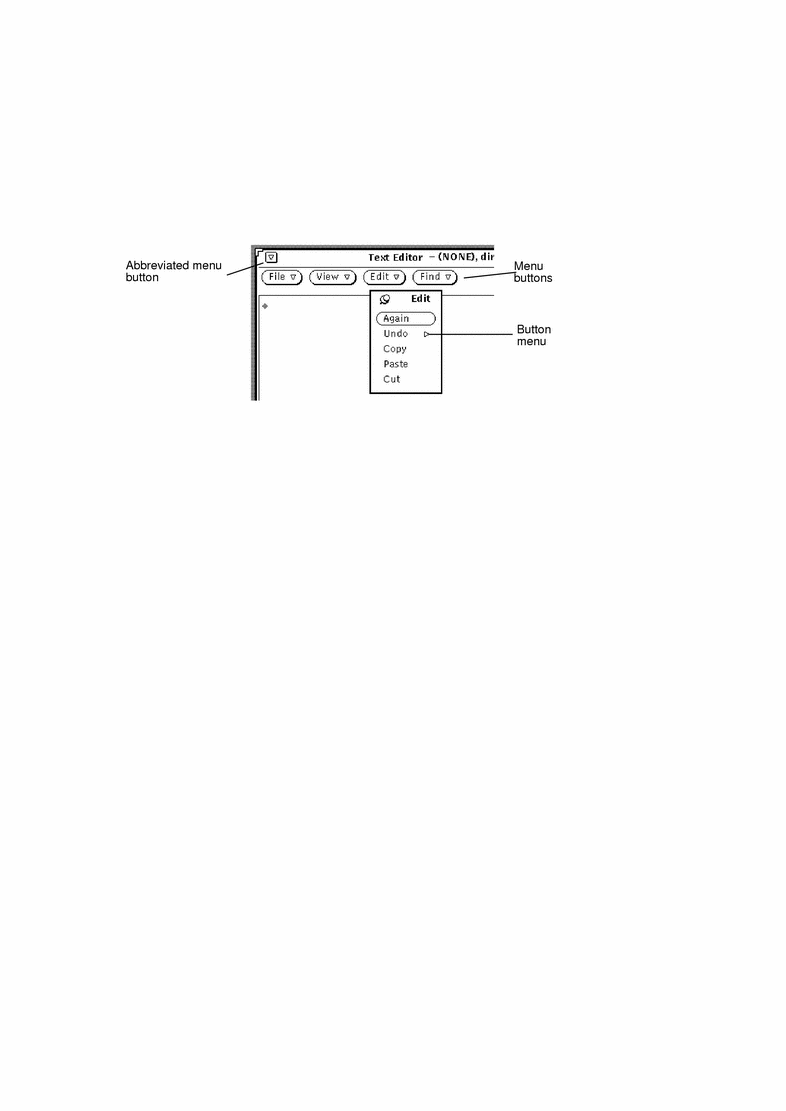
There are four buttons at the top of the Text Editor window, each with a hollow triangle pointing down, indicating that there are further menu choices beneath each button. You can see these choices by placing the pointer on one of the buttons and pressing MENU. The window buttons for all of the applications are discussed in their respective sections.
- © 2010, Oracle Corporation and/or its affiliates
