How to Create a Mount Point
-
Click the appropriate icon in the tool bar to create a UFS or NFS mount point, or choose the appropriate option from the Object menu.
The Mount Point Name window appears.
-
Type a name and click OK.
The property book for the mount point is displayed.
-
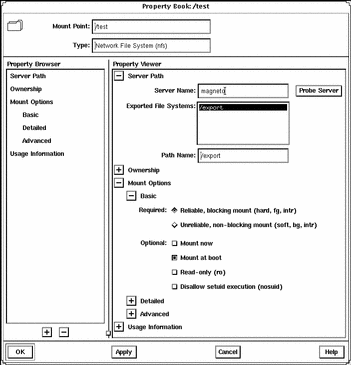
If you are creating a UFS mount point, skip to Step 6. If you are creating an NFS mount point, open the Server Path chapter.
-
Type the name of a server and click Probe Server.
A list of exported file systems is displayed in the Exported File Systems list.
-
Click the desired file system name or type a name in the Path Name field. Skip to Step 9.
-
Open the Device chapter.
-
Enter the device name of an unused slice or metadevice on which to create the UFS mount point.
You can either type the name of a device or drag and drop a slice from Disk Manager.
-
If you want to verify that the specified device is currently available, click the Check File System button.
-
Make modifications to the other chapters, if needed.
For example, in the Mount Options chapter you can choose to mount now and/or mount at boot time.
-
Click OK.
The mount point appears in the Mount Point list.
Example -- Creating a Mount Point

- © 2010, Oracle Corporation and/or its affiliates
