Creating a Basic ETL Collaboration
Note –
The Data Integrator Wizard was enhanced in Java CAPS 6 Update 1. The instructions in this topic might differ from what is available in Release 6.
A basic collaboration allows you to transfer data from a single data source to a data target. If you have multiple sources, you can create a virtual database before creating the basic collaboration. See Creating and Connecting to Data Mashup Services for more information. You could also use the Advanced option of the wizard instead.
You can click Finish at any time during the wizard to generate a collaboration with the information you specified to that point. Then you can complete the configuration using the ETL Collaboration Editor.
 To Create a Basic ETL Collaboration
Before You Begin
Complete the following tasks:
-
Connecting to Source and Target Databases (if your source or target data is stored in a relational or virtual database)
-
On the NetBeans Projects window, expand the new Data Integrator project and right-click Collaborations.
-
Point to New, and then select ETL.
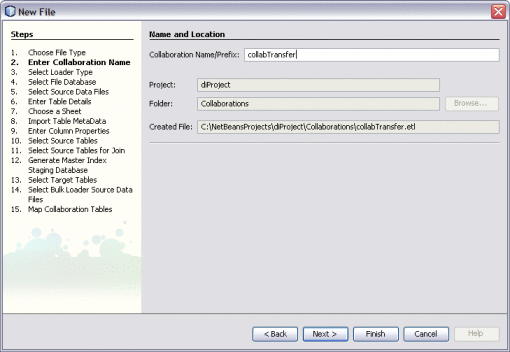
The New File Wizard appears with the Name and Location window displayed.
-
Enter name for the collaboration.
-
Click Next.
-
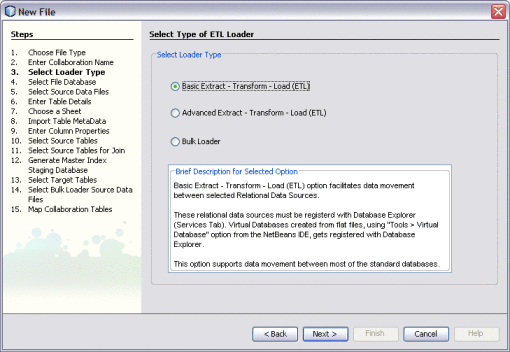
On the Select Type of ETL Loader window on the New File Wizard, select Basic Extract – Transform – Load (ETL).
-
Click Next.
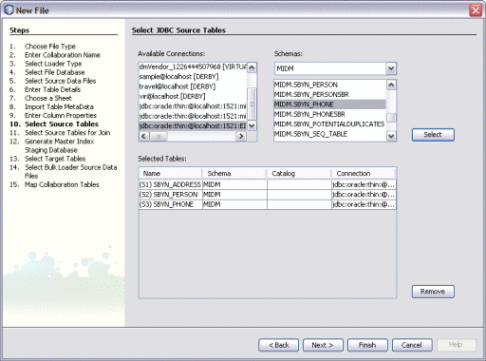
The Select Source Tables window appears.
-
To select the source data, do the following:
-
Under Available Connections, select the database that contains the data to be extracted.
-
Under Schemas, select the name of the database schema that contains the data to be extracted.
Data Integrator automatically selects a schema based on the login information. You only need to change this field if you are using a different schema.
-
Under Schemas, select the tables containing the source data and then click Select.
Tip –You can use the Shift and Control keys to select multiple tables at once. If you add a table in error, select the table in the lower portion of the window and click Remove.
-
Click Next.
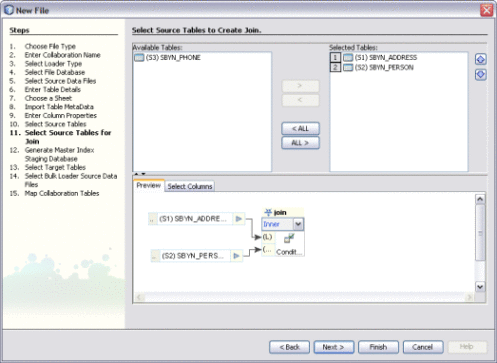
The Select Source Tables for Join window appears.
-
-
To define join conditions, do the following. If there are no join conditions, click Next.
-
Under Available Tables, select the tables to join, and then click the right arrow to add them to the Selected Tables list.
-
In the Preview panel, click the drop-down menu at the top of the join box and select the type of join to use from one of the following options:
-
Inner – Use this if all tables to be joined contain the same column.
-
Left Outer – Use this if the results should always include the records from the left table in the join clause.
-
Right Outer – Use this if the results should always include the records from the right table in the join clause.
-
Full Outer – Use this if the results should always include the records from both the right and left tables in the join clause.
-
-
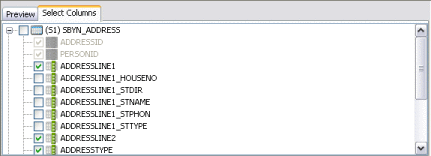
To specify columns to exclude from each joined table, click the Select Column tab in the Preview panel, expand the table list, and deselect any columns to exclude.
-
Click Next.
The Select Target Tables window appears.
-
-
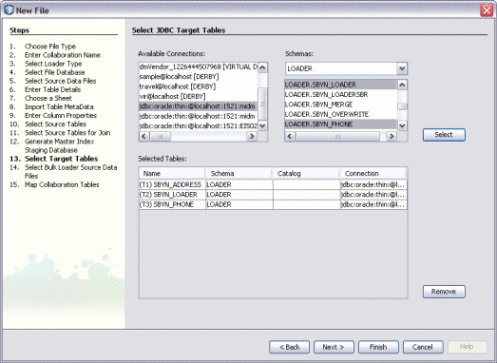
To choose the target tables to load the extracted data into, do the following:
-
Under Available Connections, select the database that contains the schema to load the data into.
-
Under Schemas, select the schema that contains the tables to load the data into.
-
Under Schemas, select the tables that will contain the target data and then click Select.
Tip –You can use the Shift and Control keys to select multiple tables at once. If you add a table in error, select the table in the lower portion of the window and click Remove.
-
Click Finish.
The new ETL collaboration appears in the Projects window, and the Collaboration Editor opens with the source tables displayed on the left and target tables displayed on the right.
-
Next Steps
You can further configure the ETL collaboration using the ETL Collaboration Editor. For more information, see Configuring ETL Collaborations.
- © 2010, Oracle Corporation and/or its affiliates
