 To View and Modify Table Data
-
Open the collaboration you want to view or edit.
-
Right-click the table in the ETL Collaboration Editor, and select Show Data.
-
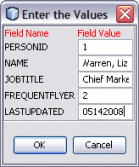
To add a record, do the following:
-
To delete a record, do the following:
-
To copy table data to the clipboard, do the following:
-
In the Data Integrator Output panel, select the data to copy.
You can select one or more cells or rows.
-
Right-click on the cell or row and select one of the following options:
-
Copy Cell Value to copy just the selected cell.
-
Copy Row Values to copy the entire row.
-
Copy Row Values With Header to copy the entire row along with the corresponding column or header names.
-
-
Paste the information to the desired location, such as a word processing application.
-
-
To truncate the displayed table, click Truncate This Table in the left toolbar of the Data Integrator Output panel.
- © 2010, Oracle Corporation and/or its affiliates

