Creating and Configuring the Environments
Environments include External Systems, Logical Hosts, application servers, and message servers used by a project. These contain the configuration information for these components. Environments are created using NetBeans and the Environment Editor. This section describes how to create and configure Environments for all five of the Connectivity Maps included in the inbound and outbound projects. You only need to create Environments for the operations you want to run.
The instructions are divided into the following sections:
Creating and Configuring the HL7 Outbound Environment
The components required for the HL7 outbound Environment include a Logical Host, application server, JMS IQ Manager, and two external systems.
 To Create an Environment for the prjHL7Outbound
-
On the NetBeans Services window, right–click CAPS Environment and then select New Environment.
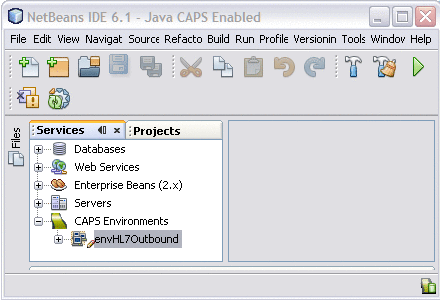
A new environment is created and is added to the CAPS Environment tree.
-
Rename the new Environment to envHL7Outbound.
-
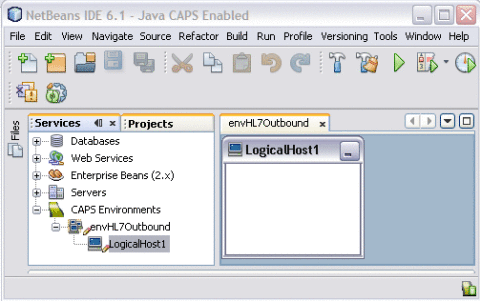
Right-click envHL7Outbound, point to New, and then select Logical Host.
It takes few seconds to process the Logical Host into the Environment.
-
Rename the Logical Host lhHL7Outbound
-
Create and configure an application server:
-
Right-click lhHL7Outbound, point to New, and then select Sun Java System Application Server.
A new application server is added to the Environment tree .
-
Rename the server gfHL7Outbound.
-
Right-click gfHL7Outbound and select Properties.
The Properties Editor appears.
-
Click the ellipses button next to the Password property.
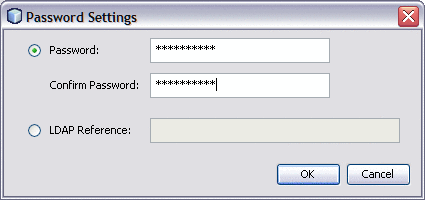
The Password Settings dialog box appears.
-
Click the ellipses available at the end of the field.
The Password Settings dialog box appears.
-
Enter the password in the Password and the Confirm Password fields.
The default Password is adminadmin and the default Confirm Password is adminadmin.
-
Click OK.
-
On the Properties Editor, verify the remaining properties and then click OK.
-
-
Create and configure a JMS IQ Manager:
-
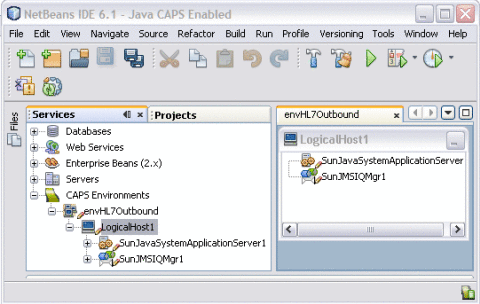
Right-click lhHL7Outbound, point to New, and then select Sun JMS IQ Manager.
A new JMS IQ Manager is added to the Environment tree.
-
Rename the IQ Manager iqHL7Outbound.
-
Right-click iqHL7Outbound, and select Properties.
The Properties Editor appears.
-
In the Sun JMS IQ Manager URL property, enter the URL of the IQ Manager.
The default URL is stcms://localhost:18007.
-
Enter a password as described for the application server above.
-
Verify the remaining fields, and then click OK.
-
-
Create and configure a File External System:
-
Right-click envHL7Outbound, point to New, and then select File External System.
-
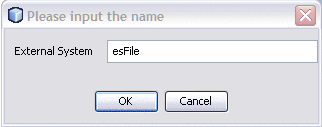
On the dialog box that appears, enter esFile as the name.
-
Click OK.
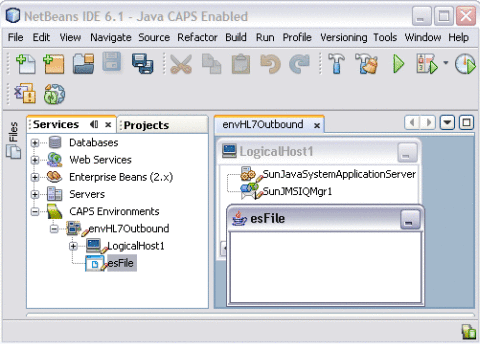
The external system is added to the Environment tree.
-
Right-click esFile and select Properties.
The Properties Editor appears.
-
On the Properties Editor, expand Inbound File eWay, and modify the directory from which the File Adapter will pick up the input file.
-
Click OK.
-
-
Create and Configure an HL7 External System:
-
Right-click envHL7Outbound, point to New, and then select HL7 External System.
-
On the dialog box that appears, enter esHL7 as the name.
-
Click OK.
The External System is added to the Environment tree.
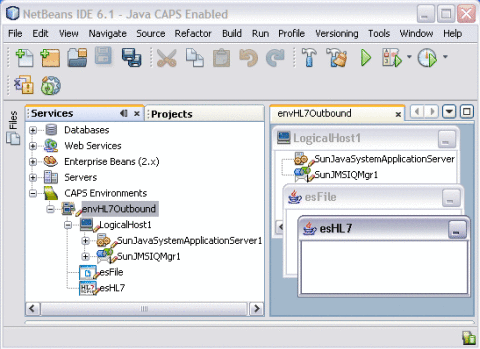
-
Right-click eHL7 and select Properties.
The Properties Editor appears.
-
On the Properties Editor, expand HL7 Outbound eWay, and select TCPIP Outbound Settings.
-
Make sure the hostname and port are correct for the application that is listening for HL7 messages.
-
Click OK.
-
-
On the NetBeans toolbar, click Save All.
Creating Environments for the HL7 Inbound and Outbound Samples
Follow the example given in the previous section, create Environments for the remaining TCP/IP HL7 samples. You only need to create Environments for the samples you want to run. Make sure the configure the URL and authentication information for all the application servers and JMS IQ Managers you add. Any additional required configuration is listed below.
Tip –
Even if you do not modify the Environment components of an External System, be sure to open the Properties Editor for each External System. Otherwise, the build process may fail.
HL7 Inbound Sample
Create the envHL7Inbound Environment with the following components:
HL7 Inbound Forward MSG Sample
Create the envHL7InboundForwardMSG Environment with the following components:
HL7 Outbound Delayed ACK Sample
Create the envHL7OutboundDelayedACK Environment with the following components:
-
HL7 External System
Configure the HL7 Outbound eWay > TCPIP Outbound Settings properties.
-
File External System
Configure the Inbound File eWay > Parameter Settings properties.
-
Logical Host
-
GlassFish (Sun Java System Application) Server
-
Sun JMS IQ Manager
-
HL7 Outbound Forward Sample
Create the envHL7OutboundForward Environment with the following components:
- © 2010, Oracle Corporation and/or its affiliates
