 Create a Scheduler Binding Component
-
From the Project tree, right-click the SayHello node and select New -> WSDL Document.
The WSDL Document Wizard appears.
-
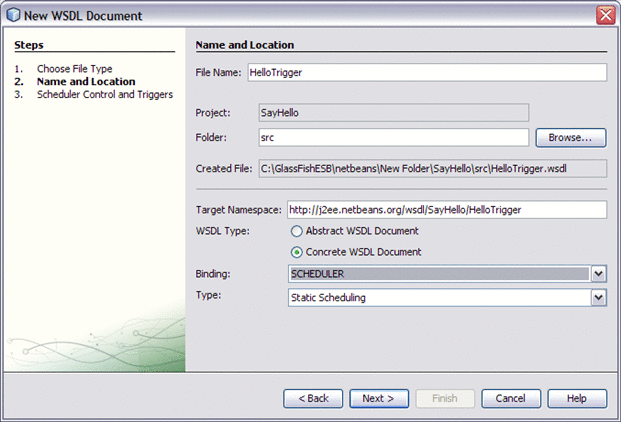
Enter HelloTriggers as the file name.
-
Select Concrete WSDL Document as the WSDL type, and select SCHEDULER as the binding.
-
Click Next.
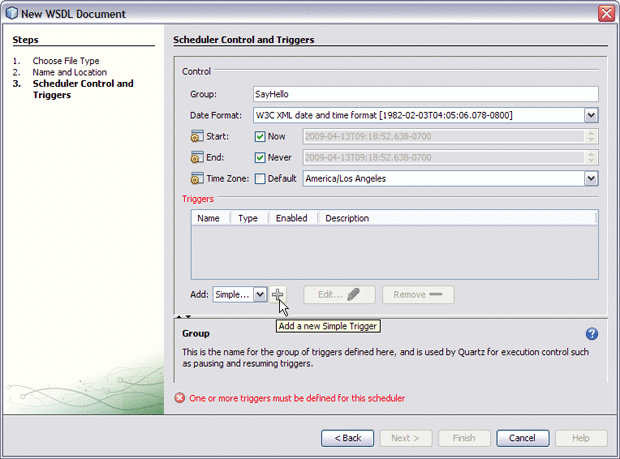
The Scheduler Control and Triggers Wizard appears.
-
From the Scheduler wizard's Add field, select Simple. Click the plus sign next to the Add field to open the Add New Simple Trigger dialog box.
-
From the Add New Simple Trigger dialog box, add the following values:
-
Name: SimpleTrigger1
-
Description: Say Hello first 20 seconds
-
Repeat: 4
-
Interval: 5
-
Message: Hello first 20 seconds
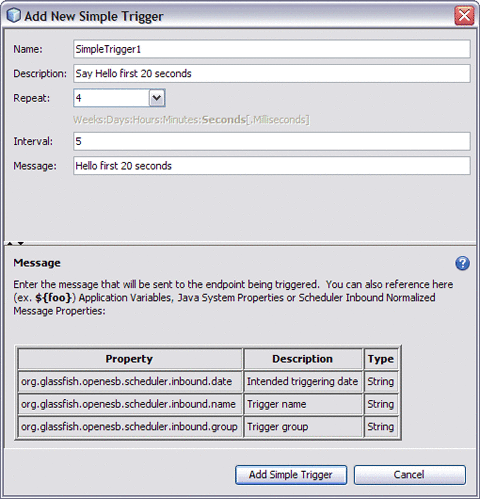
This creates a trigger that sends the message “Hello first 20 seconds” and repeats it four times in five second intervals for a total of five messages.
-
-
Click Add Simple Trigger.
SimpleTrigger1 is added to the Triggers field.
-
Now create a Cron trigger. Change the Add field value to Cron and click the plus sign next to the Add field.
The Add New Cron Trigger dialog box appears.
-
From the Add New Cron Trigger dialog box, add the following values:
-
Name: CronTrigger1
-
Description: Say Hello at the bottom of each minute
-
From the Second (1) tab, select Just on Second: and select 30 as the value. Leave remaining tabs at their default values.
-
Message: Hello at the bottom of each minute
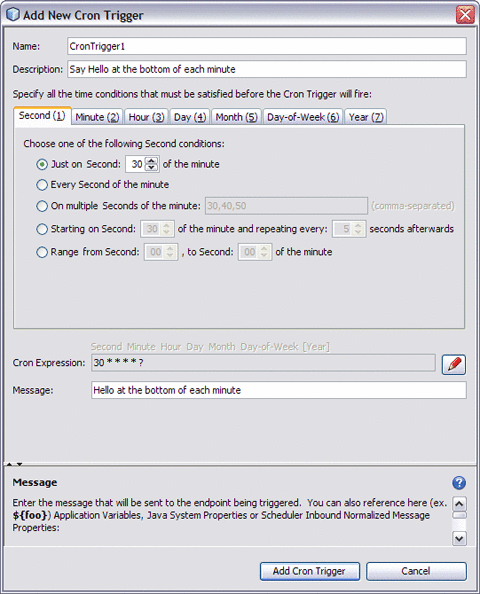
This creates a trigger that sends the message “Hello at the bottom of each minute” every minute at second 30, indefinitely.
-
-
Click Add Cron Trigger.
CronTrigger1 is added to the Triggers field.
-
Now create a Hybrid trigger. Change the Add field value to Hybrid and click the plus sign next to the Add field.
The Add New Hybrid Trigger dialog box appears.
-
From the Add New Hybrid Trigger dialog box, add the following values:
-
Name: HybridTrigger1
-
Description: Say Hello for the last 20 seconds of each minute
-
From the Second (1) tab, select Just on Second: and select 40 as the value. Leave remaining tabs at their default values.
-
Duration: 20 Seconds
-
Repeat: Indefinite
-
Interval: 5
-
Message: Hello for the last 20 seconds of each minute
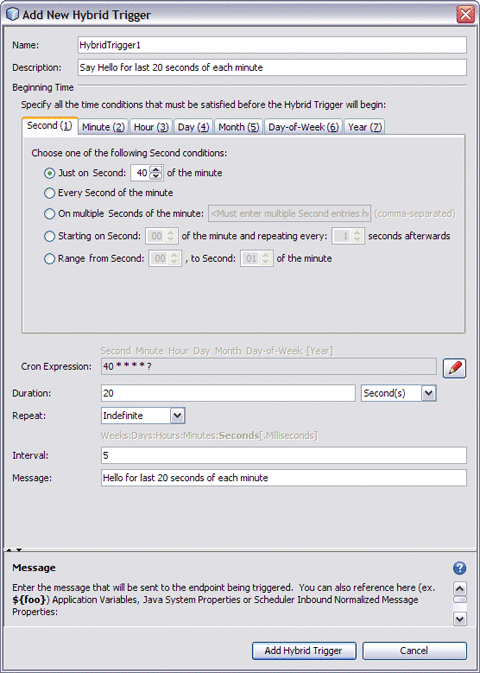
This creates a trigger that sends the message “Hello for the last 20 seconds of each minute” every five seconds, from second 40 through 59 of each minute, indefinitely.
-
-
Click Add Hybrid Trigger.
HybridTrigger1 is added to the Triggers field.
-
Click Finish to create the new WSDL document.
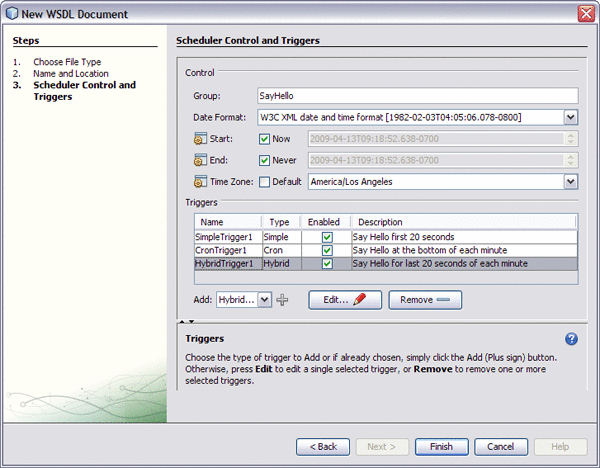
The HelloTriggers WSDL document is added to the SayHello Project's process files.
- © 2010, Oracle Corporation and/or its affiliates
