Getting Help
There are two kinds of on-line help available: Magnify HelpTM or immediate assistance with an item in the OpenWindows environment, such as a menu or window element, and the help handbooks for quick reference on the elements and applications of the OpenWindows environment.
Note -
The OpenWindows "more help" facility (Help Viewer) depends on the X11 window server. Therefore, it will not work with a non-OpenWindows server (for example, the MIT X11 server). In particular, clicking the More button within a Magnify Help window, or choosing Help from the Workspace menu fails, and the following error message is displayed on the console:
XView error: NULL pointer passed to xv_set helpopen: Viewer could not display document: handbooks/...
Magnify Help
When you begin using the Solaris software, you will find that you can choose from a variety of windows and menus. When you need information on a particular window, menu, or object, Magnify Help enables you to get information quickly.
Follow these steps to get on-line help about a window or menu item:
-
Move the pointer to the item (such as a menu) that you want to know about.
-
Press the Help key on the keyboard.
This is the F1 key on some systems. A help window pops up with information about that item.
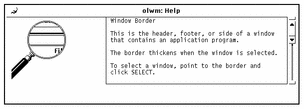
Figure 1-34 shows a Magnify Help window.
Figure 1-34 Magnify Help Window
More Help
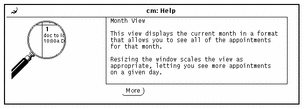
Most items on the Workspace have associated help handbooks. When an associated handbook exists, a button labeled "More" appears at the bottom of the Magnify Help window. To see more help on that topic, click SELECT on the More button. Figure 1-35 shows a help window with a More button.
Figure 1-35 Window with More Button
Dismissing a Help Window
A pop-up window is dismissed when you close or quit the application. If you would like to close the Magnify Help window before you quit the application, you can click SELECT on the pushpin in the upper left corner of the Magnify Help window.
No Help
A small pop-up window appears if no Magnify Help is available, stating that there is no help for that item. The pointer jumps to the OK button, and you must click SELECT to continue.
Help Viewer
The help handbooks provide introductory information to guide you through the OpenWindows environment. These are presented in a concise format in the Help Viewer. The "Introducing Your Desktop" handbook is a tutorial that describes basic OpenWindows operations. The other handbooks provide task-oriented steps on individual topics. In addition, there is a handbook that describes how to navigate in the on-line help system. You can browse all of the handbooks in any order you choose.
Desktop Introduction
You can access the introductory handbook, "Introducing Your Desktop" from the Workspace menu, as follows:
-
Move the pointer onto the Workspace and press MENU.
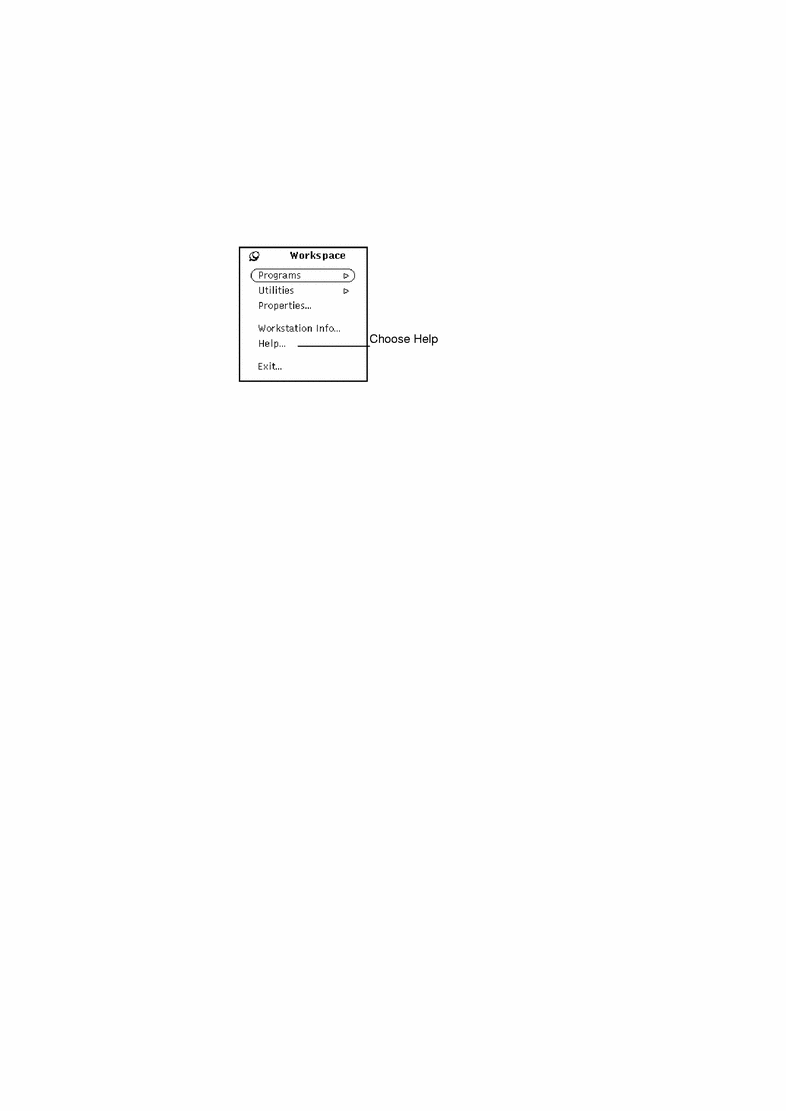
The Workspace menu appears, as shown in Figure 1-36.
Figure 1-36 Workspace Menu
-
Drag the pointer to choose Help.
When you release the mouse button, the Help Viewer appears displaying a list of handbooks.
-
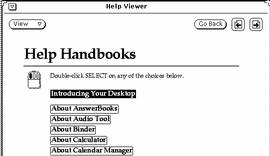
Double click SELECT on "Introducing Your Desktop".
Figure 1-37 shows the Help Viewer selection.
Figure 1-37 Selecting Introducing Your Desktop
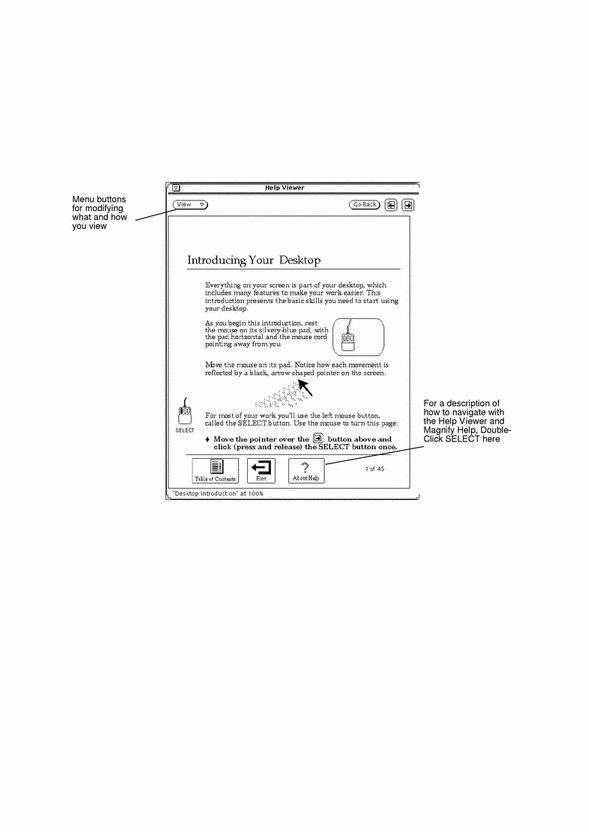
The on-line tutorial, "Introducing Your Desktop," opens in the Help Viewer, as shown in Figure 1-38.
Figure 1-38 First Page of the Desktop Intro Handbook
Help on Help
You can view a description of how to navigate in the help system. Double-click SELECT on the "About Help" icon shown in Figure 1-38. (Alternatively, you can click SELECT once on the icon and then click SELECT on the View menu button.) This option is available from any help handbook. Note also that there is Magnify Help (described in "Magnify Help") for each element on the Help Viewer.
Other Handbooks
You can access help handbooks that describe the DeskSet applications and the OpenWindows Workspace by following the steps below. Note, however, that if you are currently displaying the first page of any handbook, you can bypass these steps by double-clicking SELECT on the More Handbooks icon at the bottom of the Help Viewer.
To access the help handbooks at any time:
-
Move the pointer onto the Workspace and press MENU.
The Workspace menu appears.
-
Drag the pointer to choose Help.
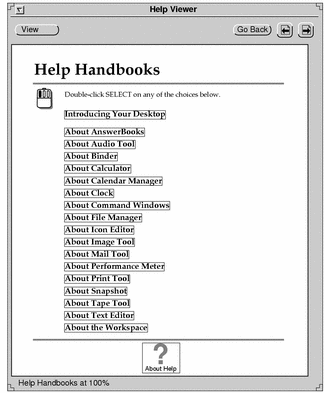
When you release the mouse button, the Help Viewer displays the help handbook table of contents that lists handbooks, as shown in Figure 1-39.
Figure 1-39 Help Viewer
-
Double-click SELECT on the topic of your choice.
The Help Viewer then displays the table of contents for the selected handbook.
Quick Access to Help Handbooks
You can accelerate access to a help handbook from any DeskSet application, icon, or menu by pressing Shift and Help (or F1) on your keyboard. As an example, position the pointer over an area of interest, such as the Mail Tool application window, and press Shift-Help. The Help Viewer appears on the Workspace, displaying the appropriate handbook, in this case "About Mail Tool."
Note -
On x86 and PowerPC machines, the Help key is the F1 key.
Navigating through Handbooks
When you display a particular handbook, you have several choices. You can:
-
Page through the handbook.
-
Double-click SELECT on a topic to access that information quickly.
-
Return to the table of contents of help handbooks.
-
Return to a handbook's table of contents from within that handbook.
The following sections describe these operations.
Paging through a Handbook
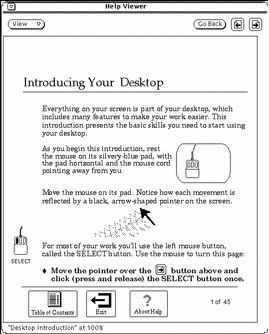
The buttons at the top of the Help Viewer enable you to move backward or forward, page by page. Clicking SELECT on the Next Page and Previous Page buttons is equivalent to pressing the PgUp and PgDn buttons on your keyboard. Figure 1-40 shows the help handbook paging buttons.
Figure 1-40 Buttons for Paging Through the Handbooks
The Go Back button gives you the option to go back to the last page viewed. Click SELECT on the Go Back button to return to wherever you were last. If you have viewed pages in various parts of a handbook or in different handbooks, you can retrace your steps by choosing Go Back as many times as necessary.
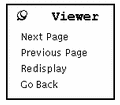
The paging features are also available from the Viewer menu, shown in Figure 1-41.
Figure 1-41 The Viewer Menu
To use the Viewer menu:
-
Position the pointer in the Help Viewer window and press MENU.
The Viewer Menu appears.
-
Move the pointer to the pushpin and pin up the Viewer menu if you want to keep the menu up for repeated use.
When you release the mouse button, the menu remains.
-
Click SELECT on a menu item to page down, page up, redisplay (refresh) the window, or go back to your last location.
Alternatively, if you have not pinned the menu, just choose a menu item using the MENU mouse button.
Note -
As with any DeskSet application or pinned menu, you can move the Viewer menu by positioning the pointer on the menu outline, pressing SELECT and dragging the pointer to a new location.
Using the Handbook Hypertext Links
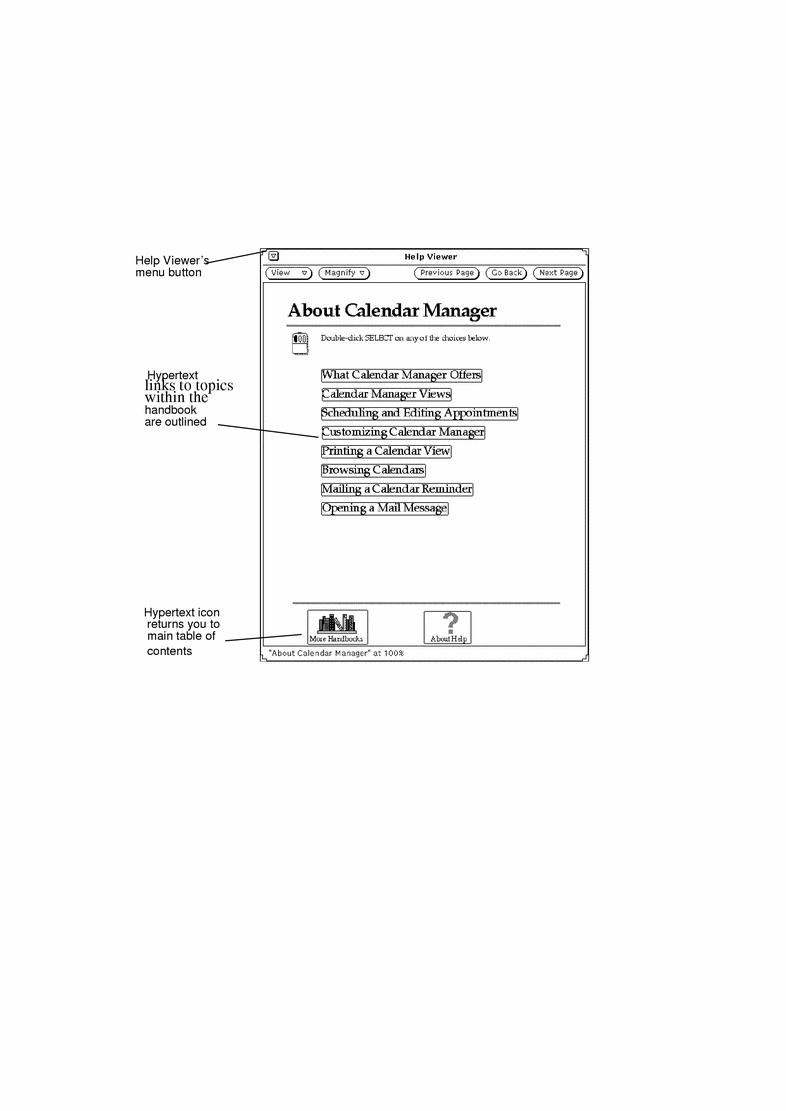
The help handbooks can be used in a non-linear fashion. When you see an outlined reference to more information, you can double-click SELECT on that portion of the text to go to the referenced location. The black outlines indicate hypertext links. From the main table of contents for the handbooks, you can access a handbook quickly by double-clicking SELECT on the handbook's title. Within a given handbook, you can double-click SELECT on one of the links within that book to go to that topic. Figure 1-42 shows the hypertext links in the table of contents for the Calendar Manager help handbook.
Figure 1-42 Table of Contents with Hypertext Links
Returning to a Handbook's Table of Contents
When you have chosen a handbook, and selected a topic within that handbook, you can return to that handbook's table of contents by double-clicking SELECT on the Table of Contents icon (see Figure 1-43) at the bottom of the handbook.
Figure 1-43 The Table of Contents Icon in a Handbook
Returning to the Main Table of Contents
To return to the main table of contents for all the help handbooks, navigate to the first page of the current handbook and double-click SELECT on the More Handbooks icon at the bottom of a page (shown in Figure 1-42).
Closing the Help Viewer
You can close the Help Viewer to an icon until you need it next. To close Help Viewer, click SELECT on the abbreviated menu button in the upper left corner of any handbook.
Figure 1-44 shows the Viewer icon.
Figure 1-44 Viewer Icon
Double-click SELECT on the Viewer icon when you want to open it again.
Exiting the Help Viewer
You can exit the Help Viewer from any location by choosing Quit from the Window menu.
Double-clicking SELECT on the Exit icon at the bottom of the page of Introducing Your Desktop handbook displays instructions for quitting the tutorial handbooks. Figure 1-45 shows the Exit icon.
Figure 1-45 The Exit Icon in Introducing Your Desktop
- © 2010, Oracle Corporation and/or its affiliates
