Copying (Writing) Files onto Tape
To copy (write) one or more files or directories onto a tape cartridge:
-
Click SELECT on the Props button to display the Tape Tool Properties window and confirm that you have the correct options set.
You should check the Tape Tool Properties window each time you write files to a tape, since the settings are not saved if you quit Tape Tool and start it up again.
-
Check the tape to be sure that it is not write-protected.
-
Insert a blank tape into your tape drive.
Alternatively, you can use a tape containing data that are no longer needed.
 Caution -
 Any data on the tape will be overwritten by the new data.
-
Click SELECT on the files or directories in a File Manager file pane that you want to copy onto tape.
Use ADJUST to select additional files or directories.
-
Drag and drop the files onto the Tape Tool drag and drop target and release.
Press SELECT and use the pointer to move the file or directory icon across the Workspace to the Tape Tool target.
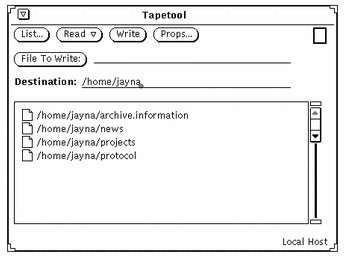
Alternatively, you can type the name of a directory or of an individual file in the File To Write text field and then press the Return key or click SELECT on the File To Write button. The files or directories you have chosen are listed in the Tape Tool window pane, as shown in the example in Figure 12-5. When you see the directory in the scroll box, select it.
Figure 12-5 Files to be Copied to Tape

-
Click SELECT on the Write button in the Tape Tool window.
The file listing is cleared from the window pane when the copy is complete.
Because the files are copied, the original data remain on your system. If you are archiving the files to free up disk space, you then need to delete the files from your system. Before removing the files, refer to, "Checking the Tape Contents".
Checking the Tape Contents
Before deleting the backup files from your system, make certain that the copy occurred. At any time, you can list the files on a tape as follows:
-
Insert the tape into the tape drive.
-
Click SELECT on the List button in the Tape Tool base window.
In a few moments, the contents of the tape are listed in the Tape Contents window pane. Messages in the footer tell you how many files have been found.
Retrieving (Reading) Files from a Tape
The following three sections describe three methods of retrieving (reading) files from a tape. The method you choose depends upon whether you want to retrieve a small portion of the files, a large portion, or all of the files from the tape.
Retrieving a Portion of the Files from a Tape
To retrieve a particular portion of the archived files from a tape cartridge (providing they were initially archived with the SunOS tar command, or through Tape Tool), follow these steps:
-
Click SELECT on the Props button to display the Tape Tool Properties window and confirm that you have the correct options set.
You may want to check the Tape Tool Properties window each time you retrieve files, since the settings are not saved if you quit Tape Tool and start it up again.
-
Insert the tape into the tape drive.
-
Click SELECT on the List button in the Tape Tool window.
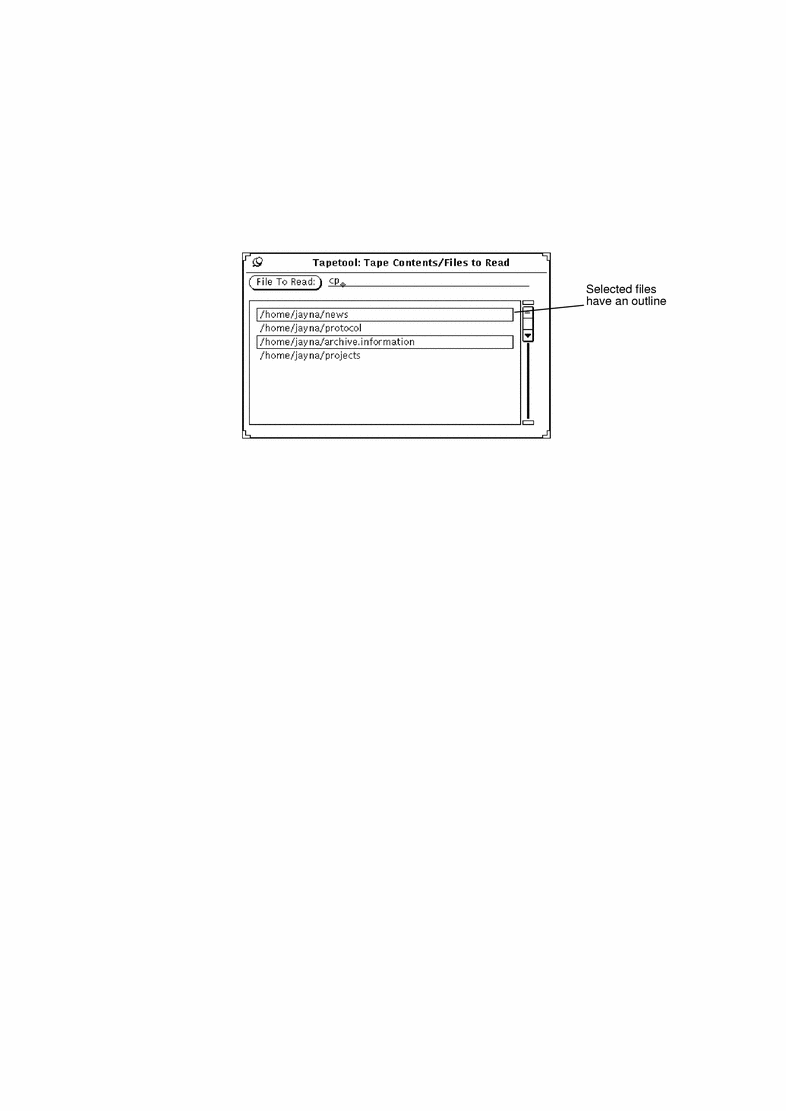
A Tape Contents window displays listing the files on the tape. If there are a large number of files, it may take several minutes for the listing to be complete. Figure 12-6 shows a list of files in Tape Tool's scrolling window.
Figure 12-6 File Listing from a Tape Showing Two Files Selected

-
Click SELECT on the files you want to retrieve from the list.
-
Type the destination path, if necessary.
If you want the destination path to be somewhere other than the path you specified when the files were written (copied) to the tape, type it in the Destination text field.
-
Choose Read -> Selected from the Tape Tool base window.
Alternatively, because the Selected option is the default, you can just click SELECT on the Read menu button.
Retrieving Most of the Files from a Tape
If you have a long list of files, and you want to retrieve all but a few of them:
-
Click SELECT on the Props button to display the Tape Tool Properties window and confirm that you have the correct options set.
You may want to check the Tape Tool Properties window each time you retrieve files, since the settings are not saved if you quit Tape Tool and start it up again.
-
Insert the tape into the tape drive.
-
Click SELECT on the List button in the Tape Tool base window.
-
Deselect the files you do not want in the Tape Contents window.
Click SELECT on those files that you do not want to include in the file extraction.
-
Choose Delete -> Selected from the Tape Contents window Read Functions menu.
The files you have selected are removed from the list.
-
Choose Read -> Entire List from the Tape Tool base window.
The files remaining in the list are extracted from the tape.
If you have archived a group of files, you can retrieve the whole group or just a few of them. Unless you removed or changed the path names of the files when you archived them, they are automatically restored to their original directories. (If you have removed or changed the path names, then the files are restored to the new paths with which you archived them.)
Retrieving All Files from a Tape
If you want to retrieve everything on the tape and do not want to list the contents first:
-
Click SELECT on the Props button to display the Tape Tool Properties window and confirm that you have the correct options set.
You may want to check the Tape Tool Properties window each time you retrieve files, since the settings are not saved if you quit Tape Tool and start it up again.
-
Insert the tape in the tape drive.
-
Choose Read -> Entire Tape.
The contents of the entire tape are copied onto your system.
- © 2010, Oracle Corporation and/or its affiliates
