
This chapter describes how to install the GT Graphics Tower.
-----------------------------------------------


Install the Graphics Tower Legs       page 38

Connect the Host Adapter Cable        page 40

Connect the Video Cable               page 42

Connect the Power Cable               page 44

Install the Cable Management Bracket  page 45

Review the Installation               page 47

Power on the System                   page 48

What's Next                           page 49

-----------------------------------------------
To install the legs on the Graphics Tower, you need one of the following tools:
Remove the Graphics Tower legs and hardware from the shipping container and install the legs with the hardware supplied. See Figure 5-1 for reference.

Figure 5-1 Install the Legs Onto the Graphics Tower
Push in on the small recessed dot on the round plastic cover to make the cover protrude. Remove the plastic covers to expose the screws that attach the legs to the tower. See Figure 5-2.
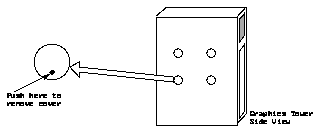
Figure 5-2 Plastic Cover
You will now connect the host adapter cable, the video cable, and the two ac power cables.
To install the host adapter cable:
The host adapter cable has gray metal connectors on both ends. See Figure 5-3.
See Figure 5-3. Align the plug on the cable with the connector on the Graphics Tower, squeeze the two release levers on the plug, and push the plug into place.
See Figure 5-3.

Figure 5-3 Connect the Host Adapter Cable
Note - The following information refers to connecting the Sun 21-inch color monitor supplied with the GT Graphics Subsystem. If you wish to install another type of monitor, refer to the connector descriptions in Appendix A.
Refer to Figure 5-4 to install the video cable. Install the video cable as follows:
See Figure 5-4.
Hand tighten the two screws on either side of the plug by turning the screws clockwise.
Hand tighten the two screws on either side of the plug by turning the screws clockwise.
Note - Video cables supplied by Sun are of sufficient length to meet the needs of most installations. If you have special cable length requirements, ask your Sun sales representative about the availability of alternate cables.

Figure 5-4 Install the Video Cable
Caution -

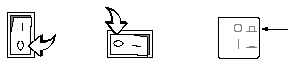
Note - For operation on 230 volts, replace the fuse as described under "Voltage Selection" on page 4.

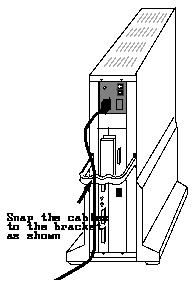
The cable management bracket protects and restrains the cables behind the Graphics Tower. After all the cables have been installed, install the cable management bracket as follows:
See Figure 5-5. A moderate push should be all that is necessary to properly seat the bracket snaps on the rails.
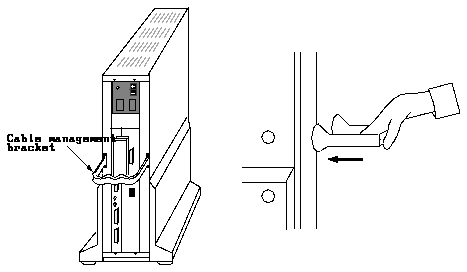
Figure 5-5 Install the Cable Management Bracket
The bracket should be approximately in the vertical center of the rails.
See Figure 5-6.
Before powering on the system, verify that everything is installed properly. Make certain that:
After you have verified that everything is properly installed, power on the system as described on the next page.
Power-on the system in the following order:
Note - It is important that you power on the monitor and the Graphics Tower before you power on the system unit. This is necessary to allow the system unit to initialize the drivers it uses to communicate with the GT Graphics Subsystem .
The ac power switch is "ON" when the switch is pushed in.

Figure 5-7 shows the location of the Graphics Tower power switch and power indicator. The switch is "ON" when the side with the "1" is pushed in.


Figure 5-7 Graphics Tower Power Switch and Indicator
Proceed to Chapter 6, "System Verification" on page 51.
