
To install SBus cards, MBus modules, DSIMMs, or an internal disk drive; or to change the serial port jumper settings on the main logic board (see Appendix D), you must open the SPARCsystem 10 system unit.
This appendix tells you how to open and close the system unit.
The top cover of the system unit attaches to the chassis at the front with molded plastic hooks and to the back panel with a plastic button and a captive screw. When you lift the cover upwards until it is at a 60-degree angle in relation to the chassis, you release the front of the cover from its points of attachment to the chassis.
To remove the cover from the system unit:
The screw will remain attached to the back panel after it is fully loosened from the cover. See Figure B-1.
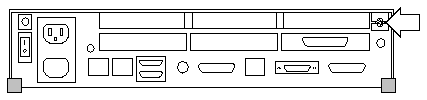
Figure B-1 Captive Screw Location, Back Panel
See Figures B-2 and B-3.

Figure B-2 Plastic Tab Location, Back Panel
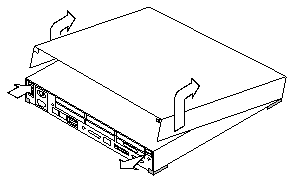
Figure B-3 Lifting the System Unit Cover
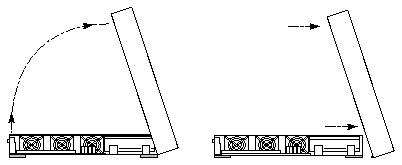
Figure B-4 Removing the System Unit Cover, Side View

To replace the system unit cover:

Figure B-5 Replacing the System Unit Cover, Side View
See Figure B-6.
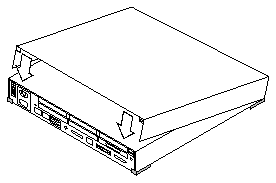
Figure B-6 Pushing Down on the Cover's Sides, Back Panel View
See Figure B-6.

Figure B-7 Captive Screw Location, Back Panel
You have finished Appendix B and have learned how to:
You need to open the system unit to reset the serial port jumpers and to:
All of the parts listed above come with installation instructions packed in the shipping boxes.
