
Removing and replacing the OpenBoot PROM in your system are required as part of upgrading the MBus module. This chapter gives the procedures for removing SBus cards, removing and replacing the OpenBoot PROM, and replacing SBus cards.
If SBus cards are installed in slots 0 and/or 1, they must be removed before the OpenBoot PROM can be physically accessed.
If SBus cards are installed in slots 0 and/or 1, follow the SBus card removal procedure below.
If SBus cards are not installed in slots 0 and/or 1, go directly to the OpenBoot PROM removal procedure later in this chapter.

Figure 4-1 SBus Slots 0 and 1 on the Back Panel
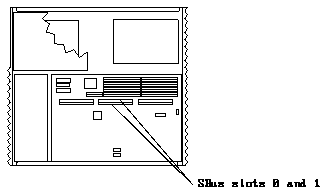
Figure 4-2 SBus Slots 0 and 1, Internal Locations
Note - Use a card extractor to remove an SBus card from the system board. If no extractor is available, pull up on the edge of the SBus card near the SBus connector.
See Figure 4-3.
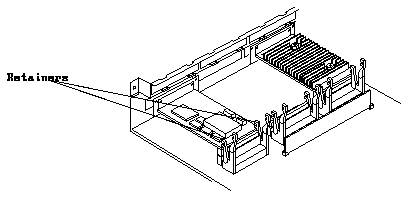
Figure 4-3 SBus Card Retainers
See Figure 4-4. Save the screws and washers for later use.

Figure 4-4 SBus Backplate Screws and Washers
See Figure 4-5.
Note - If no card extractor is available, pull up on the edges of the card near the SBus connector to remove the SBus card from the slot.
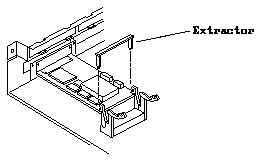
Figure 4-5 Installing the Card Extractor
Note - If no card extractor is available, pull up on the edges of the card near the SBus connector to remove the SBus card from the slot.
See Figure 4-6.
It should come out easily without bending. See Figure 4-6.
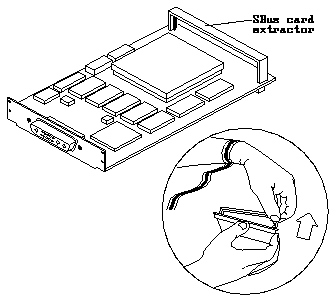
Figure 4-6 Removing the Extractor from the SBus Card
See Figure 4-7 for the socket location.
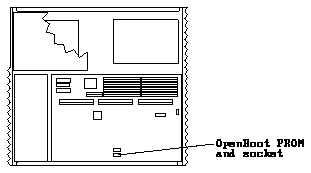
Figure 4-7 OpenBoot PROM and Socket Location
See Figure 4-8. Do not touch the pins.
Caution -


Figure 4-8 Orientation of OpenBoot PROM
Press down firmly until the pins are fitted in the socket.
See Figure 4-9.
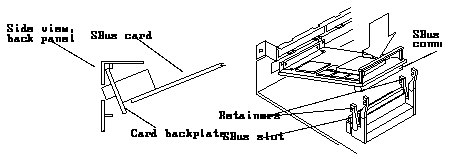
Figure 4-9 Installing an SBus Card
Be sure the card backplate shows through the slots on the back panel.
See Figure 4-9.
See Figure 4-9.
Caution -

See Figure 4-9.
