Basic Array Configuration
The order of the basic proxy cache configuration and basic array configuration sequences is not significant. However, for these instructions, it is assumed you have completed the basic proxy cache configuration, as described in the preceding section.
To Perform Basic Array Configuration
To enter values for the array configuration properties, use the data you gathered in Table 1-6.
When configuring the proxy cache array for the first time, use the basic array configuration link. After you have completed first-time configuration, you can use the advanced array configuration pages to fine-tune properties, such as timeout values.
-
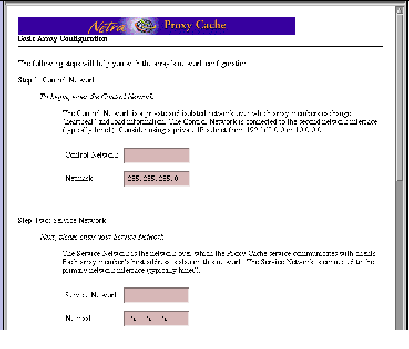
In the Proxy Cache Administration page, click the Basic Array Configuration link. The Basic Array Configuration page is displayed, as shown in Figure 3-8.
Figure 3-8 Basic Array Configuration Page

-
In the Step One segment shown in Figure 3-8, enter the subnet number and netmask for your control network.
Enter a subnet number with zero(s) in the host portion. For example, 192.168.89.0, for a Class C subnet address.
-
In the Step Two segment, also shown in Figure 3-8, enter the subnet number and netmask for your service network.
An example subnet number is 129.144.118.0, for a Class C subnet address.
-
Scroll down to the Step Three segment, which is shown in Figure 3-9.
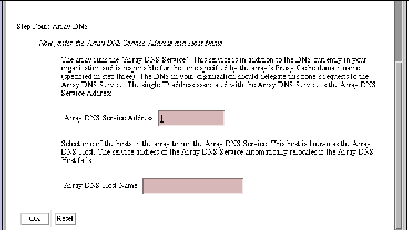
Figure 3-9 Basic Array Configuration: Step Three

-
In the segment shown in Figure 3-9, enter the name of the DNS domain formed by the hosts in your array.
-
Scroll down to the Step Four segment, shown in Figure 3-10.
Figure 3-10 Basic Array Configuration: Step Four

-
In the Step Four segment shown in Figure 3-10, enter the name of the DNS host for your array, as well as the DNS service address.
For the DNS host name, enter only the host name, not the host name and the domain name.
-
Click OK.
If you make an error, either the same page or a special error page is displayed. In both cases, the error is cited on the page. If the same page is displayed, correct the error and click OK to proceed. If an error page is displayed, correct the error, the use the browser's back button to return to the Basic Array Configuration page. In this page, click OK to proceed.
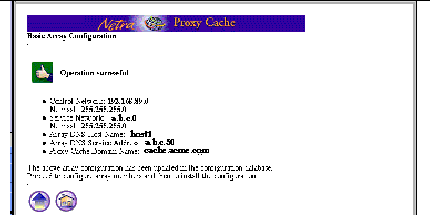
After you have submitted a correct set of array properties, a page is displayed indicating success and displaying your selections. An example of such a page is shown below.
Figure 3-11 Successful Basic Array Configuration

-
Click the up-arrow icon in the page shown in Figure 3-11.
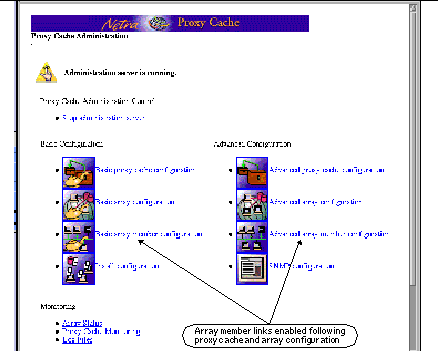
You return to the Main Administration page, as shown in Figure 3-12.
At this point, your array configuration is recorded in a configuration database. Later, you will install your configuration. Proceed to basic array member configuration.
Figure 3-12 Return from Basic Array Configuration

In Figure 3-12, note that the two host links, basic and advanced, are enabled, indicating that you have valid proxy cache and array configurations. Compare this figure to Figure 3-3.
- © 2010, Oracle Corporation and/or its affiliates
