| Previous Contents Index Next |
| BuyerXpert 4.1 SP3 Installation Guide |
Chapter 4 Installing BuyerXpert
This chapter describes the tasks needed to install BuyerXpert, which you should perform in the following order:
Preparing to Unload the Distribution Media
Verifying the Database and Server Installations
Preparing to Unload the Distribution Media
For some of the installation tasks, you will need to work in a temporary directory called a staging area. You extract the contents of the distribution media into this staging area. In the example installation, the staging area is a directory called stage, meaning you can name it anything you want, and that it is temporary. You must be logged in as the root user.iPlanet recommends you install the BuyerXpert software behind the firewall.
Note You need approximately 700 MB of available disk space for the staging area.
Your BuyerXpert system package contains CD-ROMs for some of the third-party software. The BuyerXpert software is distributed on one CD-ROM.
BuyerXpert CD-ROM Contents
The following file is on the BuyerXpert CD or is included with the BuyerXpert distribution:
Verifying the Database and Server Installations
Make sure you have the following software installed and running:
Oracle Server Database 8.1.6 Standard or Enterprise Edition with InterMedia Text (this can be on a separate machine)
Oracle Client (if Oracle Database is running on a different machine)
iPlanet Web Server (iWS) 4.1, SP5
Information About Sample Data
During the installation of BuyerXpert, an option to load sample data is available. This sample data is designed to demonstrate various features of BuyerXpert. The sample data includes entries for the Directory Server (LDAP) data storage, as well as the RDBMS data storage. If you choose to include sample data in your installation, the data storage specified will be populated with the sample entries.After you are satisfied with the installation, you will want to change the BuyerXpert configuration to point to data storage other than those configured during the sample data installation. These procedures are located in the section, Preparing the Seed Data Storage, located in this chapter. You can now reconfigure the installation to point to this data storage. Also, you can choose to refresh the data storage by cleaning and preparing it with the seed data as described in the previously mentioned section (Preparing the Seed Data Storage).
Sample Data in Directory Server
The sample data in the Directory Server is rooted with a well-known suffix o=iplanet.com. This allows you to use the same Directory Server instance (host:port) for the real data and at the same time keep the sample data separate and away from interfering the real data. When using the real data, you can continue to use the same Directory Server instance and configure BuyerXpert to look at a suffix other than o=iplanet.com as the search root. To use the sample data, you will have to configure BuyerXpert to use o=iplanet.com as the search root. It is not required to create the o=iplanet.com suffix during installation of the Directory Server. Loading of sample data will automatically create it.
Sample Data in Oracle
The sample data in Oracle will be loaded into the user tables for the specified Oracle database user. When using real data, it is advised to use a different Oracle database SID. This will prevent any conflicts with or overwriting or loss of the sample data.Switching between using the sample data and real data (and vice versa) will require you to only reconfigure the BuyerXpert installation. For instructions on how to reconfigure, please refer to the BuyerXpert Deployment Guide.
Installing BuyerXpert Software
Note When you install BuyerXpert, you must use the same Unix user and group that you used to install iAS.
To install the SellerXpert software from the CD:
Change to the SellerXpert directory and run the setup script:
% zcat buyerxpert.tar.Z|tar xvf -
The Welcome screen displays. Read the instructions and press Enter to continue.
The Licensing Agreement screen displays. Read the instructions and type YES.
The Installation Location screen displays. Type /export/IAS60 (this is the location where iAS is installed).
The BuyerXpert Component screen displays. Read the instructions and press Enter to continue.
The Additional BuyerXpert Components screen displays. The default is all components listed are installed. If you wish to install different components on another machine, select the component(s) that you need and press Enter. It is recommended to install all the components first.
When the next screen displays, read the instructions and press Enter to continue.
The Choosing a Unix User and Group screen displays. This is the same Unix user and group you created in Chapter 3, Installing iPlanet Web Server (iWS), Step 9. Press Enter to continue.
At the Application Server Administrator screen, enter the administrator user ID and password that you created when you installed iAS (Chapter 3, Installing iPlanet Application Server (iAS), Step 28).
At the next screen, the default iAS administrative server port number is displayed as the default entry. Press Enter if the default port number is correct.
Note To check the port number, run: When the screen displays, expand the tree:
SOFTWARE>iPlanet>Application Server>6.0>Admin>Port
The default port number displays.
I
The Oracle Database Host screen displays. Enter the machine name where Oracle is installed.
The Oracle Connection (JDBC) screen displays. The JDBC connection is the user name and password in the format username/password@ORACLE_SID. The installer will create this Oracle user.

At the next screen, read the instructions and enter the Directory Server (LDAP) name.

At the next screen, read the instructions and press Enter to continue.
At this screen, enter the Directory Server user and password.
At the upgrade screen, type Y to set up for the upgrade process.
At this screen, enter the JDBC connection where your existing data is stored
The Attachment Directory screen displays. Type /tmp if you want to save the attachments to the temp directory. Make sure there is a /tmp directory first; if not, create one.

When the Sample Data screen displays, choose your option for installing sample data. Type 3 to include sample data.
Note For BuyerXpert to run properly, you do not have to have sample data installed (option 0) but you must have seed data. Installing the seed data instructions are provided in the section, Preparing the Seed Data Storage, located at the end of the chapter. For information on sample data, refer to the section, Information About Sample Data, located at the beginning of this chapter.
Configuring Actuate for BuyerXpert
The Setup Actuate Reports screen displays. Type N if you do not wish to configure Actuate with BuyerXpert at this time. Type Y if you do and the next two screens will display.
Allow approximately 30 minutes for BuyerXpert to complete the installation.
Note You must have already installed Actuate prior to installing BuyerXpert.
If you typed Y in the previous screen, the Report Server screen displays. Enter the path where Actuate is installed.
At the next screen, enter the Actuate Server URL.
The Actuate Administrator Password screen displays. Enter the Actuate administrator password.
Creating Catalogs in Catalog Manager
To create catalogs in Catalog Manager:
Go to the URL:
http://hostname:port/NASApp/buyer/iMM/imm.jsp
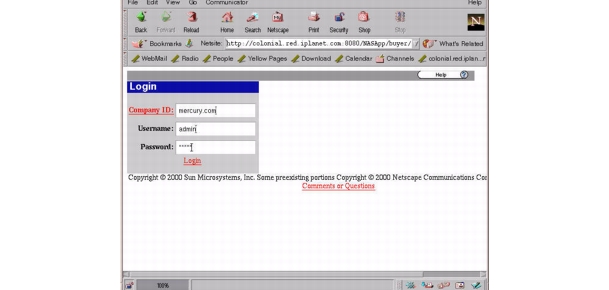
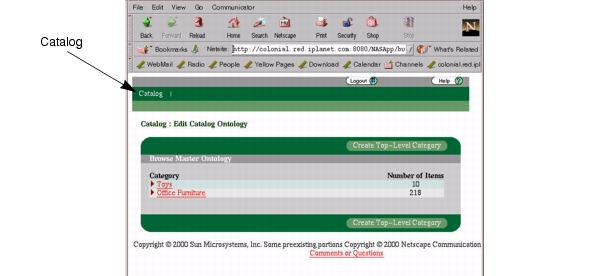
To enter the sample catalog data, type the following information in the fields shown:
When the Edit Catalog Ontology screen displays, click Catalog, located on the upper left hand side of the screen.
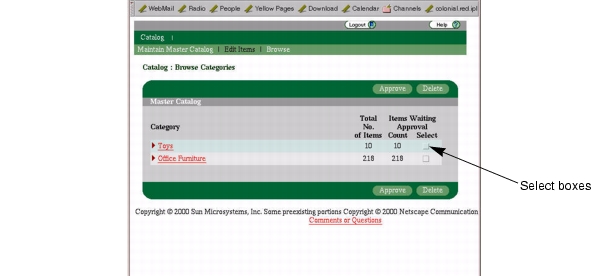
This screen displays. You will notice that there are now options to select under the Catalog field (Maintain Master Catalog, Edit Items and Browse).
From this screen, check the boxes located on the right side of the screen, under the heading Select. Click Approve.
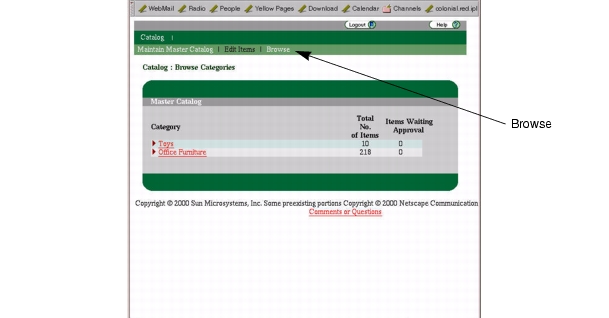
When this screen displays, click Browse, located near the top of the screen.
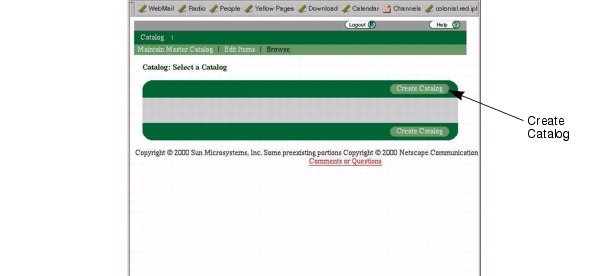
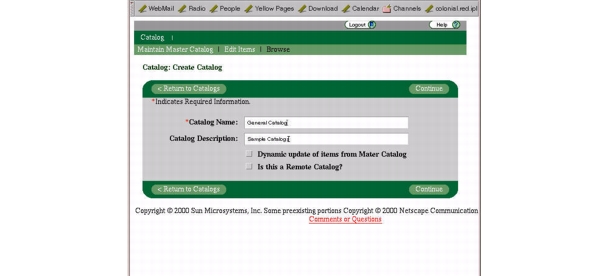
When the Create Catalog screen displays, click Create Catalog.
When this screen displays, enter the catalog name and description in the appropriate fields, then click Continue.
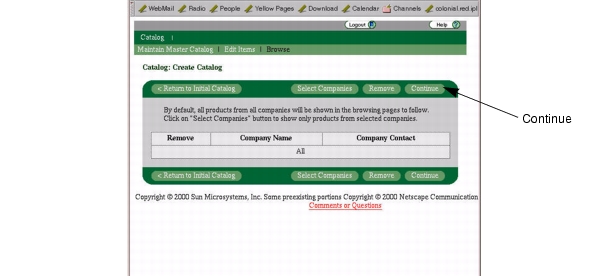
At this screen, click Continue.
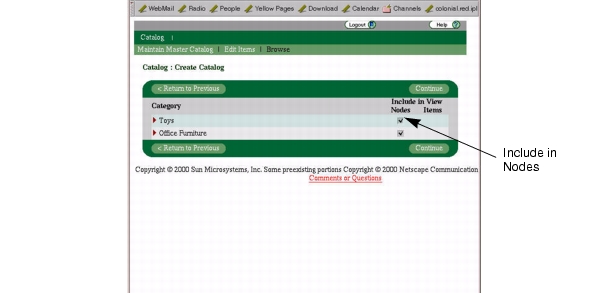
When this screen displays, click the two boxes under Include in Nodes, then click Continue.
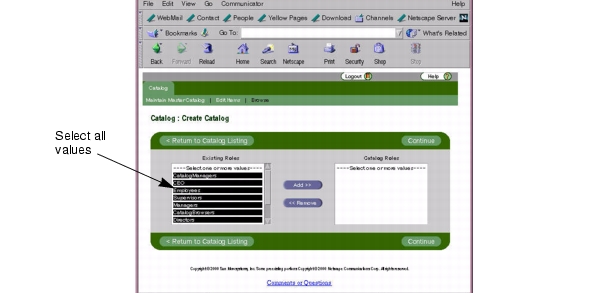
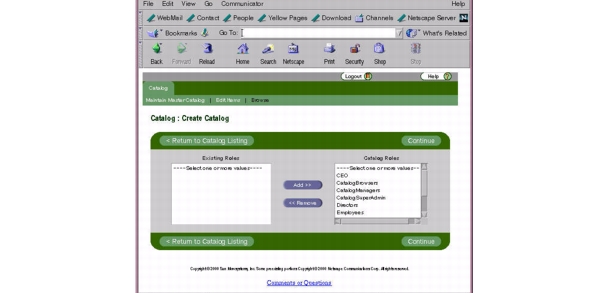
When this screen displays, select all the values under Existing Roles so that they are highlighted, then click Add.
When this screen displays, the Catalog Admin line item should have moved from the Existing Roles to the Catalog Roles section. Click Continue.
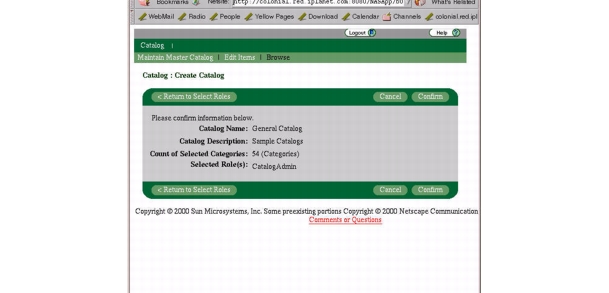
When this screen displays, click Confirm.
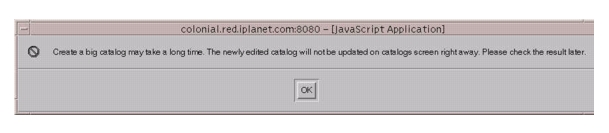
This message displays. Click OK.
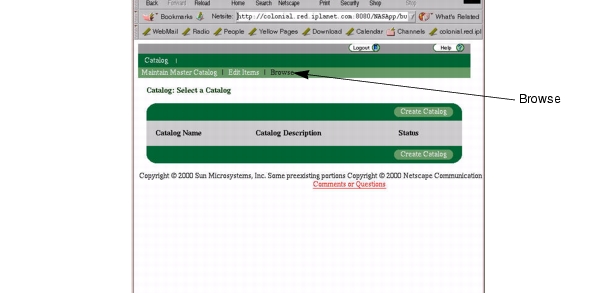
This screen displays when the system is finished creating the catalogs. Wait for the catalogs to be created (approximately 3 minutes), then click Browse.
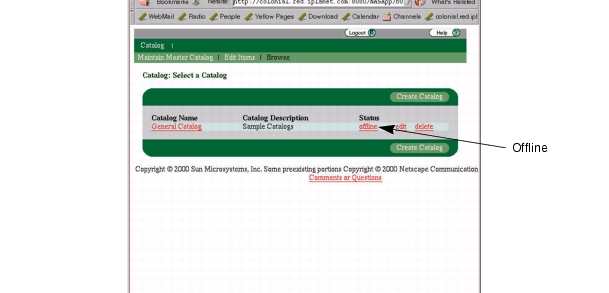
When this screen displays, click offline, located under Status.
When this screen displays, you will noticed that the status has changed to online. The General Catalog is now available.
Click logout, located on the upper right side, to log out.
Creating Membership Indexes
For membership performance improvements, you need to create the following indexes in your membership Directory Server if they do not already exist:
- iplanetecguild
- iplanetecparentorgguid
- uid
- sn
- cn
- ou
- o
- displayname
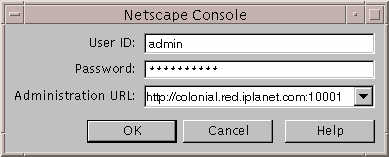
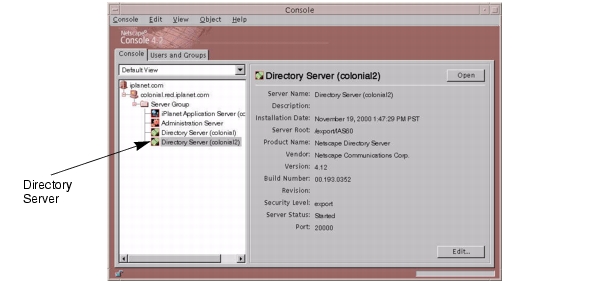
To create indexes, you need to run startconsole from the IAS home directory.
Enter the administrator password you gave when you installed Process Manager. Click OK.
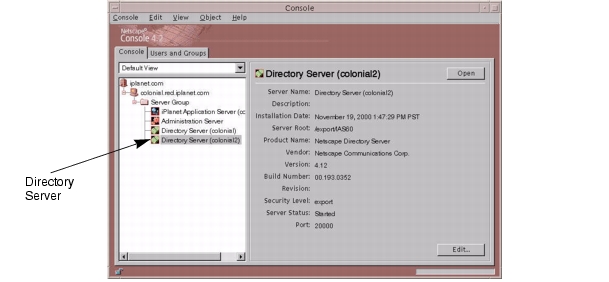
Double click on the Directory Server that you created under the Server Group.
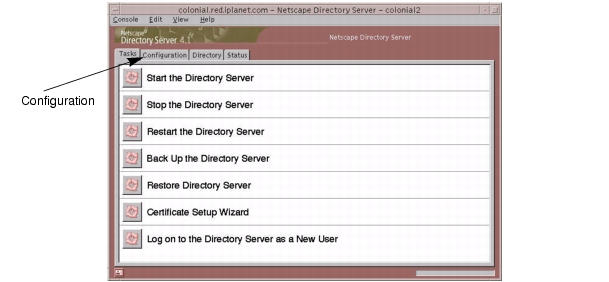
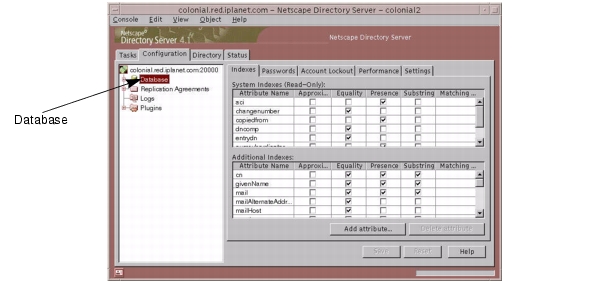
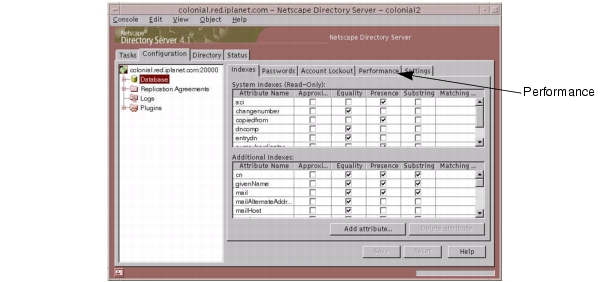
When this screen displays, select the Configuration tab.
When this screen displays, highlight Database, located on the left side. Click Add Attribute.
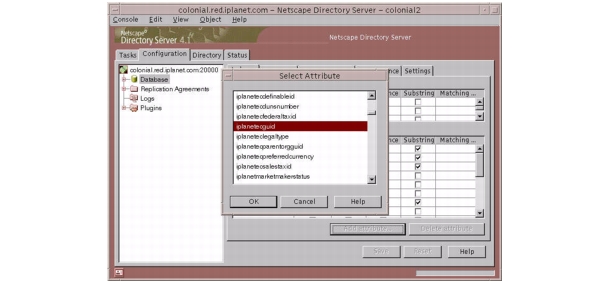
The Select Attribute window displays. Select iplanetecguid and click OK.
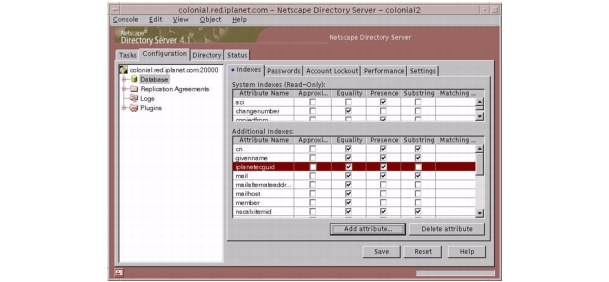
You will see that iplanetecguid is now under the Addition Indexes with attribute Equality and Presence checked.
Now you need to add the other attributes, repeating the previous steps. Click Add Attribute to add all these attributes:
When you are finished, click Save and restart the server.
- iplanetecparentorgguid
- uid
- sn
- cn
- ou
- o
- displayname
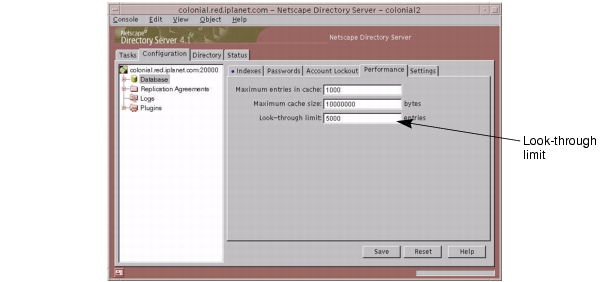
Set the Look-through Limit to Unlimited
Run startconsole from the IAS home directory.
Enter the administrator password you gave when you installed Process Manager. Click OK.
Double click on the Directory Server that you created under the Server Group.
Select the Configuration tab and highlight Database on the left side.
The default value for the look-through limit is 5000. In this field, type -1.
Running the Process Builder
To deploy a sample application, as follows,
Run the Process Builder:
% IAS_ROOT/builder/Builder.sh &
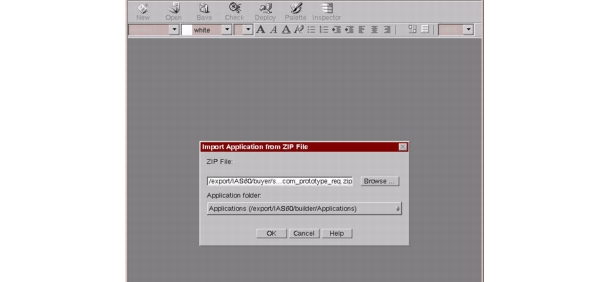
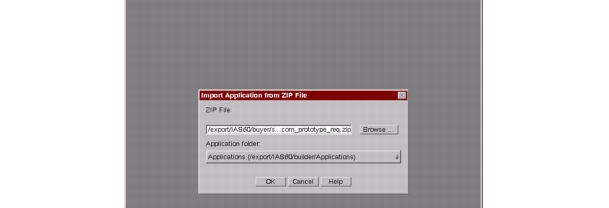
When the Process Builder screen displays, click Import.
When the Import Application window displays, enter the zip file location and then click OK:
IAS_ROOT/buyer/sample_data/workflow/bx40_mercurycom_prototype_ req.zip
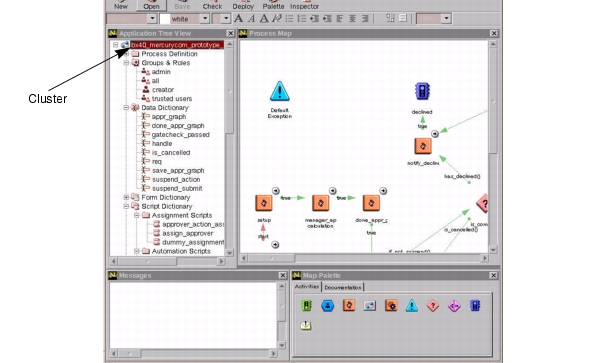
When this screen displays, the cluster that you just set up displays on the left side.
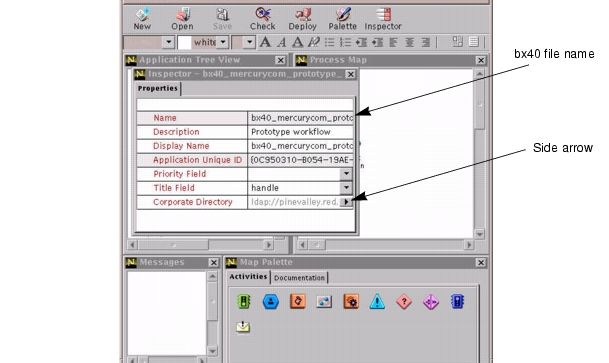
Double click on the bx40_mercurycom_prototype file name, located on the far left side of the screen.
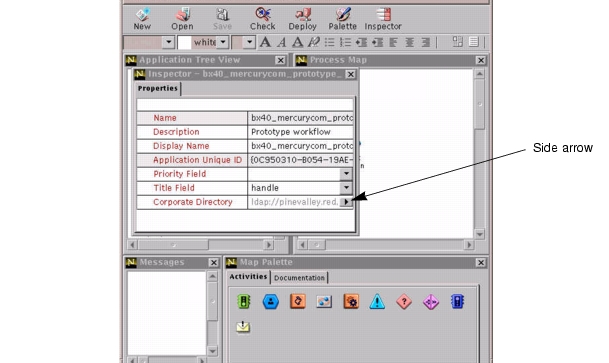
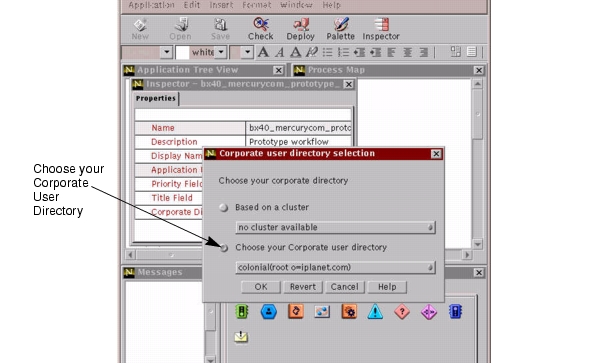
When the Inspector screen displays, verify that the corporate directory contains the correct machine name. If not, click the side arrow button.
When the next screen displays, select Choose Your Corporate User Directory. Click OK.
Close the Inspector screen and click Save.
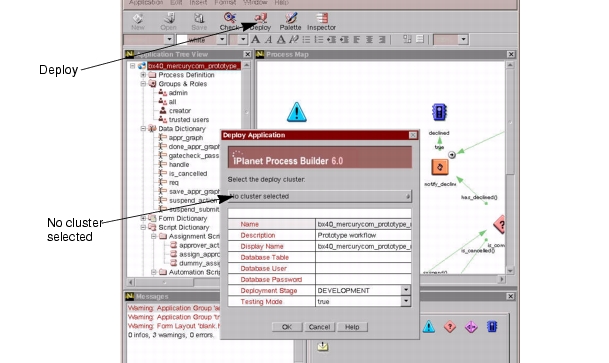
Click Deploy (located in the row of buttons near the top of the screen).
Select the cluster by clicking No Cluster Selected and the drop down menu displays with the cluster that you previously created.
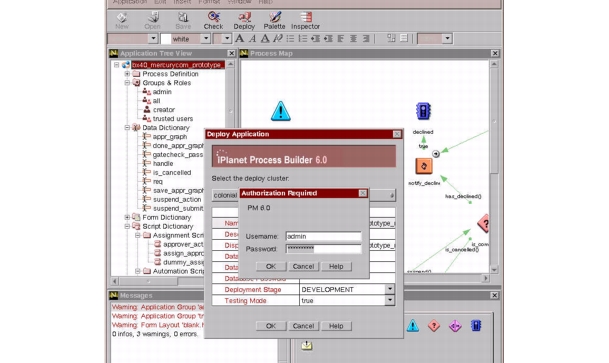
Enter your iAS user ID and password and click OK.
The Successful Deployment screen displays.
Go to the browser and type the URL:
http://hostname:iwsport/Express.npm
Click the New Process tab. The name of the application that you just deployed displays.
Importing Timecard Application
Run the Process Builder again:
The BuyerXpert software installation is complete.When this screen displays, click Import.
When the Import Application window displays, enter the zip file location and then click OK:
IAS_ROOT/buyer/sample_data/timecard/bx40_mercurycom_prototype_ tc.zip
When this screen displays, the cluster that you just set up displays on the left side.
Double click on the bx40_mercurycom_prototype file name, located on the far left side of the screen.
When the Inspector screen displays, verify that the corporate directory contains the correct machine name. If not, click the side arrow button.
When the next screen displays, select Choose Your Corporate User Directory. Click OK.
Close the Inspector screen and click Save.
Click Deploy (located in the row of buttons near the top of the screen).
The Database Table name must be changed from the previous deployment. Click the Database Table field and enter a new name for the timecard deployment.
Select the cluster by clicking No Cluster Selected and the drop down menu displays with the cluster that you previously created. Click OK.
Enter your iAS user ID and password and click OK.
The Successful Deployment screen displays.
Go to the browser and type the URL:
http://hostname:iwsport/Express.npm
Click the New Process tab. The name of the application that you just deployed displays.
Preparing the Seed Data Storage
You need to install seed data for BuyerXpert to work properly. If your BuyerXpert installation points to data stores populated with sample data, you do not need to install any seed data. Sample data includes the required seed data.The procedures to install seed data consist of the following steps:
Preparing the Directory Server Data Storage
To prepare the Directory Server data storage before you can install seed data:
Create a new instance of Directory Server (see Chapter 3, Creating an iPlanet Directory Server (LDAP) Instance, for instructions).
Set the directory root, for example, o=iplanet.com.
Modify the schema on the Directory Server. You can do this either by including the schema files (a) or by applying schema modifications specified in ldif file format (b).
To include the schema files:
To load seed data use the loadSeedData script located in the BuyerXpert installation directory:Pick your favorite path for these configuration files, located in your BuyerXpert installation directory:
path to ias/buyer/sample_data/directory_ldif/buyer/iplanet.
Include lines similar to those shown below in the
slapd-instance/config/ns-schema.conf file:
include path/iplanet-userx-schema.conf
include path/iplanet-ecommerce-schema.conf
include path/iplanet-vortex-schema.conf
include path/iplanet-buyer-schema.conf
After these changes to the ns-schema.conf file, restart the Directory Server:
% slapd-instance/restart-slapd
To apply schema modifications specified in the ldif file format:
Use the schema.ldif file, located in your BuyerXpert installation directory:
path to ias/buyer/sample_data/directory_ldif/buyer/iplanet/schema.ldif.
Load the schema into a running Directory Server using ldapmodify as:
# ldapmodify -h host -p port -c -a -D dirMgr -w password\
path to ias/buyer/sample_data/directory_ldif/buyer/iplanet
Run the script loadSeedData.sh:
# loadSeedData.sh hostname port root_dn bind_dn bind_password ias_root_dir
Preparing the Oracle Data Storage
To prepare the Oracle data storage:
Create your database account (make sure that you have tablespace to do this first).
CONNSTR — Oracle connect string of the format user/passwd@dbsourceIAS-ROOT/ias/bin/KIVAes.sh stop
Run the create_schema.sh script. This script does the following:
Creates user accounts
Before running the script, read the following notes:Creates all the tables/indexes in the user accounts.
Loads the seed data for the whole application, including the iPlanet MarketMaker catalog piece.
Valid parameters for this script are:
For example:
- -b BX_DATA — populate BuyerXpert data only, does not load catalog name
- -r IASRoot — IAS base directory, for example, /export/IAS60/
- -u USER/PASSWORD— Oracle user login and password
- -s SYSTEM USER/PASSWORD— Oracle system user and password
- -d DBSOURCE — Oracle database access name
- -o ORACLE_HOME — Pass this if you want to override the ORACLE_HOME environment variable.
- -t DATA TABLESPACE — data tablespace to be used for the user
- -i INDEX TABLESPACE — index tablespace to be used for the user
cd /export/netscape/server4/buyer/sample_data/impexp_files/
. /create_schema.sh -r /export/netscape/server4/ -u bx/bx -d deepc -s system/manager -o $ORACLE_HOME -t TS01 -i TS02
The script can be found at:
- where:
- /export/IAS60/ is the IAS Root , bx is the account to be dropped or created (the schema and data are loaded into this), deepc is the Oracle database instance name, and TS02 is the tablespace in the Oracle data.
Loading the Application Seed Data
To load the application seed data, the following tasks are required:
Creating the install superuser
After the install is complete and you are satisfied with the data, it is recommended that you delete the InstallUser and InstallOrg. Before doing this, verify that you have other users designated as superadmins.Cleaning up the install superuser
To create the install superuser, in your BuyerXpert installation (without any sample data), log in using -/-/- as your organization, followed by login name and password.
Create a dummy organization for the superuser. For example, InstallOrg.
Create a user with superadmin privileges. For example, InstallUser.
To import the policy book, start the application:
- These are conveniences to allow administrative privileges, in the event that there is no super administrator available.
Log into the Admin interface as InstallUser.
Click the Import/Export tab.
Select the files to be imported. Multiple files can be imported in the same screen.
Import the following files in this order:
IAS-ROOT/buyer/schema/cleardb.imp


Previous Contents Index Next
Copyright © 2001 Sun Microsystems, Inc. Some preexisting portions Copyright © 2001 Netscape Communications Corp. All rights reserved.
Last Updated October 04, 2001