Chapter 2
Quick Start: Running the Examples
- Running the Sample C Application (CIIOP)
- Running the Sample C++ Application (WASP)
server_root/wai/examples directory on UNIX and in the server_root\wai\examples directory on Windows NT.
NOTE: These examples assume that your server is running in non-secure mode.For more detailed information on setting up, writing, and running WAI applications, see the rest of the chapters in this manual:
- To set up your server to run WAI applications, see Chapter 3, "Using WAI".
- To write a WAI application in C, C++, or Java, see Chapter 4, "Writing a WAI Application in C", Chapter 5, "Writing a WAI Application in C++", Chapter 6, "Writing a WAI Application in Java", and Chapter 7, "Writing a WAI Server Plug-In".
- For tips on troubleshooting problems with WAI applications, Chapter 11, "Troubleshooting Problems".
Running the Sample C Application (CIIOP)
The sample C application provided with the web server is in theserver_root/wai/examples/CIIOP directory. The source file for the example is CAPIIIOP.c.
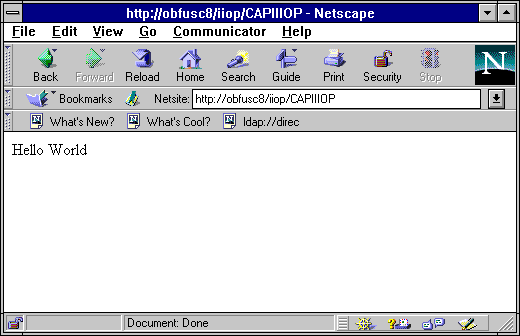
This example sends a page containing the text Hello World back to the client, as shown in the following figure:
 The rest of this section explains how to set up and use this example. You can use this as a guideline for setting up and running your own C examples.
To run the sample C application, follow these steps:
- (For 3.0 servers only)Start up osagent.
- Enable WAI applications on the web server.
- In the wai/examples/CIIOP (in UNIX) or wai\examples\CIIOP (on Windows NT) directory, review the sample source file CAPIIIOP.c.
- Accepts an argument that specifies the host and port where the web server is running. For example, you can use the following command argument to specify that your web server is running on port 80 of the server named
mooncheese: - Calls the
WAIcreateWebAppService()function to create a new web application service namedCAPIIIOP. Users will be able to access this web service through the following URL (if, for example, your web server is running on port 80 of the server namedmooncheese): - Calls the
WAIregisterService()function to register the web application with the web server running on the host and port number specified on the command-line. - Calls the
WAIimplIsReady()function to indicate to the web server that it is ready to receive requests. - Calls the
WAIsetResponseContentLength()function to specify the content length of the page returned to the client. - Calls the
WAIStartResponse()function to start sending the response to the client. - Calls the
WAIWriteClient()function to send the text "Hello World" to the client. - Compile and link the sample application.
- After compiling and linking the application, run the application by entering the following command:
- In a web browser, go to the following URL:
osagent is located under server_root/wai/bin in UNIX and
server_root\wai\bin in Windows NT.
Specify the
-a flag to restrict osagent to the localhost IP address. For
example:
osagent -a 127.0.0.1
From the Server Administration page in the administration server, click the
button labelled with your server name. This displays the Server Manager for
your server.
Click Programs | WAI Management to display the form for administering
WAI on your server.
Under Enable WAI Services, select the Yes radio button and click OK. Save
and apply your changes.
For more information, see "Setting the Option to Enable WAI".
Basically, the code in this source file does the following (for a more
complete explanation of these steps, see Chapter 4, "Writing a WAI
Application in C"):
CAPIIIOP mooncheese:80
http://mooncheese.mydomain.com:80/iiop/CAPIIIOP
The sample application includes a Makefile (for example,
Makefile.SOLARIS or Makefile.WINNT) that you can use to compile and
link the application.
For more information on compiling and linking your application, see
"Compiling C/C++ Applications".
CAPIIIOP hostname:port
where
hostname and port identify the name of the machine that the web
server runs on and the port number that the server listens to. For example:
CAPIIIOP myserver:80
This registers the application with the web server. The web server should
be able to find the CAIIIOP WAI application.
http://hostname:port/iiop/CAPIIIOP
where hostname and
port identify the name of the machine that the web
server runs on and the port number that the server listens to. For example:
http://myserver:80/iiop/CAPIIIOP
The web server processes the request. While processing the request, the
server parses the URL, retrieves the name of the service you want to access
(CAPIIIOP), and contacts your application.
Your application receives the request and returns the Hello World string.
The web server returns this to the web browser.
Running the Sample C++ Application (WASP)
The sample C++ application provided with the web server is in theserver_root/wai/examples/WASP directory. The source file for the example is WASP.cpp.
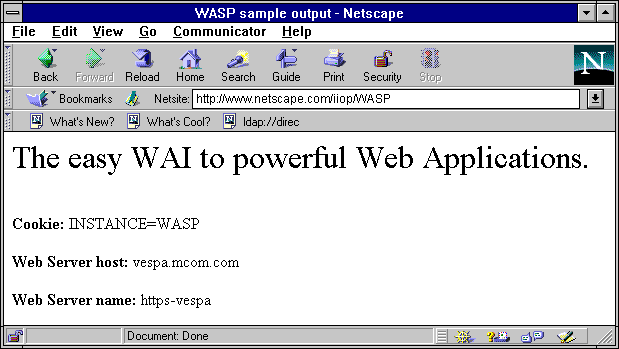
This example does the following:
- Sends a cookie to the browser, if the browser does not already have a cookie set
- Gets information about the web server, including the host name and server ID of the web server
- Gets information from the request headers in the request sent by the browser
 Note that this example can be compiled and linked as a standalone application that runs outside the web server's process and as a server plug-in that runs within the web server's process.
The rest of this section explains how to set up and use the standalone application in this example. (For an example of writing a server plug-in, see Chapter 7, "Writing a WAI Server Plug-In".)
 You can use this example as a guideline for setting up and running your own C++ examples. To run the sample C++ application, follow these steps:
- (For 3.0 servers only) Start up osagent.
- Enable WAI applications on the web server.
- In the wai/examples/WASP (in UNIX) or wai\examples\WASP (on Windows NT) directory, review the sample source file WASP.cpp.
- Accepts an argument that specifies the host and port where the web server is running. For example, you can use the following command argument to specify that your web server is running on port 80 of the server named
mooncheese: - Creates a new web application service named
WASP. Users will be able to access this web service through the following URL (if, for example, your web server is running on port 80 of the server namedmooncheese): - Calls the
RegisterServicemethod to register the web application with the web server running on the host and port number specified on the command-line. - Calls the
getCookieandsetCookiemethods to demostrate how to get and set cookies in the client. - Calls several different methods to illustrate the kinds of data you can get from the session's context and the client's request. For example, to get information from the request, the sample application calls the
getRequestInfomethod. - Calls the
setResponseContentLengthmethod to specify the length of the content to be delivered to the client. - Calls the
StartResponsemethod to start sending the HTTP response back to the client. - Calls the
WriteClientmethod to send data back to the client. - Compile and link the sample application.
- After compiling and linking the application, run the application by entering the following command:
- In a web browser, go to the following URL:
osagent is located under server_root/wai/bin in UNIX and
server_root\wai\bin in Windows NT.
Specify the
-a flag to restrict osagent to the localhost IP address. For
example:
osagent -a 127.0.0.1
From the Server Administration page in the administration server, click the
button labelled with your server name. This displays the Server Manager for
your server.
Click Programs | WAI Management to display the form for administering
WAI on your server.
Under Enable WAI Services, select the Yes radio button and click OK. Save
and apply your changes.
For more information, see "Setting the Option to Enable WAI".
Basically, the code in this source file does the following (for a more
complete explanation of these steps, see Chapter 5, "Writing a WAI
Application in C++"):
WASP mooncheese:80
http://mooncheese.mydomain.com:80/iiop/WASP
The sample application includes a sample Makefile (for example,
Makefile.SOLARIS or Makefile.WINNT) that you can use to compile and link
the application.
For more information on compiling and linking your application, see
"Compiling C/C++ Applications".
WASP hostname:port
where
hostname and port identify the name of the machine that the web
server runs on and the port number that the server listens to. For example:
WASP myserver:80
This registers the application with the web server. The web server should
be able to find the WASP WAI application.
http://hostname:port/iiop/WASP
where
hostname and port identify the name of the machine that the web
server runs on and the port number that the server listens to. For example:
http://myserver:80/iiop/WASP
The web server processes the request. While processing the request, the
server parses the URL, retrieves the name of the service you want to access
(WASP), and contacts your application.
Your application receives the request and retrieving information from the
request and the web server. The web server returns this information to the
web browser in an HTML page.
Running the Sample Java Application (WASP.Java)
The sample Java application provided with the web server is in theserver_root/wai/examples/WASP directory. The source file for the example is WASP.java.
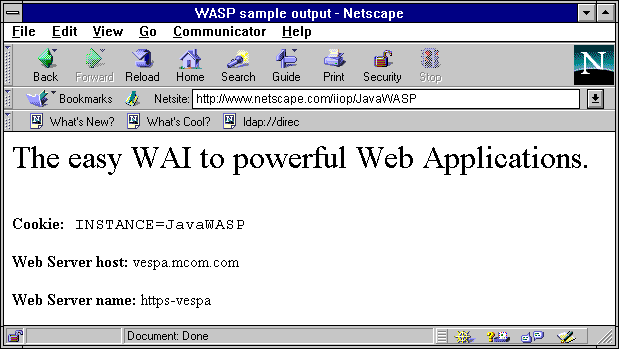
This example does the following:
- Sends a cookie to the browser, if the browser does not already have a cookie set
- Gets information about the web server, including the host name and server ID of the web server
- Gets information from the request headers in the request sent by the browser
 The rest of this section explains how to set up and use this example. You can use this as a guideline for setting up and running your own Java examples.
To run the sample Java application, follow these steps:
- (For 3.0 servers only) Start up osagent.
- Enable WAI applications on the web server.
- In the wai/examples/WASP (in UNIX) or wai\examples\WASP (on Windows NT) directory, compile the sample application.
server_root/wai/java/nisb.zipserver_root/wai/java/WAI.zip- After compiling the application, run the application.
- In a web browser, go to the following URL:
osagent is located under server_root/wai/bin in UNIX and
server_root\wai\bin in Windows NT.
Specify the
-a flag to restrict osagent to the localhost IP address. For
example:
osagent -a 127.0.0.1
From the Server Administration page in the administration server, click the
button labelled with your server name. This displays the Server Manager for
your server.
Click Programs | WAI Management to display the form for administering
WAI on your server.
Under Enable WAI Services, select the Yes radio button and click OK. Save
and apply your changes.
For more information, see "Setting the Option to Enable WAI".
Make sure to include the following files in your
CLASSPATH environment
variable:
java -DDISABLE_ORB_LOCATOR WASP hostname:port
TheIf you are running a 3.0.1 version of a Netscape web server, run the following command:-DDISABLE_ORB_LOCATORoption specifies thatosagentshould not be used to find the ORB in the Netscape web server.
java WASP hostname:port
This registers the application with the web server. The web server should be able to find the JavaWASP WAI application.
http://hostname:port/iiop/JavaWASP
where
hostname and port identify the name of the machine that the web
server runs on and the port number that the server listens to. For example:
http://myserver:80/iiop/JavaWASP
The web server processes the request. While processing the request, the
server parses the URL, retrieves the name of the service you want to access
(JavaWASP), and contacts your application.
(Note that the name used to register the server -- JavaWASP -- does not
necessarily need to be the same as the name of the class -- WASP.)
Your application receives the request and retrieving information from the
request and the web server. The web server returns this information to the
web browser in an HTML page.
Running the FormHandler Sample
The classes used for writing WAI applications include a class for handling submissions through HTML forms. Using theFormHandler class, you can write a WAI application that receives and interprets data submitted through an HTML form.
To read in and parse posted form data (where the client used the HTTP POST method to submit the form), create an instance of the FormHandler class. The constructor for this class reads in the data and parses it.
To read in and parse form data submitted through the HTTP GET method, create an instance of the FormHandler class and call the ParseQueryString method.
Depending on the language you are using, you can access the parsed data in different ways:
- In C++, you can call the
Getmethod to get the value of a specific name-value pair, or you can call theInitIteratormethod and theNextmethod to iterate through all name-value pairs in the parsed data. - In Java, you can call the
GetHashTablemethod to get a Java hash table containing the parsed data. Then, you can call methods of thejava.util.Hashtableclass to access the data.
You can also call the
Add method to add a new name-value pair to the
parsed form data and the Delete method to remove a name-value pair
from the parsed form data.
The names serve as keys in the hashtable. The values are stored as Java
vectors (for details, see your Java documentation on
java.util.Vector).
The values are implemented as Java vectors because a given name may be
associated with multiple values. For example, if the form contains multiple-
selection input, the submitted form data can contain several name-value
pairs with the same name but different values.
About the FormHandler Class Example
The FormHandler samples provided with the web server are in theserver_root/wai/examples/forms directory. This directory contains C++ and Java examples of using the WAI FormHandler class. You can use this class to process data submitted through an HTML form.This directory contains the following files:
The C++ example is written as an in-process server plug-in. The Java example is written as a stand-alone application (running out of process). Both examples process and display data submitted through theform.html form.
Running the C++ FormHandler Sample
The FormHandler sample provided with the web server is in theserver_root/wai/examples/forms directory. The source file for the example is formHandler.cpp.
This example is written as an in-process server plug-in that performs the following tasks:
- It forms pairs of names and values using the
NVPairclass. - It calls the
InitIteratormethod and theNextmethod to iterate through all name-value pairs in the parsed data.
You can use this example as a guideline for setting up and running your own C++ forms.
- Compile the example using the makefile provided.
- Open the
obj.conffile (located in theserver-root/server-id/configdirectory) in a text editor. - Add an Init directive to specify the intialization function (FormInit) for this server plug-in (form.dll or form.so).
- Save your changes and exit from the text editor.
- Open the form.html file in a text editor and verify that the action of the form is set to "/iiop/FORMip".
- Go to the following URL:
- Fill in the fields and click Send to submit the form.
For example:
nmake -f Makefile.WINNT
or
make -f Makefile.SOLARIS
For example:
Init funcs="FormInit" shlib="server-root/wai/examples/forms/form.dll" fm="load-modules"
Init LateInit="yes" fn="FormInit"
or
Init funcs="FormInit" shlib="server_root/wai/examples/forms/form.so" fn="load-modules"
Init LateInit="yes" fn="FormInit"
When you specify the
Init directive make sure to set LateInit to "yes".
For example:
<FORM name="submitform" method="POST" ACTION="/iiop/FORMip">
FORMip is the name with which this WAI server plug-in registers.
http://server-name:port-number/form.html
The WAI server plug-in should send a generated HTML page back to your
browser. The page should display some of the data you have submitted.
Running the Java FormHandler Sample
The Java example is written as a stand-alone application, running out of process. It processes and displays data submitted through theform.html form in the /wai/examples/forms directory.
- Compile the TestDriver.java example.
- Run the TestDriver Java application.
- Open the form.html file in a text editor and change the action of the form to "/iiop/JavaForm".
- Go to the following URL:
- Fill in the fields and click Send to submit the form.
javac TestDriver.java
Specify the server name and port number of your Enterprise Server as
follows:
java TestDriver server-name:port-number
For example:
<FORM name="submitform" method="POST" ACTION="/iiop/JavaForm">
JavaForm is the name with which this WAI application registers.
http://server-name:port-number/form.html
The WAI application should send a generated HTML page back to your
browser. The page should display some of the data you have submitted.
[Contents] [Previous] [Next] [Index]
Last Updated: 12/04/97 16:11:51
Any sample code included above is provided for your use on an "AS IS" basis, under the Netscape License Agreement - Terms of Use