Part 7: Creating a Container Managed Persistence Enterprise Java Bean

This container managed persistence EJB part of the tutorial can only be performed with an Oracle 8.1.6 database.

Before You Begin

Before you can create a container managed persistence EJB, you must:
  1. Setup an Oracle 8.1.6 database using the database script provided.

    See the Running the Tutorial section of the Installation Instructions for details on getting this setup.

  2. Use the obcustomer database table that is created by the database script provided in the installation instructions.
  3. Capture a database schema.
  4. Create the Container Managed Persistence EJB.
  5. Create a Servlet to call the CMP EJB.

To capture a database schema:

  1. From the Explorer, select or mount a new directory.

    In this example, the directory name is "EJB".

  2. Right click on the EJB directory and select New Package.
  3. In the Name field of the Create New Package dialog, enter Customer.

    A question dialog similar to the following appears:

  4. From the Tools menu, select the Capture Database Schema submenu item.

    The Database Schema wizard launches.

  5. In the first panel of the wizard, enter CMPExample in the name field and select the customer directory Package you just created.

  6. Select Next.
  7. In the second panel of the wizard, select New Connection and enter or select the following data:

    Name: Oracle thin
    Driver: oracle.jdbc.driver.OracleDriver
    Database URL: jdbc:oracle:thin:@<hostname>:<portnumber>:<servicename>
    User Name: <yourusername>
    Password: <yourpassword>

  8. Select Finish.

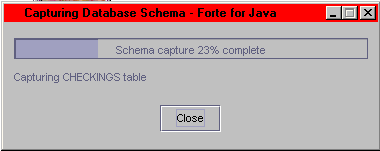
    A database schema status dialog appears:

    The schema and database tables are created under the package name you selected.

You are now ready to create your Container Managed Persistence EJB.

To create a Container Managed Persistence EJB:

  1. Right click to select the Customer package node and select New -> EJB -> EntityBean from the context menu.

    The entity EJB Wizard appears.

  2. Select the Container Managed Persistence and Select Database Table radio buttons and select Next.

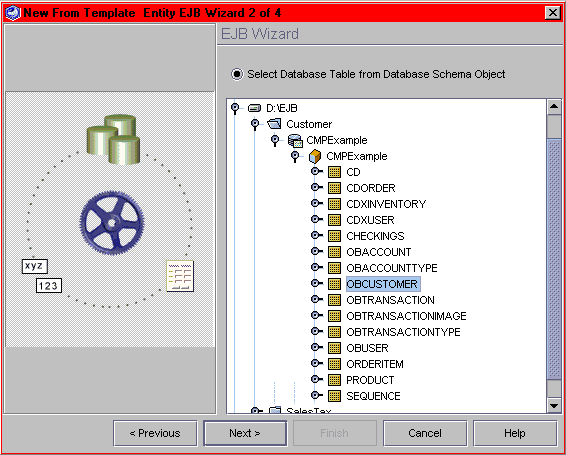
  3. Navigate to the location of your Customer package to select the OBCUSTOMER table and select Next.

  4. Select the SSN field and select Edit.

    The Edit Persistent Field dialog appears.

  5. Change the field name to customerID and select OK.

  6. In the Entity EJB Wizard, select Next.

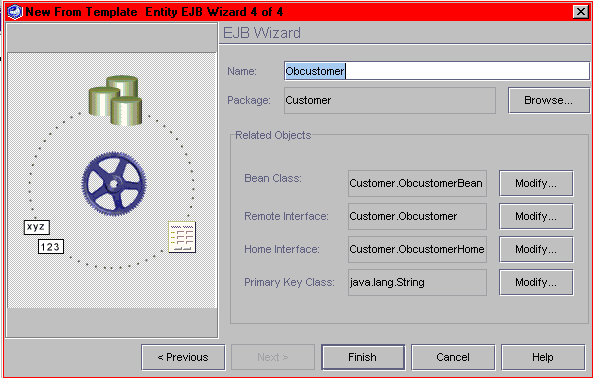
    The final panel of the Entity EJB Wizard identifies the object names.

  7. Accept the default settings and select Finish to generate the CMP Enterprise Java Bean.

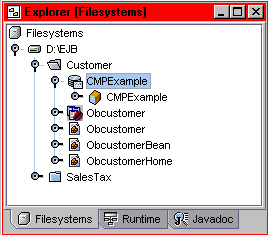
    Once the CMP EJB is created, the following files are available from the explorer:

    is the Obcustomer EJB node
    is the Obcustomer remote interface
    is the Obcustomer bean class
    is the Obcustomer home interface

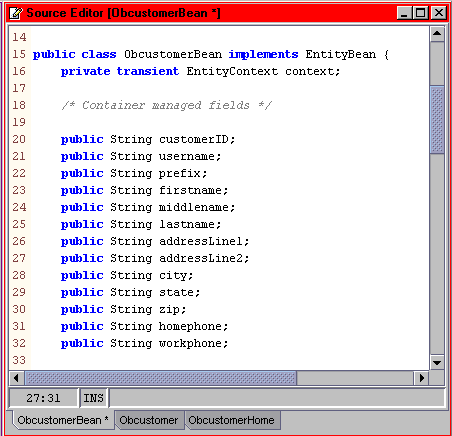
  8. From the Explorer, double click on the to view it in the Source Editor.
  9. Scroll to locate the Container managed fields.
  10. Edit the address field to addressLine1.
  11. Edit the address2 field to addressLine2.

  12. From the Explorer, select the Obcustomer EJB node.
  13. Right click to select Properties from the context menu.

    The Obcustomer Properties dialog appears:

    In the Properties tab Application Servers field, the iPlanet Application Server should be set as the default deployment server. If not, select the Application Servers field; make sure the iPlanet Application Server checkbox is checked, and select OK.

    The iPlanet AS tab now appears as part of the properties dialog.

  14. Select the iPlanet AS tab.
  15. Select the Map DB to EJB Fields property and select the button to view the Property Editor.
  16. Double click on the address and address2 EJB Field Name to edit each field to addressLine1 and addressLine2 respectively.

    Through this panel you can change the mapping settings of each field in your database table. If you edit the mappings here, you must also edit the corresponding Java file.

    If the database changes, or you change the mapping information, you can edit the mappings through this panel.

  17. Select OK.
  18. From the Properties window, select the References tab.
  19. Select the Resource Factory Reference property and select the button to view the Property Editor.

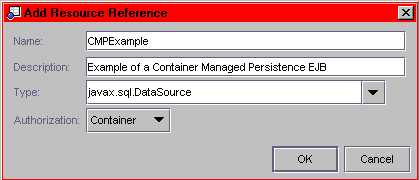
  20. Select Add to add the resource information for your database as follows:

    Name: CMPExample
    Description: Example of a Container Managed Persistence EJB
    Type: javax.sql.DataSource
    Authorization: Container

  21. Select OK to close the Add Resource Reference dialog.

  22. Now select OK to close the Resource Factory References Property Editor.

  23. From the Properties window, select the iPlanet AS tab.
  24. Select the Resource Reference Mappings property and select the button to view the Property Editor.
  25. In the JNDI Name field, enter jdbc/ directory then the name of the datasource on your database server.

    In this example, the datasource name of the database server being used is dbSol0. So, the full JNDI name specified is jdbc/dbSol0.

  26. Select OK.
  27. Close the Property Editor.
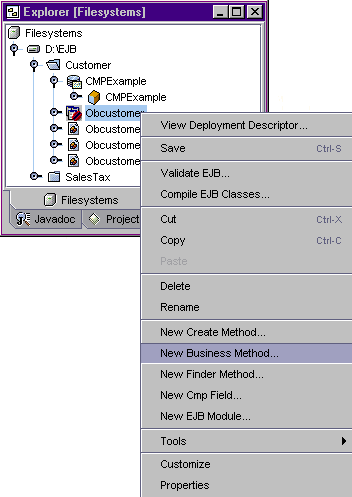
  28. From the Explorer, select the Obcustomer EJB node.
  29. Right click and select New Business Method.

    The New Business Method dialog appears.

  30. Enter the following data for each field:

    Name: setUsername
    Return Type: void
    Method Parameters: Select Add and enter the following data in the Enter Method Parameter dialog.

    Type: java.lang.String
    Name: Username

  31. Select Close to dismiss the Method Parameters dialog.
  32. The New Business Method dialog should appear as follows:

  33. Select OK to dismiss the New Business Method dialog.
  34. Select the Obcustomer EJB node again and right click to select New Business Method.

  35. Enter the following data for each field:

    Name: getUsername
    Return Type: java.lang.String

    The New Business Method dialog should appear as follows:

  36. Select OK to dismiss the New Business Method dialog.
  37. Select the Obcustomer EJB node once again and right click to select New Business Method.

  38. Enter the following data for each field:

    Name: getFirstname
    Return Type: java.lang.String

    The New Business Method dialog should appear as follows:

  39. Select OK to dismiss the New Business Method dialog.
  40. Select the Obcustomer EJB node for the last time and right click to select New Business Method.

  41. Enter the following data for each field:

    Name: getLastname
    Return Type: java.lang.String

    The New Business Method dialog should appear as follows:

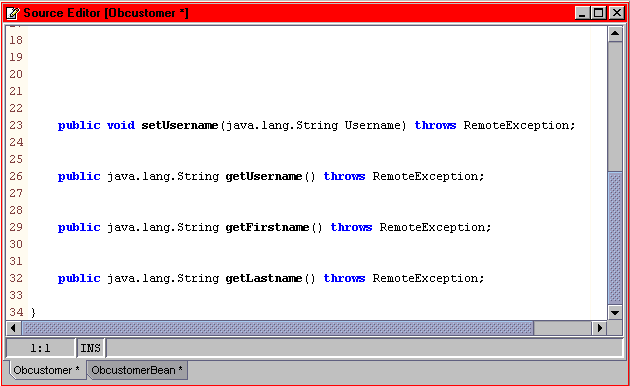
  42. From the Explorer, double click on the Obcustomer remote interface node to open it in the Source Editor.
  43. Verify that the business methods you just created have been added to the source code.

  44. Double click on the Obcustomer home interface node to open it in the source editor.
  45. Add the following create() method at the end of the file.

  46. Double click on the Obcustomer bean class to open it in the source editor.
  47. Verify that the business methods you created are in the bean class.
  48. Additionally, verify that the ejbCreate() and ejbPostCreate() methods are also in the bean class.
  49. Add the following code for each method:

  50. Select the Obcustomer EJB node.
  51. Right click to select Validate EJB... from the context menu.

    Once your EJB is validated, a "Finished" message is displayed in the status bar.

  52. Select the Obcustomer EJB node once more.
  53. Right click to select Compile EJB Classes... from the context menu.

    The Container Managed Persistence EJB is saved and the interfaces/classes are compiled. Once compilation is complete, the message "Finished Obcustomer" is displayed in the status bar.

  54. Select the Obcustomer EJB node once again.
  55. Right click and select New EJB Module... from the context menu.

    The EJBModule_Obcustomer module appears in the Explorer.

  56. From the Explorer, select the Runtime tab.
  57. Select the Data Sources node and right click to select the Add new Data Source... from the context menu.

  58. Enter the following data for each field:

    DataBase the server name (required only for a Sybase server so leave it blank)
    Database URL jdbc:oracle:thin:@<hostname>:<portnumber>:<servicename>
    DataSource your datasource name (in this example dbSol0 is used)
    Driver the registered driver name (see note below; in this example the registered driver is named Driver1)
    User Name <yourusername>
    Password <yourpassword>

    Note: Before you can run the driver, you must configure JDBC driver to identify the driver to the iPlanet Application Server. For complete configuration information post iPlanet Application Server installation, consult the iPlanet Application Server Version 6.0 Service Pack 2 Installation Guide, Appendix A: Configuring iPlanet Application Server, the section titled Third Party JDBC Driver Support.

    The newly created CMPExample datasource appears within the Data Sources node.

  59. Select the <datasourcename> node and right click to select Register from the context menu.

    Once the datasource is registered, the message "Deployment of iPlanet Application Server finished" is displayed in the status bar.

  60. From the Explorer Filesystems tab, select the EJBModule_Obcustomer node and right click to select Deploy EJB Module to iPlanet App Server from the context menu.

    After a few moments, the Output window displays indicating that deployment is finished.

    Also, the status message window displays the message "Deployment to iPlanet Application Server finished. KJS not restarted."

    You are now ready to create a servlet to call your Container Managed Persistence Bean. Follow the steps outlined in Part 6 for creating a tax calculator, but have the servlet call your CMP EJB.

To create a servlet that calls the CMP EJB:

  1. From the File menu, select New.
  2. From the Template Chooser, expand the JSP & Servlet node and select WebModule.
  3. Select Next.

  4. Select the button to create a new directory.
  5. Create a directory named EJBClient and select Add.
  6. Select Finish, then OK.
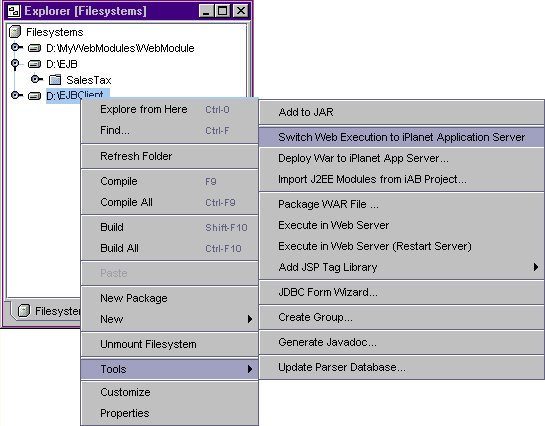
  7. Right click on the EJBClient node to select Tools -> Switch Web Execution to iPlanet Application Server from the context menu.

  8. From the Explorer, expand the EJBClient node and the WEB-INF node.
  9. Right click on the Classes node and select New Package from the context menu.
  10. In the Create New Package Name field enter CmpPack and select OK.

  11. Right click on the CmpPack node and select New -> JSP & Servlet -> Servlet.

  12. Enter ObClient in the name field and select Finish.
  13. Add the following imports to the start of the ObCLient.java file.

    import javax.ejb.*;
    import javax.naming.*;
    

  14. Edit the processRequest() method as follows:

    protected void processRequest(HttpServletRequest request, HttpServletResponse response) 
        throws ServletException, java.io.IOException { 
            response.setContentType("text/html"); 
            java.io.PrintWriter out = response.getWriter(); 
           String JNDI = "java:comp/env/Obcustomer"; 
           Object beanObject = null;
            out.println("<html>"); 
            out.println("<head>"); 
            out.println("<title>Servlet</title>"); 
            out.println("</head>"); 
            out.println("<body>"); 
            try 
            { 
                InitialContext ctx = new InitialContext(); 
                beanObject = ctx.lookup(JNDI); 
                System.out.println("Lookup OK"); 
                Customer.ObcustomerHome home = (Customer.ObcustomerHome) beanObject; 
                System.out.println("Before Home.create"); 
                Customer.Obcustomer remote = (Customer.Obcustomer) home.create("987654321", 
                "SRoberts","Mr","Steve","o","Roberts","Main Street","Suite 20", 
                "Santa Clara","CA","95054","4081112222","4082223333"); 
                out.println("<BR><h1>Welcome to the CMP Bean World!</h1></BR>"); 
                out.println("<h5>Inserting the Record for Steve Roberts in DB: "); 
                out.println("<BR>FirstName : " + remote.getFirstname()+"</BR>"); 
                out.println("<BR>LastName : " + remote.getLastname()+ "</BR>"); 
                out.println("<BR>UserID : " + remote.getUsername()+"</BR>"); 
                out.println("<P> Changing the UserID for Steve Roberts from " + 
                remote.getUsername() + " to " + "Roberts :</P>"); 
                remote.setUsername("Roberts"); 
                out.println("<BR>Accesing DB for UserID for Steve Roberts: </BR>"); 
                out.println("<BR> The UserID for Steve Roberts now is : " + remote.getUsername()+ "</BR>"); 
                remote = (Customer.Obcustomer) home.create("876543219","LHall","Mr","Larry", 
                "M","Hall","South Street","#89","Santa Clara","CA","95054","4088889999","4086667777"); 
                remote = (Customer.Obcustomer) home.create("789123456","LAllen","Mrs","Lora","C", 
                "Allen","First Street","# 1895","Santa Clara","CA","95054","4083334444","4085558888"); 
                System.out.println("Now calling findByPrimaryKey"); 
                Customer.Obcustomer primKey = home.findByPrimaryKey("876543219");
    	    String id = (String) primKey.getPrimaryKey();
                System.out.println("The primary Key is:" + id); 
                out.println("<P> Using findByPrimaryKey : Getting User record for SSN =" + id); 
                out.println("<BR> FirstName : " + primKey.getFirstname()+"</BR>"); 
                out.println(" <BR>LastName : " + primKey.getLastname()+"</BR>"); 
                out.println("<BR> UserID : " + primKey.getUsername()+"</BR>"); 
                } 
                catch (Exception ex) 
                { 
                System.err.println("Caught an exception." ); 
                ex.printStackTrace(); 
                } 
              out.println("</body>"); 
              out.println("</html>"); 
              out.close(); 
        } 
    

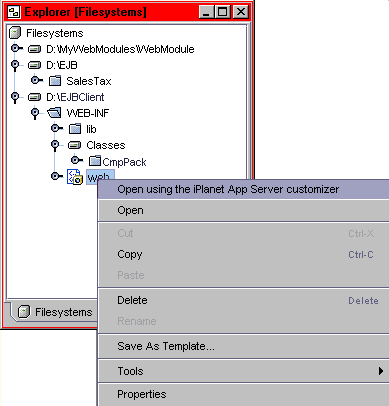
  15. Right click on the Web node and select Open using the iPlanet App Server customizer from the context menu.

  16. Select the References tab.
  17. Select the Add button (at the bottom of the window) to add a reference to to an EJB defined elsewhere.
  18. Enter the following data in each field:

    Reference The name of the EJB as specified in your code. In this example, the name is Obcustomer.
    Linked to Bean The name of the bean used to generate the JNDI name. In this Example the name is EJBModule_Obcustomer/Obcustomer.
    Bean Type The type of bean you are creating is an entity bean.
    Bean Home Interface The actual class name of the Home Interface. In this example the name is Customer.ObcustomerHome.
    Bean Remote Interface The actual class name of the Remote Interface. In this example the name is Customer.Obcustomer.

    Once you enter the data in each field, be sure to press Enter so your entry can take effect.

  19. Select OK.
  20. Right click on the ObClient file and select Compile from the context menu.

    You must compile before deploying for the first time.

  21. Right click on the ObClient file once more and select Execute from the context menu.

    The WAR is packaged and deployed. The Forte Web Browser launches and displays the following screen.

See also
  Performing Remote Debugging


Legal Notices