You can localize iPlanet Application Server web modules using Forte for Java. In this section, you will create an application that will ask the user's prefered language and name and display "hello" message in the prefered language.
Making the web application display in a new language, other than the languge it was initially developed on, involves 3 separate tasks. First, I18N support must be enabled on iPlanet Application Server. Second, you need to write the application to output in a new language, including creating localized JSP pages for existing JSP pages. Third, ias-web.xml deployment descriptor should be updated.
To use built-in support for internationalization, you must turn it on first. The detailed information of this topic can be found in Administrator's Guide book of iPlanet Application Server. In this subsection, you will use the Administration Tool to enable the internationalization support. To enable it:
![]() if the iPlanet Application Server node is not displayed under the Installed Servers node, then the integration modules is not installed or it is not enabled.
if the iPlanet Application Server node is not displayed under the Installed Servers node, then the integration modules is not installed or it is not enabled.

If you have enabled I18N Support during the installation, the checkbox should already be checked when you selected the iAS1 node. In this case, you may close the Administration Tool window and skip the rest of steps in this subsection.
You will be prompted to restart the iPlanet Application Server.

iascontrol kill -instance
iascontrol start -instance
On Windows, run the following two commands:
iascontroll kill
iascontrol start
iPlanet Application Server will now stop and start again.
You will now create an web application that prints hello in English and Japanese. The application consists of four files. The first page, named Hello2.jsp, asks for the prefered language and the user's name. When users select the submit button, a servlet, named Hello2Servlet, receives the request and redirects it to either LocalHello.jsp or LocalHello_ja.jsp depending on the language specified. As the name suggets, LocalHello_ja.jsp will output the Japanese greeting.
The files will be included in the web module that was created in the Creating a JavaServer Page section of this tutorial. To create the application:
See Creating a JavaServer Page for details.
<%@page contentType="text/html"%>
<html>
<head><title>JSP Page</title></head>
<body>
<h2>Multilingual</h2>
<FORM ACTION="servlet/myPackage/Hello2Servlet" METHOD="post" NAME="Form1">
Select preferred language: <br>
<SELECT NAME="locale" SIZE="3">
<OPTION selected value="">None</OPTION>
<OPTION          value="en">English</OPTION>
<OPTION          value="ja">Japanese</OPTION>
</SELECT><br><br>
Enter your name:<br>
<input TYPE="text" NAME="name" SIZE="30">
<input TYPE="SUBMIT" NAME="ok" VALUE="submit">
</FORM>
</body>
</html>
protected void processRequest(HttpServletRequest request, HttpServletResponse response)
throws ServletException, java.io.IOException {
   String locale = request.getParameter("locale");
   String name = request.getParameter("name");
   request.setAttribute("name", name);
   com.kivasoft.util.GX.SetLocale(locale);
   RequestDispatcher dispatcher = getServletContext().getRequestDispatcher("/LocalHello.jsp");
   dispatcher.forward(request, response);
}
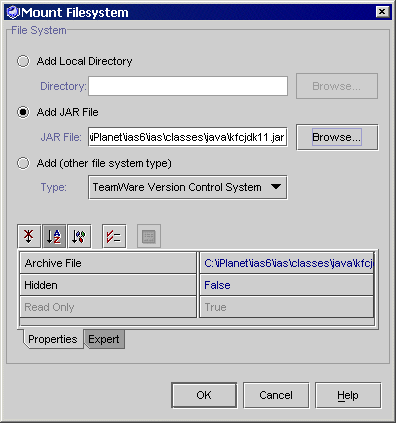
The com.kivasoft.util.GX package, used in the processRequest method in Hello2Servlet.java, is included in kfcjdk11.jar. The JAR file is mounted so that the servlet can be compiled in the IDE.
This JSP page will output a message in the English language.
<%@page contentType="text/html; charset=UTF8"%>
<html>
<head><title>English Hello Page</title></head>
<body>
<p><h2>Hello, <%= request.getAttribute("name") %>!</h2></p>
</body>
</html>
![]() The page must be saved in UTF-8 encoding.
The page must be saved in UTF-8 encoding.
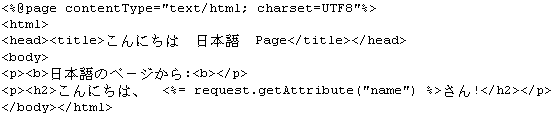
This JSP page will output a message in the Japanese language.
![]() You can download the code by right-clicking on the code above and selecting Save Link As...
You can download the code by right-clicking on the code above and selecting Save Link As...
![]() The page must be saved in UTF-8 encoding.
The page must be saved in UTF-8 encoding.
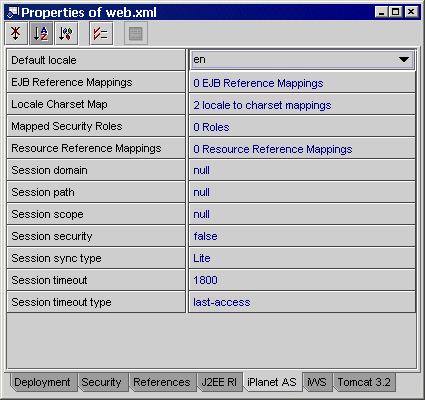
In this subsection, you will specify English as a default language and choose UTF8 as an encoding scheme for both Japanese and English languages in the deployment descriptor. To update the deployment descriptor:

 button for Locale Charet Map field.
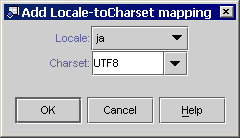
The Property Editor: Locale Charset Map window should contain the two entries you just created.

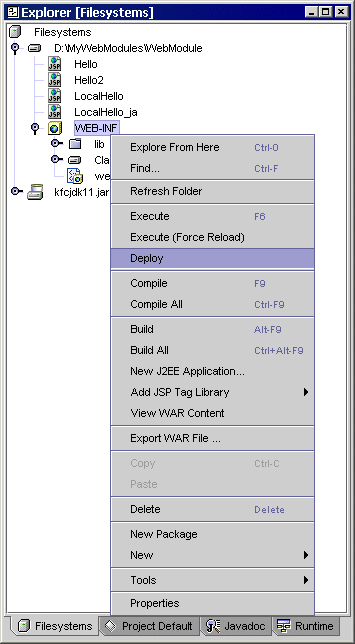
Now, the application is ready to be deployed and run.

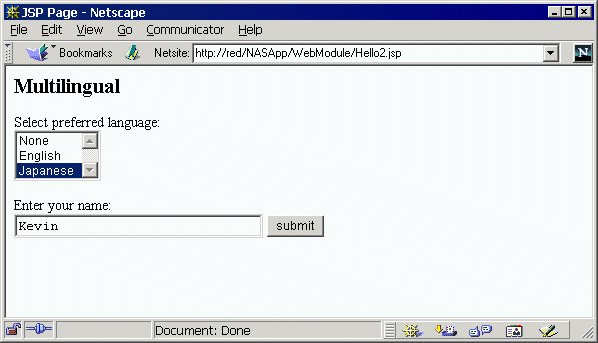
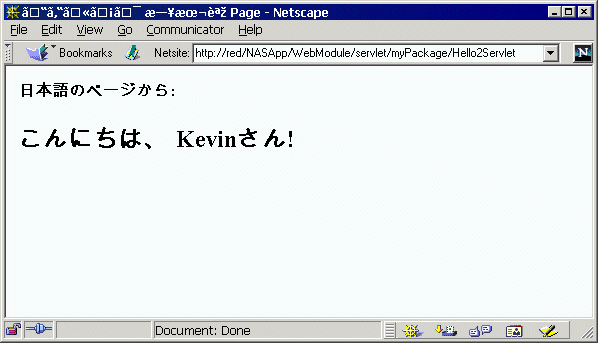
If you select None for the preferred language and submit your name, you will see the greeting in English as it was selected to be the default locale. If you select Japanese, the browser displays the greeting in Japanese, as shown below. You might have to configure the system before the Japanese characters are displayed properly.
The next step in the iPlanet Application Server Integration Module Tutorial is creating a session Enterprise Java Bean.
| © 2002 Sun Microsystems, Inc. | terms of use privacy policy feedback |