Figure 15: Add Broker Destination
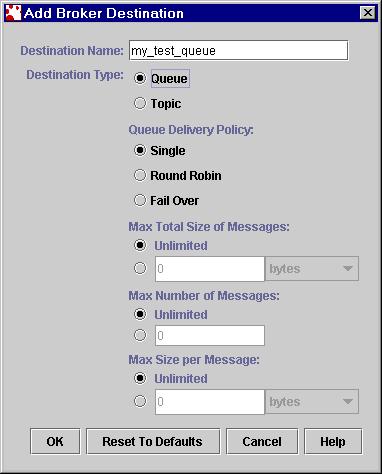
Creating a Physical Destination
If autocreate is off for queues and topics, the client application will not be able to run successfully if the destination that the application refers to does not exist on the broker.
You can create a physical destination using jmqadmin. Follow steps 1-5 in the previous page to connect to the broker, if you have not already done it, and then follow the steps outlined below.
Figure 15: Add Broker Destination
Tips using jmqcmd:
If you want to use jmqcmd to create a physical queue destination, execute
the following command.
jmqcmd create dst -t q -n my_test_queue -u admin -p admin
Once the physical destination is created, you are ready to run your
client application.
<<Back << >> Next>> <<Return to TOC>>