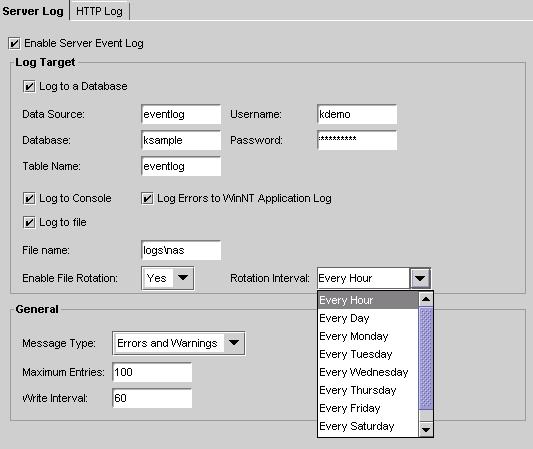
Click the Logging button on the NAS Administrator toolbar to open the Logging window.
Select the Enable Server Event Log checkbox.

In the Log Target box, choose the type of logging to enable by clicking the Log to a Database, Log to Windows NT Application Log (Errors Only), and/or Log to File checkbox(es). You can disable console logging by deselecting the Log to Console checkbox.