This chapter describes how to administer applications on multiple Netscape Application Server (NAS) machines using NAS Administrator.
Hosting Applications Locally on Multiple Servers
Hosting Partitioned Applications on Multiple Servers
Hosting and Deploying Applications for Load Balancing
Changing Attributes of Distributed Application Components
Distribute applications or parts of applications across two or more servers to specialize request and application processing.
Duplicate application components on two or more servers to increase application performance with load balancing.
Deploy the complete application to all participating NAS machines using the Deployment Manager.
Enable load balancing, which will allow each server to find application components hosted on other servers.
Disable specific application components on a server-by-server basis, leaving no component enabled on more than one server.
See Disabling an Application Component
Launch the Deployment Manager.
Deploy the JAR files containing the application components you want to load balance to each application server participating in load balancing.
When you deploy a JAR file to an application server, the file's application components are registered with a single directory server shared by multiple application servers in a directory server cluster. All application servers in this cluster can "see" the registered application components. However, you must still deploy the JAR file to each application server participating in load balancing.
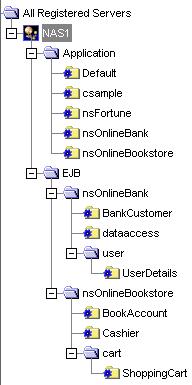
Open the Application window of NAS Administrator.
In the left pane of the Application window, click the server whose application components you want to partition.
Deployed application components appear in the right pane of the Application window.
Be sure the application components that appear in the right pane of the Application window are actually installed on the NAS machine you selected in step 4:
Select an application component in the right pane of the Application window.
Click the Application Component Properties button.
A dialog box appears displaying the application servers where the component is installed. If the selected NAS machine is not listed, you must deploy the JAR file containing the necessary application components to that machine.
Click OK to dismiss the dialog box.
Click Apply Changes for each NAS machine to which you make changes.
On the NAS Administrator toolbar, click the Application button to open the Application window.
In the left pane of the Application window, double-click the server where the application to be upgraded resides.
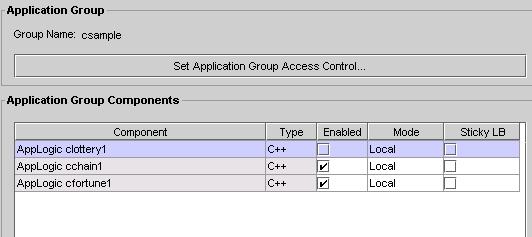
Select the folder containing the application components to disable.
In the right pane of the Application window, select the component to disable.
Click the Enabled checkbox to deselect and disable it.
Repeat steps 2 through 5 for each application component you want to disable.
Click Toggle Enabled if you want to disable all the application components in a group.
To enable application components, click their corresponding Enabled checkboxes to select them.
Click Apply Changes to save your changes to your NAS machine.
Balancing application loads between the deployment server and the destination server or servers (joining the distributed servers).
Balancing loads only between the destination servers, if deploying to more than one NAS machine.
Deploy the application locally to the server or servers (no load balancing).
In the left pane of the Application window, double-click the server for which you want to change application settings.
Select the group of application components you want to modify.
In the right pane of the Application window, select each application component for which you want to change the distribution level.
In the Mode column, change the distribution level.
If you are changing the distribution level for all components in the selected group, click Toggle Mode. All application components are updated simultaneously.
If you are modifying the Mode from Local to Distributed, you must modify the application properties to specify across which NAS machines load balancing is to occur.
If you are modifying the Mode from Distributed to Local, there is nothing more you need to do.
When you change an application component's Mode to Distributed, all registered servers appearing in the left pane of the Application window are added to that application component's server list. You can access the server list by clicking the Application Component Properties button.
In the left pane, under Registered Servers, choose which NAS machines will participate in load balancing of the selected application component. The application component must be installed on each NAS machine participating in load balancing.
If you need to register additional application servers, go to the File menu and choose New, then choose Server.
Repeat these steps for each application component.
Click Apply Changes to save your changes to the NAS machine.