| Previous Contents Index DocHome Next |
| SellerXpert 4.1 SP1 Installation Guide |
Chapter 2 Installing Oracle Database
This chapter provides information about installing the Oracle 8.1.6 Database Server Standard or Enterprise Edition for Solaris 8 operating systems. You must install this software before installing SellerXpert.Detailed information regarding Oracle products can be found in the Oracle documentation set.
Note The following instructions are only guidelines for installing Oracle software. Your individual Oracle configuration may be different.
The following sections are contained in this chapter:
Hardware Requirements
Hardware Requirements
Before installing Oracle, make sure that your hardware is sufficient. You should have the following on your system:This will allow you to perform a typical installation to create a simple database for prototyping. A real implementation will require more RAM and more disk space.
The following assumptions are made for this example of an Oracle installation:
Note The following steps are for installing Oracle 8.1.6 Database Server Enterprise Edition only.
Start the installation process as root:
Create a directory for Oracle installation:
Create a Unix group that will be used by Oracle:
Create a Unix user that will be the Oracle owner:
%useradd -g dba -d /export/oracle8 -s /bin/csh oracle
Change the ownership of the Oracle directory:
%chown oracle:dba /export/oracle8
Create a password for oracle user:
In any text editor, open the /etc/system file and append the following lines:
set shmsys:shminfo_shmmax=4294967295
set semsys:seminfo_semmns=4096
set semsys:seminfo_semmnu=4096
set semsys:seminfo_semvmx=32767
set msgsys:msginfo_msgmap=1024
set msgsys:msginfo_msgmax=8192
set msgsys:msginfo_msgmnb=65535
set msgsys:msginfo_msgmni=1024
set msgsys:msginfo_msgssz=2048
set msgsys:msginfo_msgtql=1024
set msgsys:msginfo_msgseg=4096
Add the following lines to your .cshrc file:
setenv ORACLE_BASE /export/oracle8
setenv ORACLE_HOME /export/oracle8
setenv PATH $ORACLE_HOME/bin:$PATH
setenv LD_LIBRARY_PATH/export/Oracle8/lib:$LD_LIBRARY_PATH
setenv TNS_ADMIN /export/oracle8/network/admin
setenv NLS_LANG AMERICAN_AMERICA.US7ASCII
Note If you want to use character set UTF8, then change:
Enter the following commands to boot the system:
After the system is booted, change the user to oracle:
Make sure that you have sourced the .cshrc file.
%setenv DISPLAY <hostname>:0.0
From another terminal window (that does not have Oracle as the user), type:
From the Oracle CD, type:
- This will allow the database installation to display on your screen.
When the welcome screen displays, click Next.
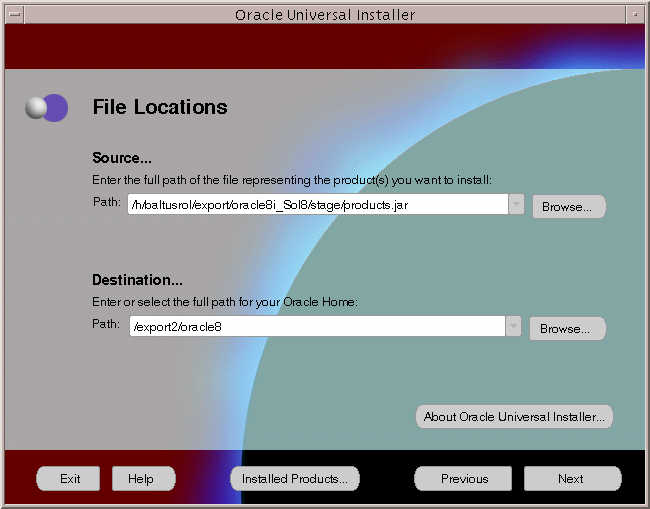
The File Locations screen displays. Leave the Source field unchanged. The Destination field will show the ORACLE_HOME value that you have set in your environment. Click Next.
The Unix Group Name screen displays. Enter the name of the Unix group you created earlier for Oracle (dba). Click Next.
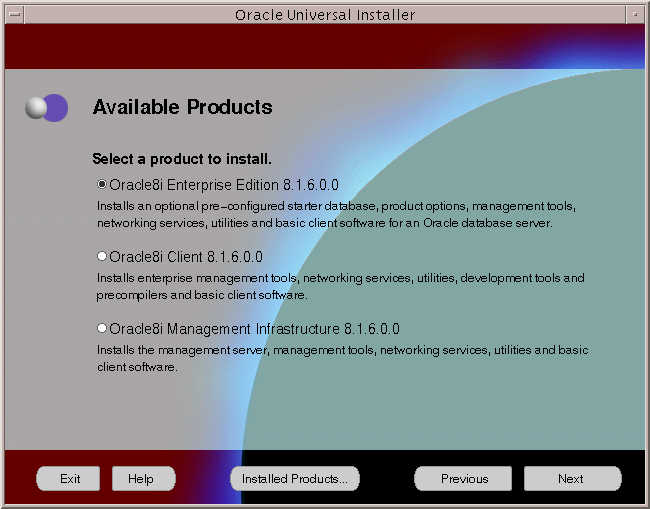
The Available Products screen displays. Choose Oracle8i Enterprise Edition 8.1.6.0.0 and click Next.
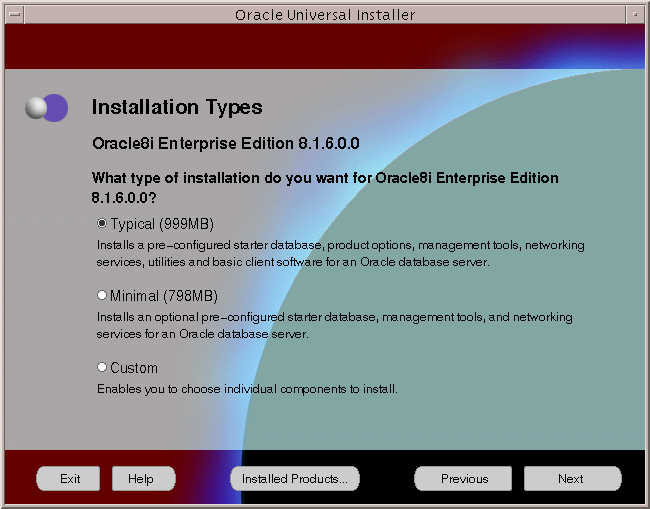
The Installation Types screen displays. Select the Typical install to get a basic set of Oracle software installed and click Next.
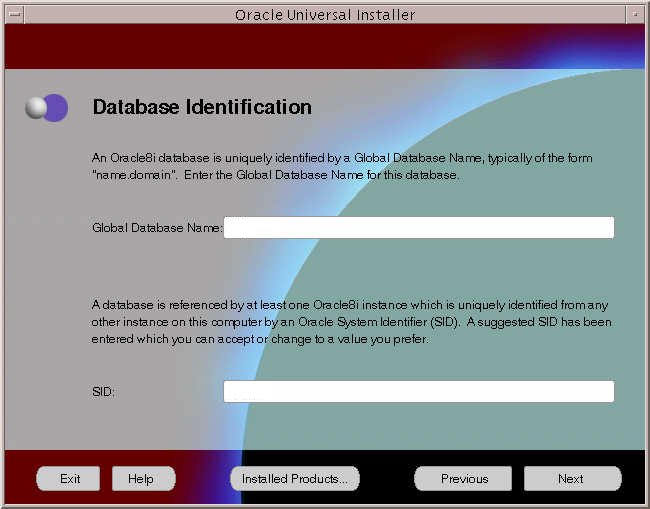
The Database Identification screen displays. Enter the ORACLE_SID you are creating for both the Global Database Name and SID and click Next.
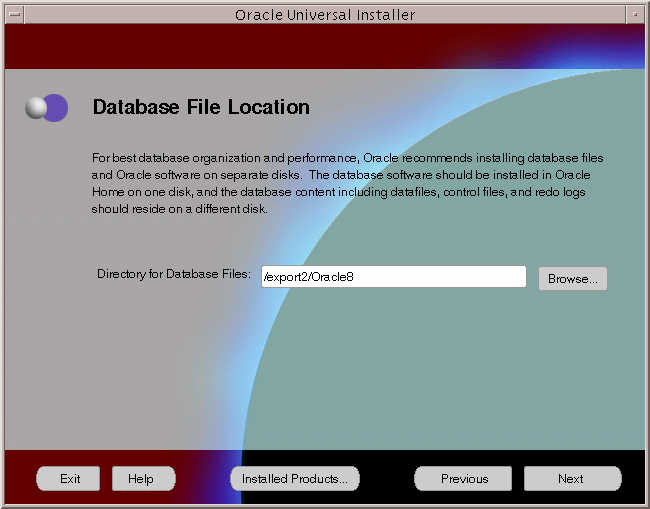
The Database File Location screen displays. Enter the directory you have created earlier to install Oracle and click Next.
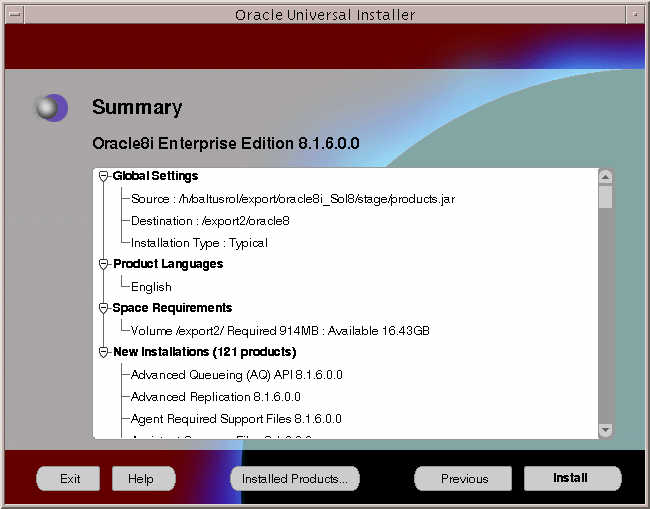
The Summary screen displays. Review all the selections you have made to confirm that they are correct and click Install.
During installation, a Setup Privileges window displays. The installation will pause at this point, waiting for you to run a script as root. Follow the instructions and run the root.sh script as a root user.
After executing the script, click OK, and then click Next.
When Oracle installation has completed, a screen displays the database information. Verify that information and click OK.
This is the end of Oracle Installation. Click Exit.
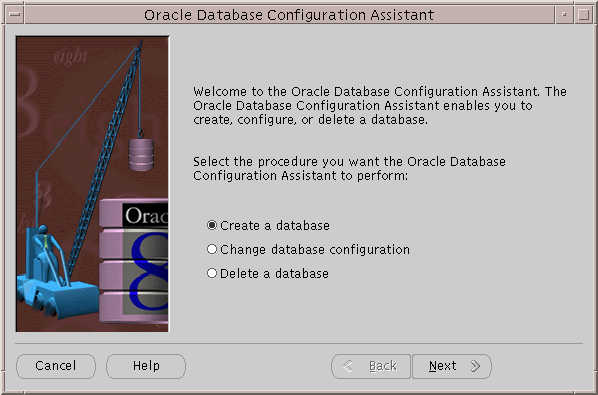
During the installation, a default database instance is created. The instance is created in the name that you have provided in the Database Identification screen. You do not want to use this instance since it is not configured to SellerXpert's specification. You need to remove this instance by executing dbassist from <ORACLE_HOME>/bin directory and select delete a database.
Click Next. Then, select the database instance (there should only be one instance since you just created the database server).
Create an Oracle Instance
The following procedures are to create an Oracle instance that is configured to SellerXpert 4.1.
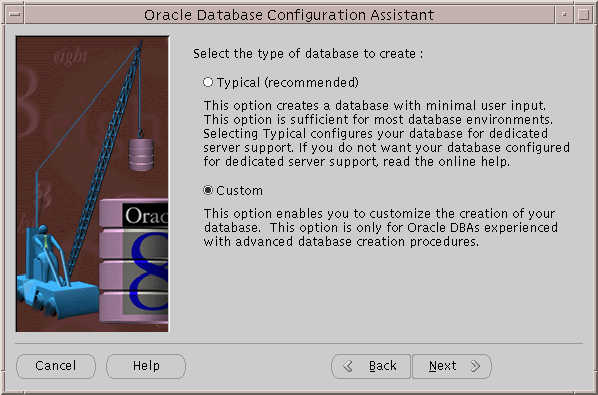
You now need to create an Oracle instance that is configured to SellerXpert's specification. Execute dbassist from <ORACLE_HOME>/bin directory and select create a database. Click Next.
This process may take approximately 2-3 hours.
To configure to SellerXpert's specification, you need to customize the creation of the database instance. Select the custom option and click Next.
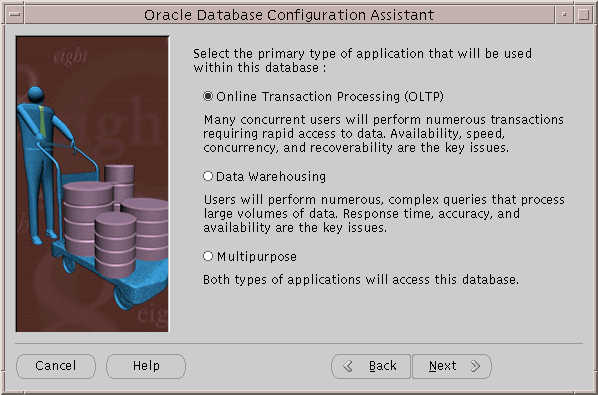
Select Online Transaction Processing (OLTP) and click Next.
When the next screen displays, enter the approximate number of users to be concurrently (simultaneously) connected to the database at any given time. Oracle Database Configuration Assistant uses this value and the information you provided about your database environment on the previous screen to set rollback information and various initialization file parameters.
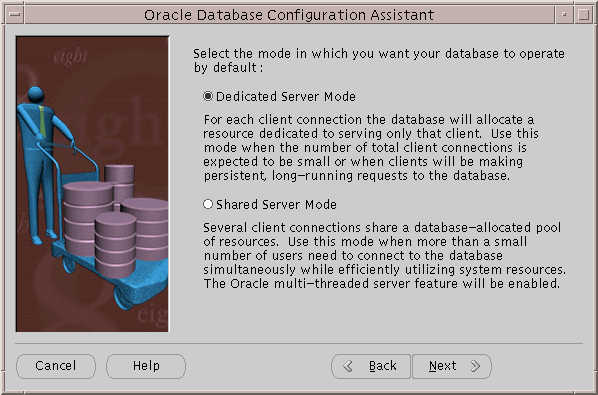
Select Dedicated Server Mode, since only a small amount of SellerXpert will be using this instance. Click Next.
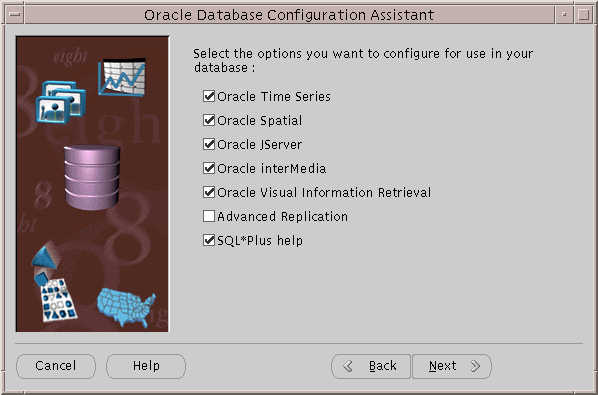
Click the following check boxes and click Next:
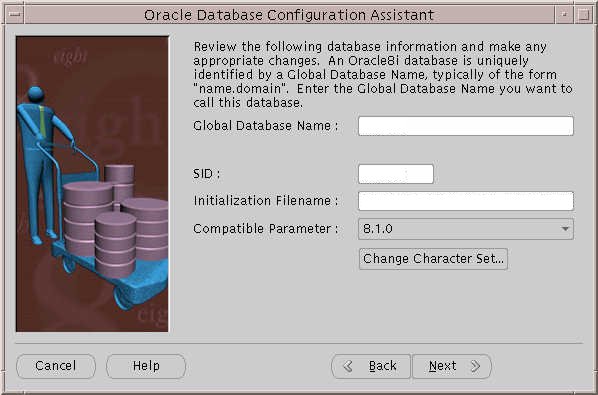
Enter the database name and SID. If your NLS_LANG is set to UTF-8, then the character set is UTF-8. If you like to change it, click Change Character Set... and make sure that the environment NLS_LANG is set to the character set that you selected. Click Next.
- Oracle Time Series
- Oracle Spatial
- Oracle JServer
- Oracle InterMedia
- Oracle Visual Information Retrieval
- SQL*Plus help
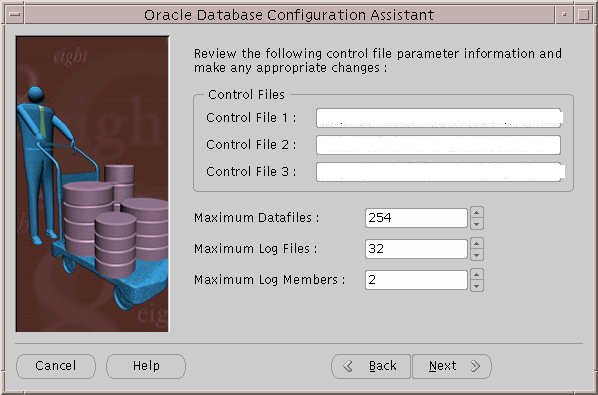
Enter the location of the control files. The recommended parameters are:
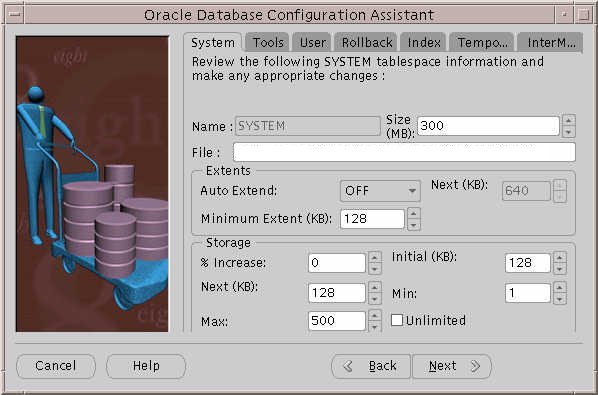
Enter the system tablespace information. The recommended parameters are:
- Maximum Datafiles: 254
- Maximum Log Files: 32
- Maximum Log Members: 2
Note The next steps are for entering the tablespace information.
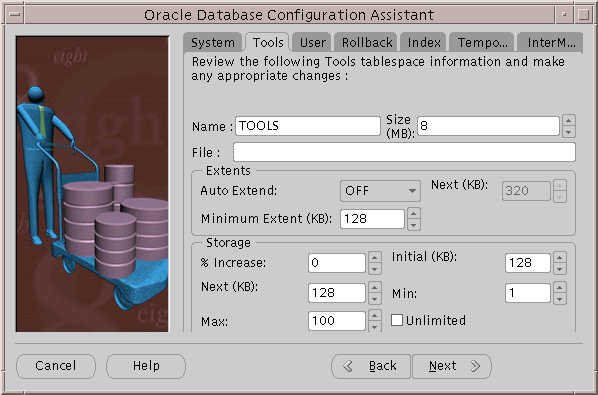
Click the Tools tab and enter the tools tablespace information. The recommended parameters are:
- Size (MB): 300
- Auto Extend: OFF
- Minimum Extent (KB): 128
- %Increase: 0
- Initial (KB): 128
- Next (KB): 128
- Min: 1
- Max: 500
- Enter the location where you want to save the system01.dbf file and click Next.
Click the User tab and enter the user tablespace information. The recommended parameters are:
- Name: TOOLS
- Size (MB): 8
- Auto Extend: OFF
- Minimum Extent (KB): 128
- %Increase: 0
- Initial (KB): 128
- Next (KB): 128
- Min: 1
- Max: 100
- Enter the location where you want to save the tools01.dbf file and click Next.
Click the Rollback tab and enter the rollback tablespace information. The recommended parameters are:
- Name: TS01
- Size (MB): 500
- Auto Extend: OFF
- Minimum Extent (KB): 128
- %Increase: 0
- Initial (KB): 128
- Next (KB): 128
- Min: 1
- Max: 500
- Enter the location where you want to save the ts01.dbf file and click Next.
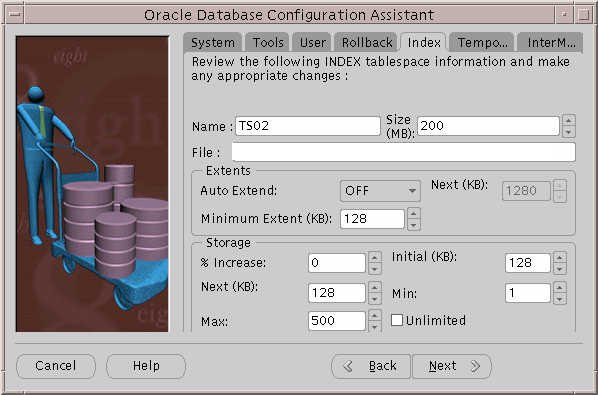
Click on the Index tab and enter the index tablespace information. The recommended parameters are:
- NAME: RBS
- Size (MB): 200
- Auto Extend: OFF
- Minimum Extent (KB): 2048
- %Increase: 0
- Initial (KB): 1024
- Next (KB): 1024
- Min: 2
- Max: 500
- Enter the location where you want to save rbs01.dbf file and click Next.
Click the Temporary tab and enter the temporary tablespace information. The recommended parameters are:
- Name: TS02
- Size (MB): 200
- Auto Extend: OFF
- Minimum Extent (KB): 128
- %Increase 0
- Initial (KB): 128
- Next (KB): 128
- Min: 1
- Max: 500
- Enter the location where you want to save the indx01.dbf file and click Next.
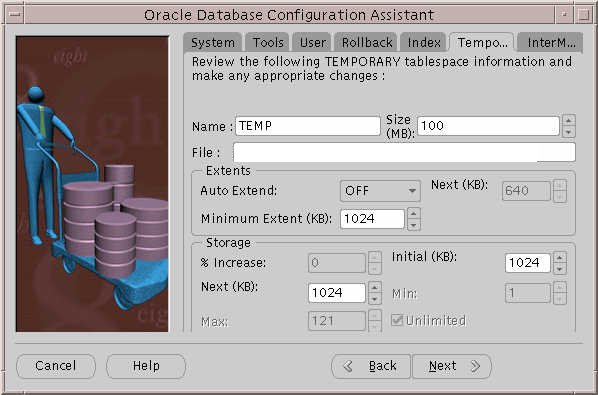
Click the InterMedia tab and enter the InterMedia tablespace information. The recommended parameters are:
- Name: TEMP
- Size (MB): 100
- Auto Extend: OFF
- Minimum Extent (KB): 2048
- Initial (KB): 1024
- Next (KB): 1024
- Enter the location where you want to save the temp01.dbf file and click Next.
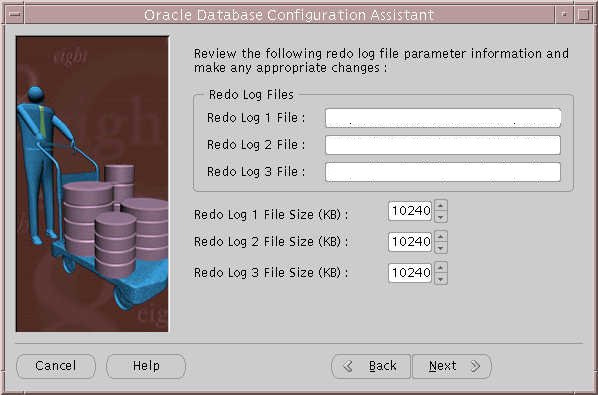
Enter the redo log file location and the file size. The recommended file sizes are:
- Name: DRSYS
- Size (MB): 300
- Auto Extend: OFF
- Minimum Extent (KB): 128
- %Increase 0
- Initial (KB): 128
- Next (KB): 128
- Min: 1
- Max: 500
- Enter the location where you want to save the drsys01.dbf file and click Next.
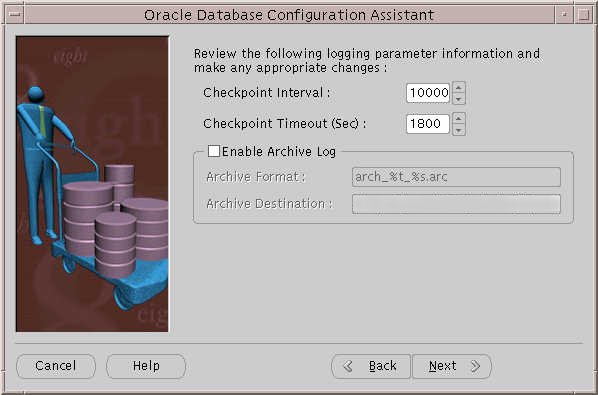
Enter the login parameter information. The recommend parameters are:
- Redo Log 1 File Size (KB): 10240
- Redo Log 2 File Size (KB) 10240
- Redo Log 3 File Size (KB): 10240
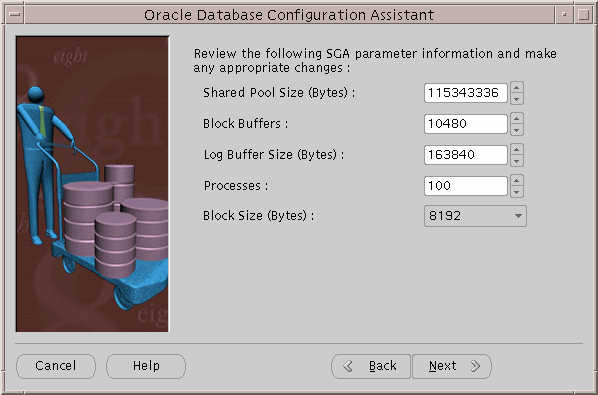
Enter the System Global Area (SGA) information. The recommended parameters are:
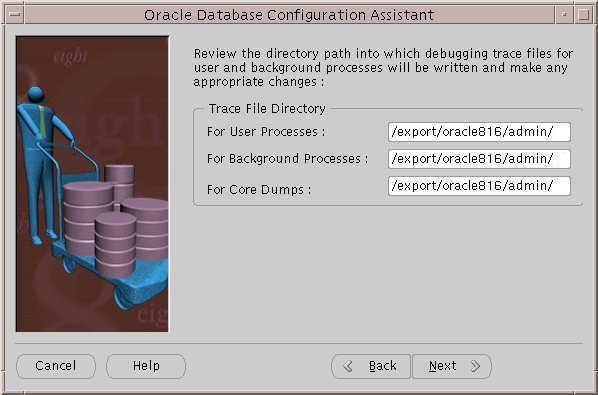
Review the directory paths and make any appropriate changes. Click Next.
- Shared Pool Size (Bytes): 115343336
- Block Buffers: 10480
- Log Buffer Size (Bytes): 163840
- Processes: 100
- Block Size (Bytes): 8192
- (block size is very important - make sure you have at least 8192 bytes)
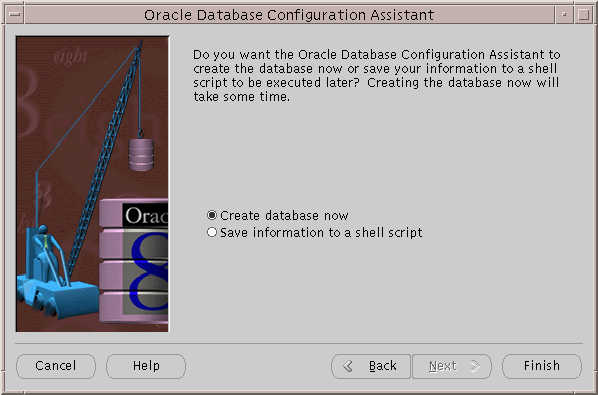
The final create a database screen displays. Select Create Database Now and click Finish.
After completion of creating the database instance, stop the Oracle instance.
This concludes the Oracle installation.To make sure listener is running:
If listener is not running, start the listener by typing:
In the init<ORACLE_SID>.ora file located in ORACLE_HOME/admin/XXX/pfile directory make the following modifications:
#uncomment rollback_segments, where x can go up to 25
rollback_segments = ( RBS0, RBS1, RBS2, RBS3, RBS4, RBS5, RBS6, ...RBSx )
#modify or add optimizer_max_permutation and set it to 1000
optimizer_max_permutations = 1000
#Verify that remote login is commented
#remote_login_passwordfile=exclusive
#remove or comment out the line


Previous Contents Index DocHome Next
Copyright © 2001 Sun Microsystems, Inc. Some preexisting portions Copyright © 2001 Netscape Communications Corp. All rights reserved.
Last Updated September 07, 2001