| Previous Contents Index DocHome Next |
| SellerXpert 4.1 SP1 Installation Guide |
Chapter 3 Installing iPlanet Servers Software
This chapter provides installation procedures for the iPlanet Web Server (iWS) and the iPlanet Application Server (iAS) software that you must install before installing SellerXpert.
Note This is information as it pertains to installing and operating SellerXpert only; for detailed information on these software programs, see:
The following sections are contained in this chapter:
What You Should Know About the iPlanet Application Server
When you follow these procedures to install the servers software, you will be able to install SellerXpert with sample data.
What You Should Know About the iPlanet Application Server
The iPlanet Application Server (iAS) is the primary engine of SellerXpert. The Application Server goes one-step further than the web-enablement functionality of the Web Server by providing powerful transaction processing features, and integrates with existing information systems and applications.
Application Server Components
The following describes the components that install with the iPlanet Application Server:
The Application Server includes the Administration Server, the Web Connector plug-in used to communicate between the iPlanet Application Server and the Web Server, and the Deployment Tool.
The Console provides the common user interfaces for all iPlanet server products. It allows you to perform common server administration functions such as stopping and starting servers, installing new server instances, and managing user and group information. The Console can be installed by itself (standalone) on any machine on your network and used to manage remote servers.
The Administration Server is a common front-end to all iPlanet servers. It receives communications from the Console, and sends them on to the appropriate iPlanet server. Your site will have at least one Administration Server for each server root in which you have installed an iPlanet server.
The Directory Server is iPlanet's LDAP implementation. The Directory Server runs as the slapd service on an NT machine, and ns-slapd on Solaris. This server manages the directory databases and responds to client requests.
Installing iPlanet Web Server (iWS)
Note Before installing iWS, make sure you are in the right user and group. If not, create the user and group.
Unpack the iWS distribution and run the setup executable to launch the installer:
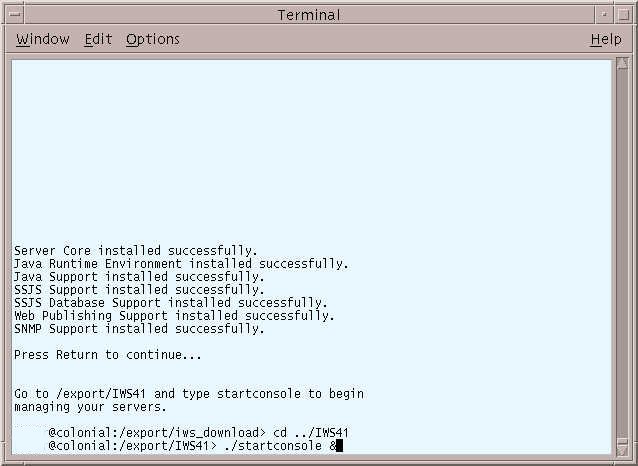
The iWS is now running.# gzcat IWS_tar_file.tar.gz|tar xvf -
The Welcome screen displays. Press Enter to continue.
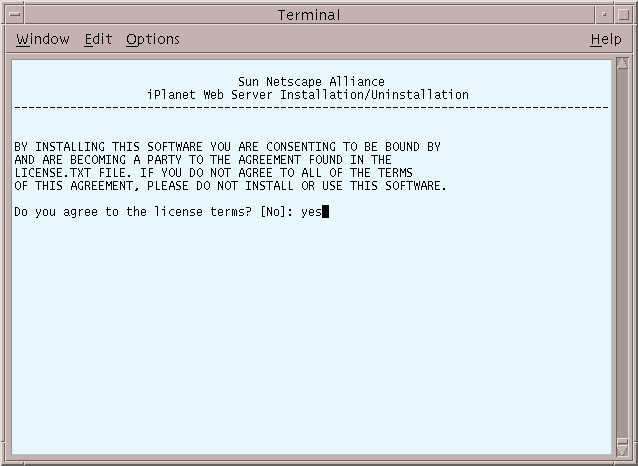
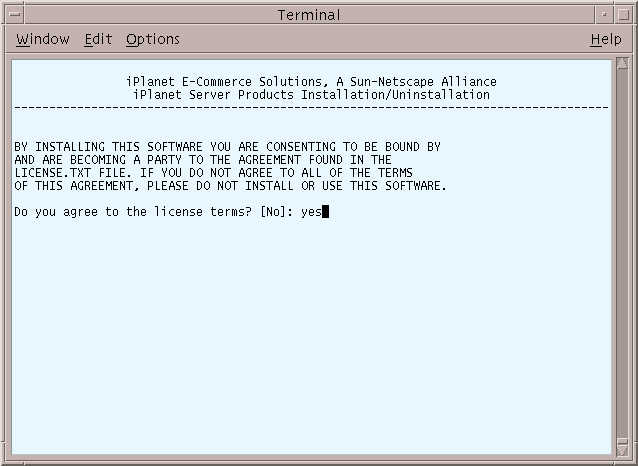
The Licensing Agreement screen displays. Type Yes to continue.
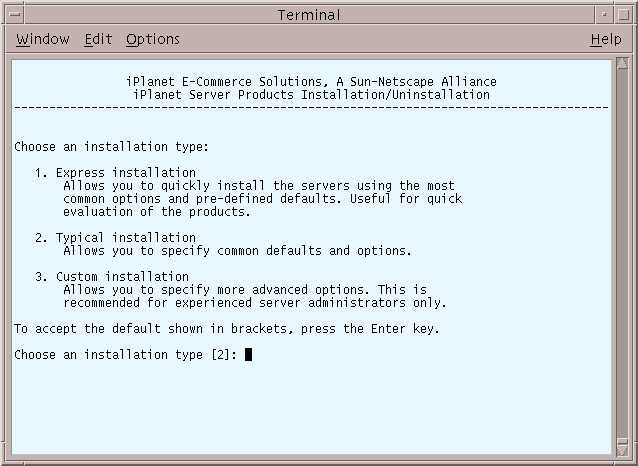
The Installation Type screen displays. Press Enter to accept a typical install.
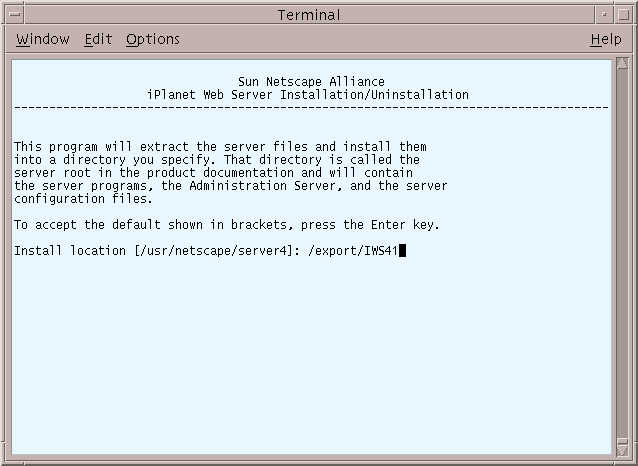
The Extracting Server Files screen displays. Type the location where you want to install iWS. The installer will create this directory.
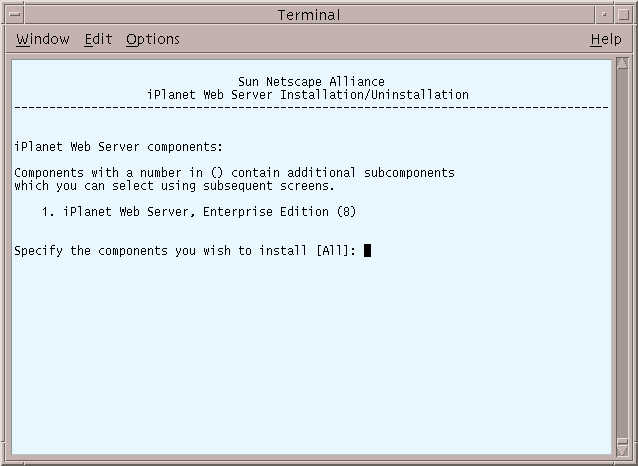
The Web Server Component screen displays. Press Enter to specify all the components.
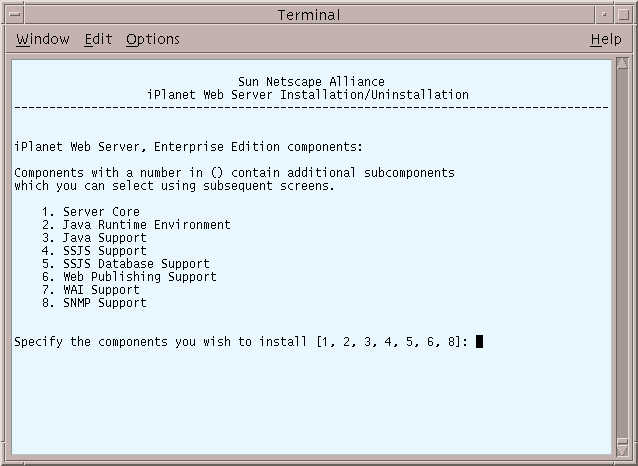
The Additional Web Server Components screen displays. Press Enter to specify all the components listed.
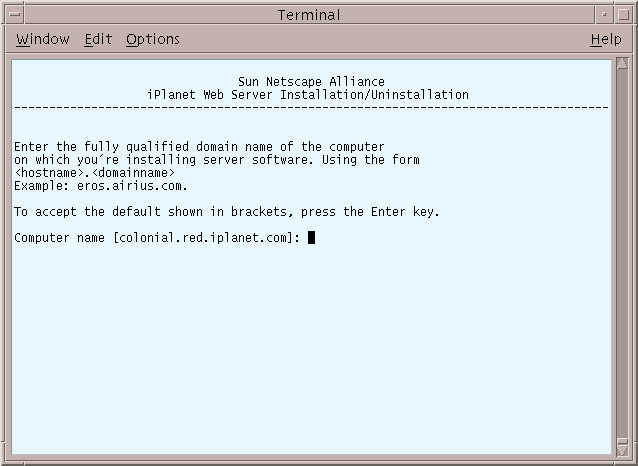
When this screen displays, read the instructions, verify that this is the correct computer name and press Enter. If it is not, enter the correct domain and press Enter.
The Choosing a Unix User and Group screens display. The default should be chosen only if you want iWS to use the displayed Unix user and group to run iWS. Press Enter to accept the default or enter a Unix user and group.
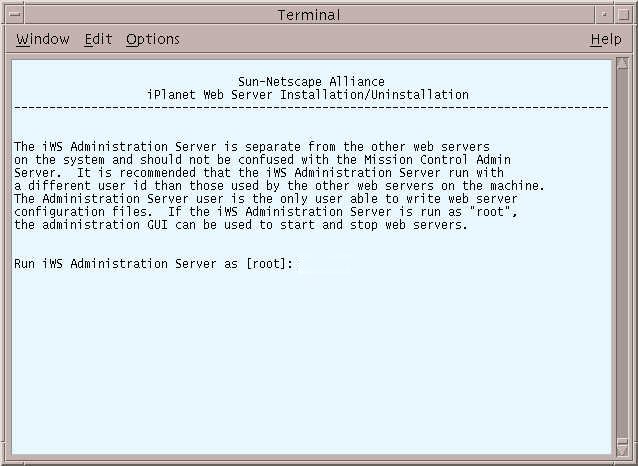
The iWS Administration Server User Name screen displays. Press Enter to accept the default, or enter a new iWS username.
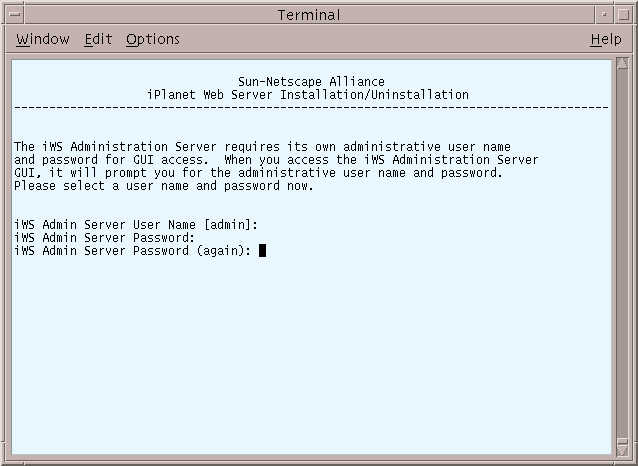
Create a password and enter it twice. This password will be used to access the administration of iWS.
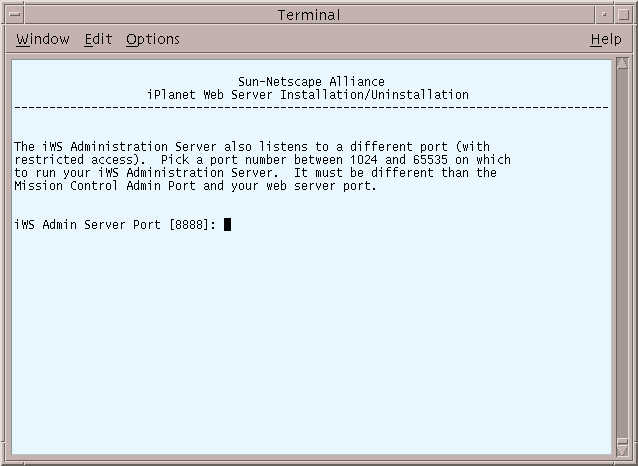
At the next screen, type your iWS administration server port number. You can use the default port number, 8888.
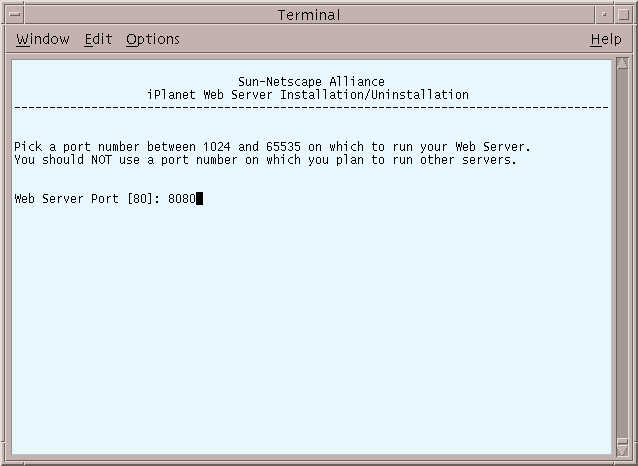
At the next screen, enter your iWS port number. The default shown is 8080.
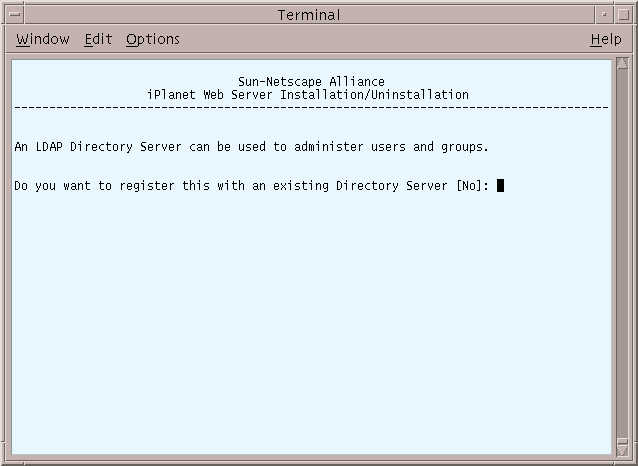
The LDAP Directory Server screen displays. If other iPlanet products have been installed on this network, you can unify the administration of the separate servers by typing Y and entering the necessary information.
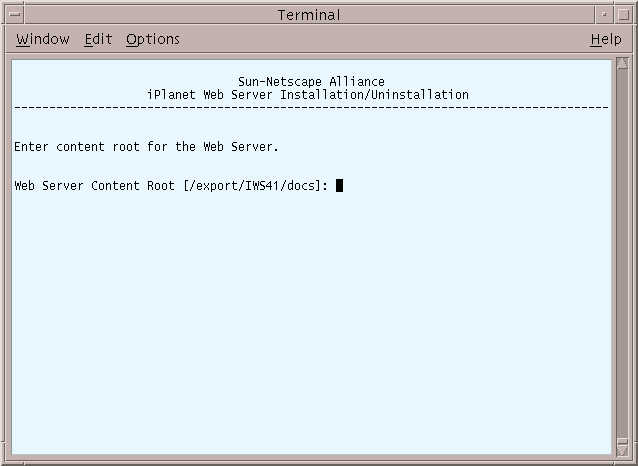
At the next screen, press Enter to accept the default, which is the location of the documents for iWS.
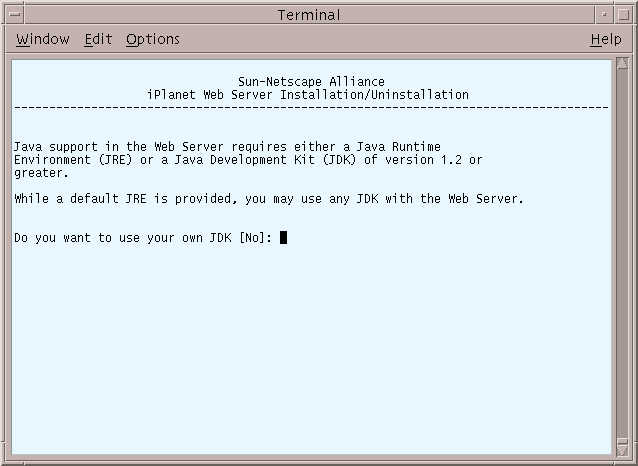
The Java Support screen displays. SellerXpert does not run from the Java Development Kit (JDK) that is installed with this step and will not be affected by what you select from this screen. Press Enter if you want to use the JDK provided. Type Y if you want to use your own JDK.
At the end of installation, the following messages display:
Installing Actuate
See the Actuate installation instructions, located on the iPlanet CommerceXpert Actuate Desktop Products ReportCast CD. There are two PDF files in the directory actuate_4/manuals/directory named reportcast-unix-install.pdf and server-unix-install.pdf.
Installing iPlanet Application Server (iAS)
Note Make sure you are in the right user and group before installing iAS. You must install iAS as the same user you plan to use to install SellerXpert.
Note These steps contain information as it pertains to installing and operating SellerXpert only. For more detailed information on installing iAS, see:
Unzip and set up the iAS file:
# unzip ias60sp2-solaris.tar.gz
The Welcome screen displays. Press Enter to continue.
The Licensing Agreement screen displays. Type Yes.
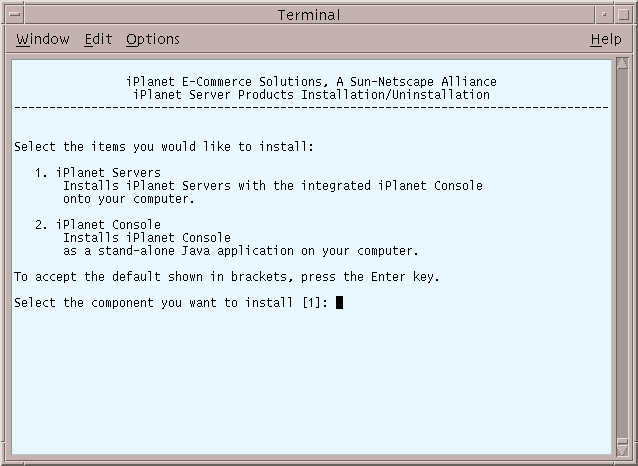
The Install Items screen displays. Press Enter to accept iPlanet servers.
The Installation Type screen displays. Press Enter to accept a typical installation.
The Extract Server Files screen displays. Type /export/IAS60 or the location you want to install iAS.
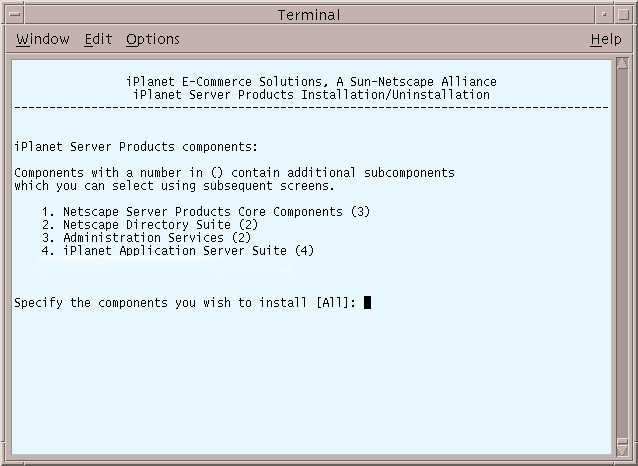
The Server Products screen displays. Since SellerXpert will need all the components listed, press Enter.
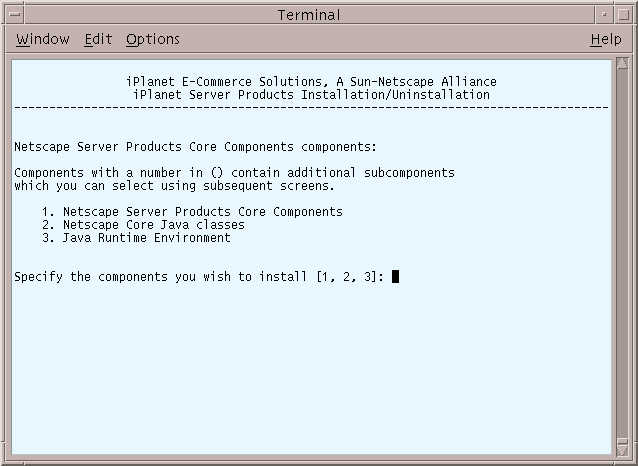
The Server Family Core Components screen displays. Press Enter to specify all the components listed.
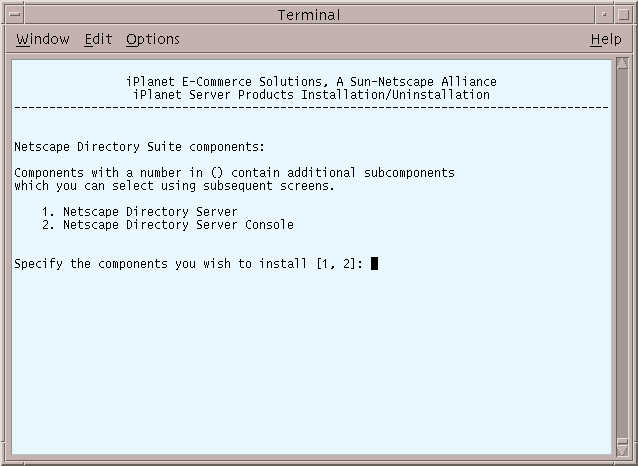
The Directory Suite Components screen displays. Press Enter to specify all the components listed.
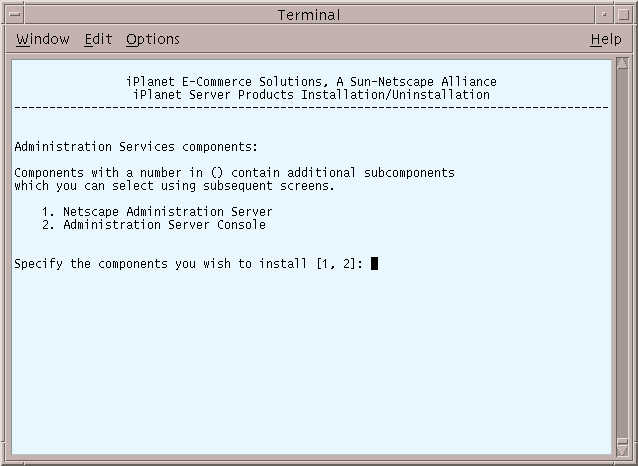
The Administrative Services screen displays. Press Enter to specify all the components listed.
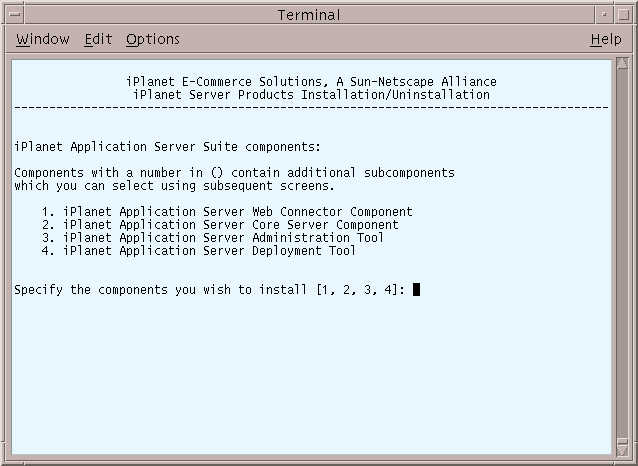
The Application Server Suite Components screen displays. Press Enter to specify all the components listed.
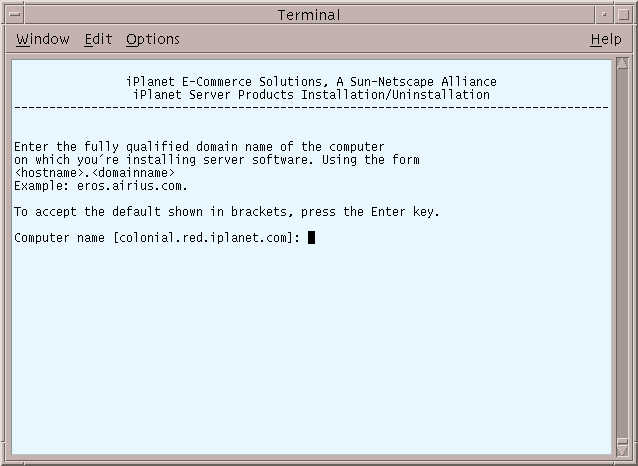
The Domain Name screen displays. Enter the domain name where you are installing the server software. See section , Step 8.
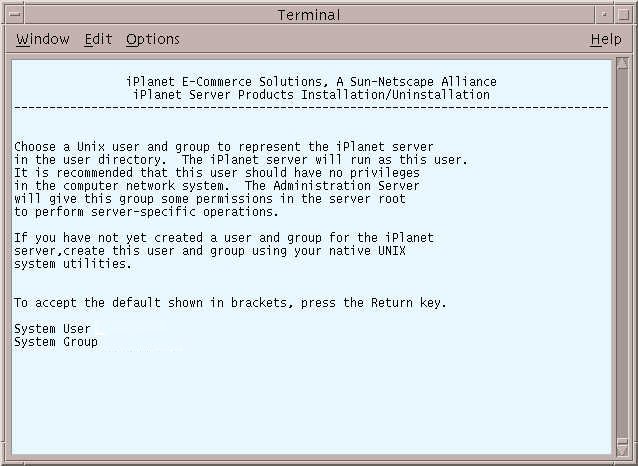
The Unix User and Group screen displays. Enter the system user and group name that was created in the section, , Step 9.
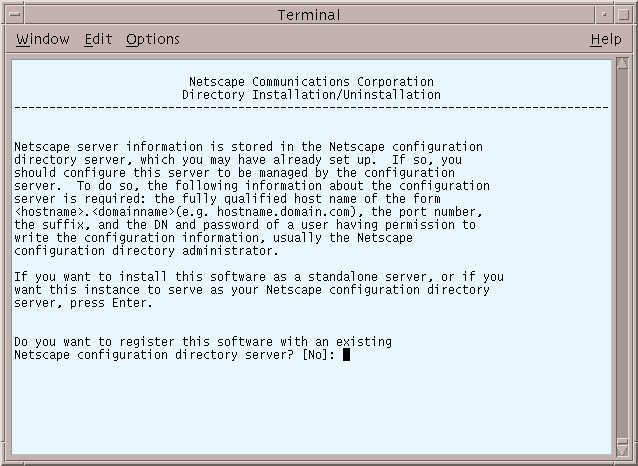
The Configuring Server screen displays. Type Yes if you want to register this software or press Enter if you do not.
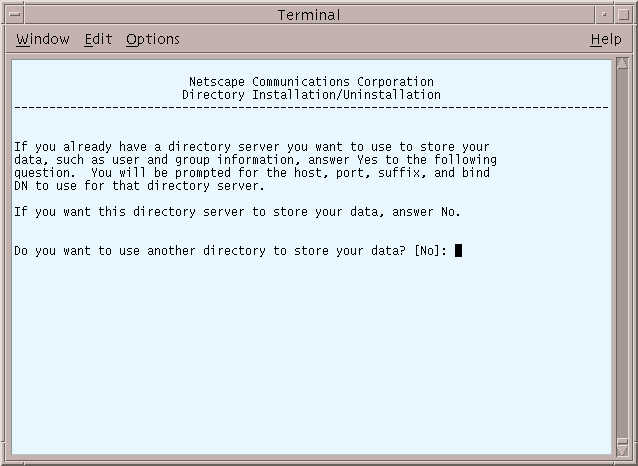
The Store Directory Server screen displays. Press Enter to continue.
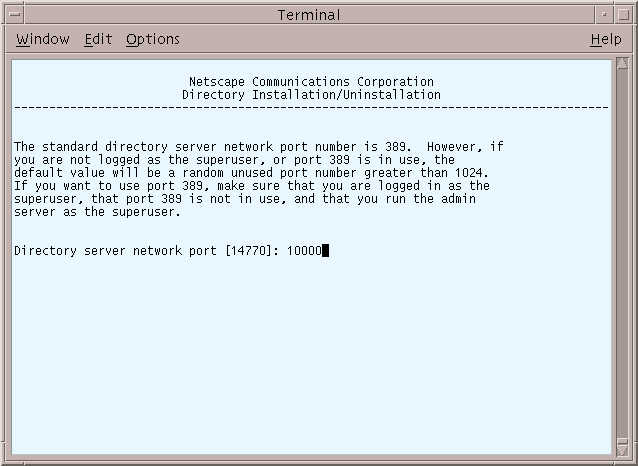
The Directory Server Network Port screen displays. Type 10000 or other port number.
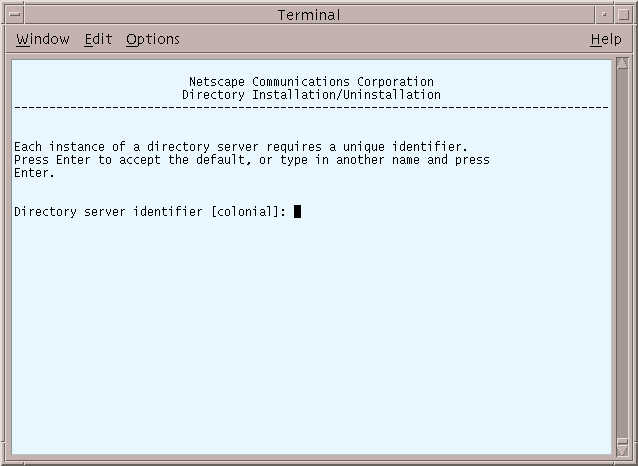
The Directory Server Identifier screen displays. Press Enter to accept the default.
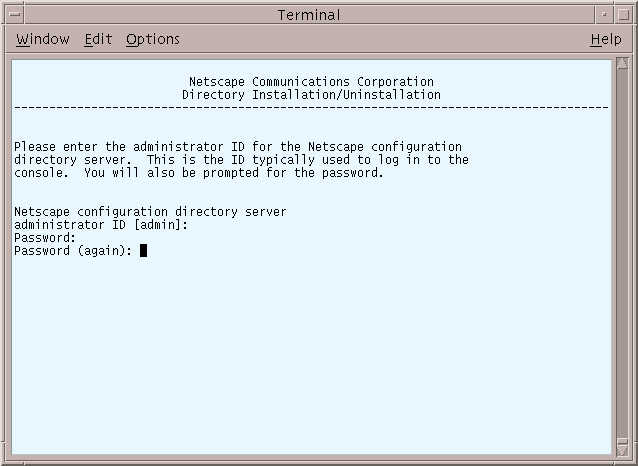
The Administrator ID screen displays. Enter your administrator ID, your password, and the password again.
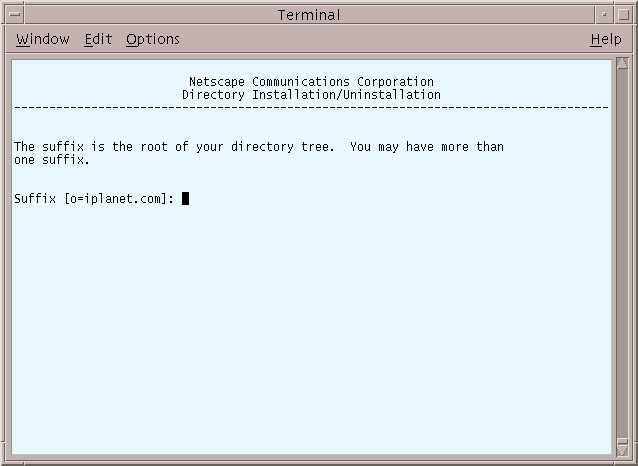
The Directory Tree Suffix screen displays. Enter a suffix for this installation, for example, o=sxinstall.com.
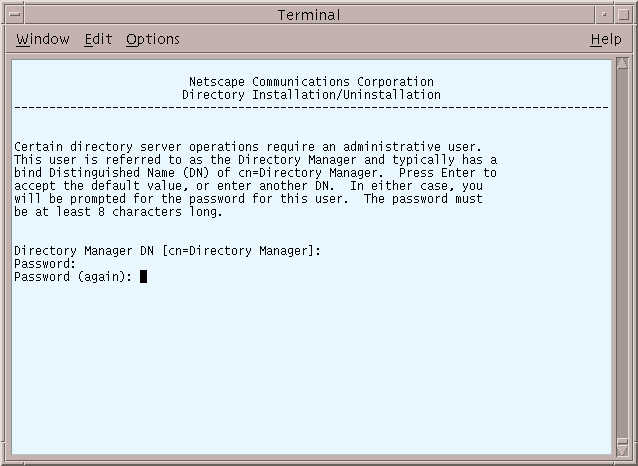
The Directory Manager Distinguished Name (DN) screen displays. Press Enter to accept the default Directory Manager DN, then enter your password and the password again.
The Administration Domain screen displays. You must use iplanet.com.
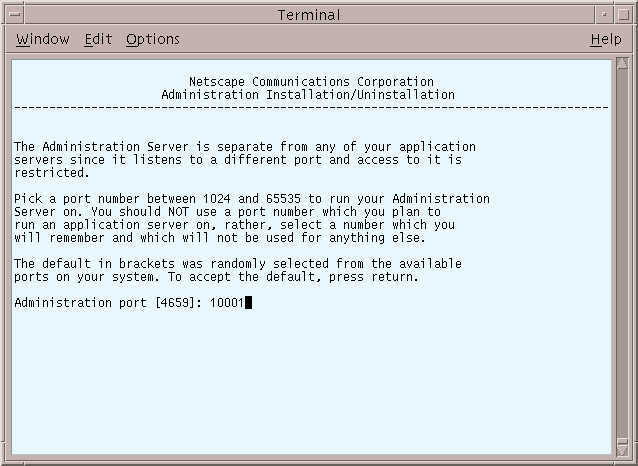
The Administration Server Port screen displays. Type 10001 or your port number.
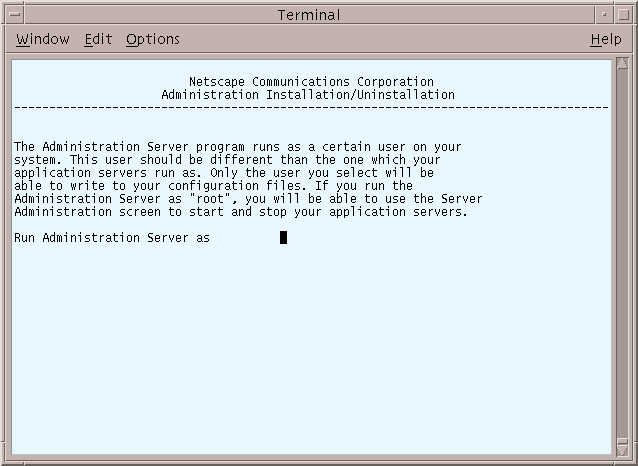
The Administration Server screen displays. Press Enter to accept the default.
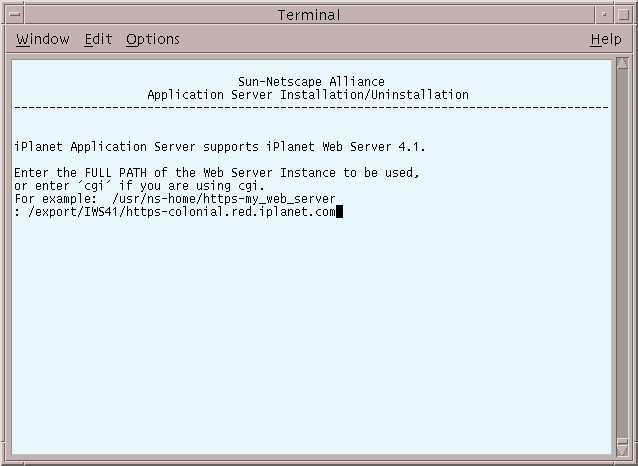
The Web Server Instance screen displays. Enter the web server instance location where iWS is installed.
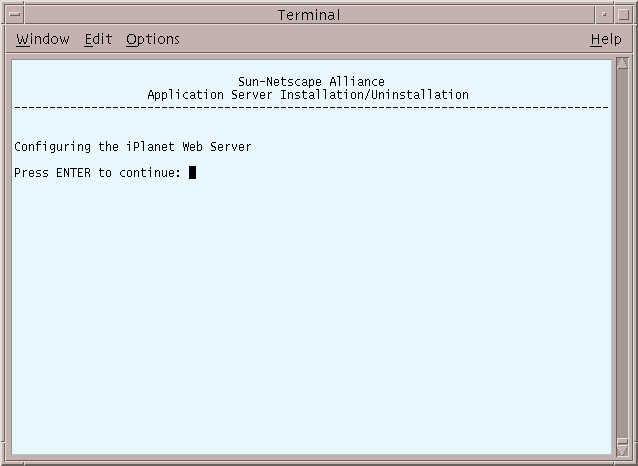
The next screen displays with this message: Configuring the iPlanet Web Server. Press Enter to continue.
The Administration Server Username and Password screen displays. Enter your administration server username, your password, and the password again.
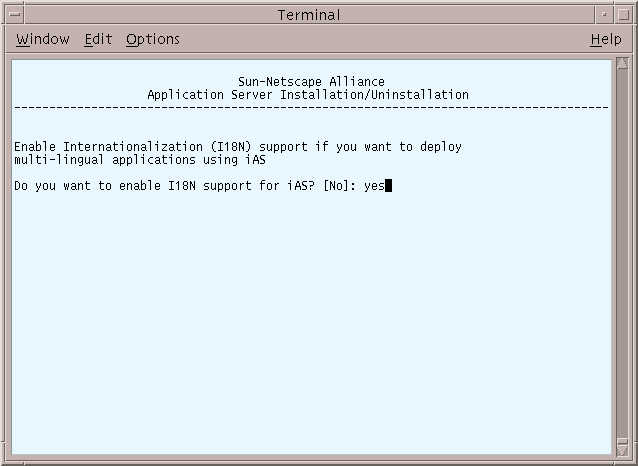
The Enable Internationalization screen displays. Type Yes to enable international support for iAS.
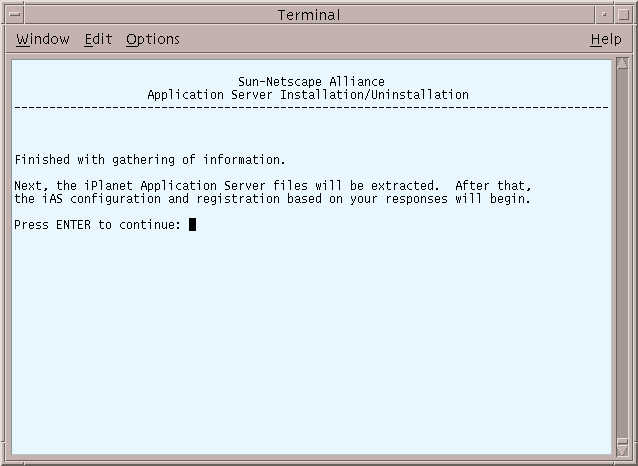
When this screen displays, press Enter to continue.
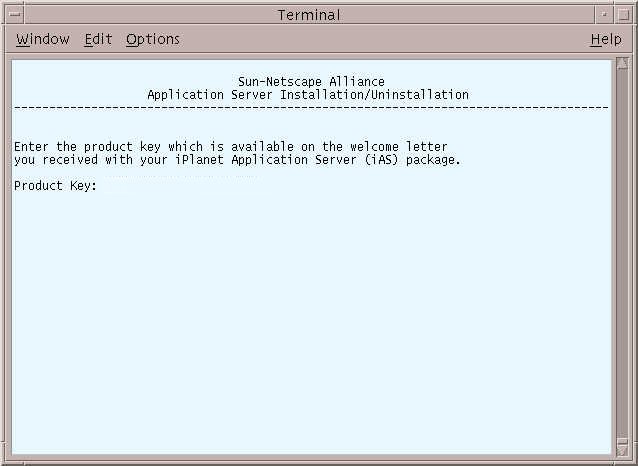
At the next screen, enter your product key (iAS serial number).
- This installation will take several minutes.
Reloading Configuration Files
iWS needs to be stopped and started to reload configuration files that were loaded during iAS installation.
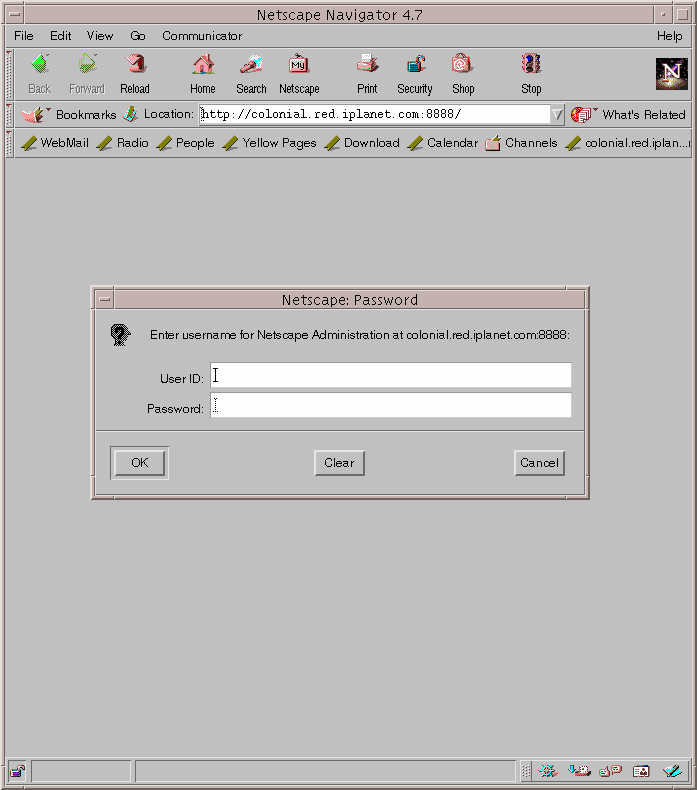
Run startconsole from IWS_ROOT.
The browser is launched and the login screen displays. Enter the username and password you created in Step 11.
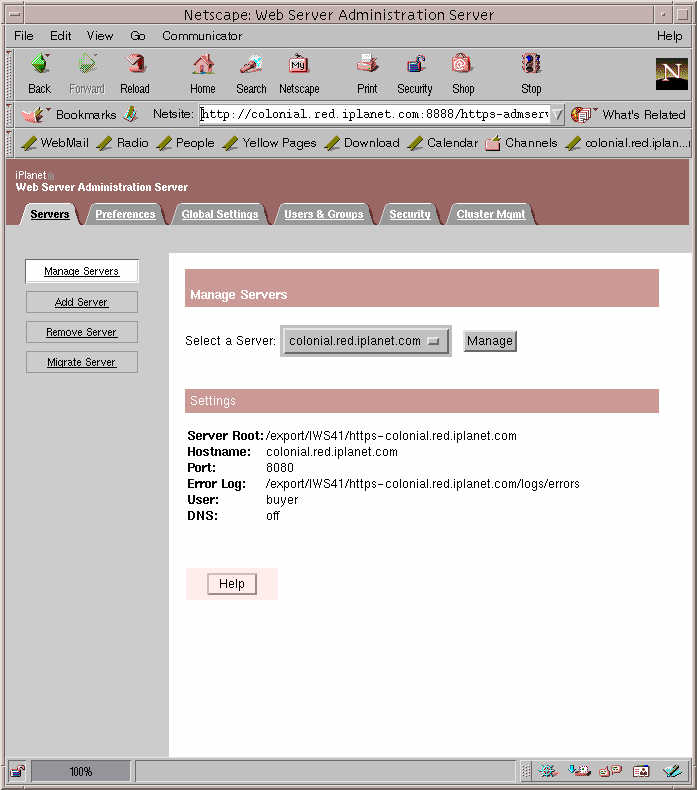
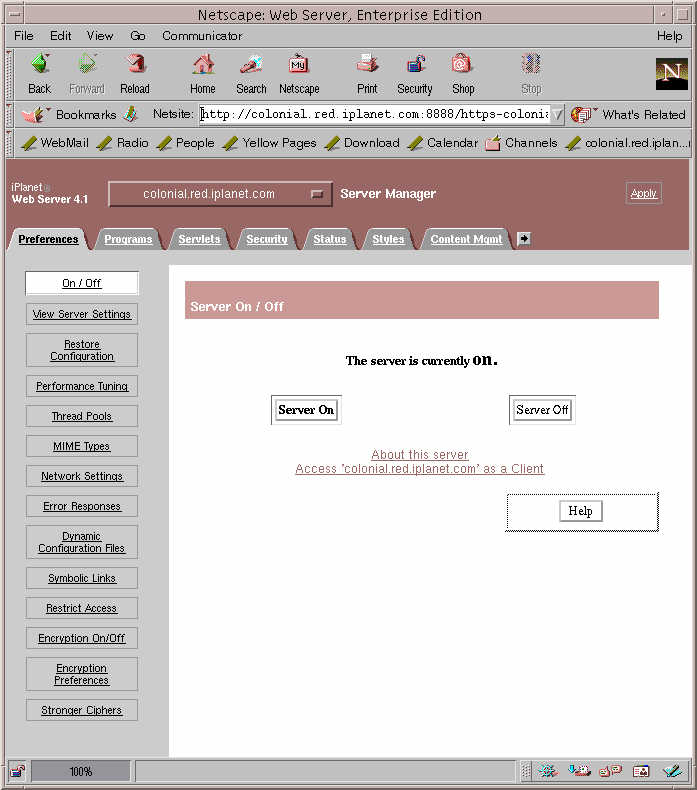
The Manage Server screen displays. Click the server name (located next to Select a Server) and then click Manage.
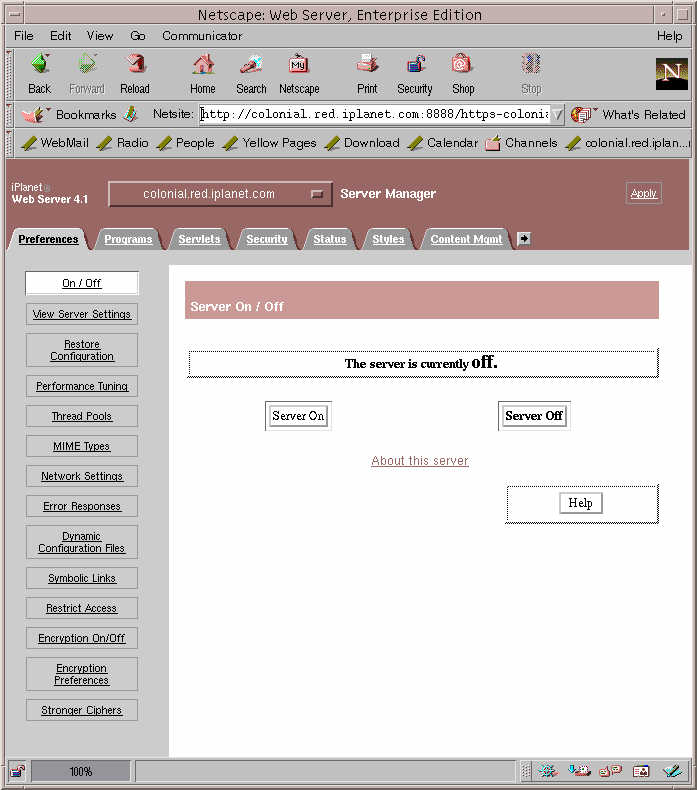
The Server On/Off screen displays with this message: Click Server Off.
A message displays Warning: manual edits not loaded. Apply the changes by clicking Load Configuring Files.
The Server On/Off screen displays with this message: The server is currently on.
After completing the iAS installation, you can check to see if iAS is installed properly by executing a sample fortune program:
Click Access New iAS Sample Application.
- http://hostname:port/GXApp
- For example,
- http://colonial:8080/GXApp
Under Sample Application, click Fortune.
From the Fortune page, you can check your fortune and verify that iAS is installed properly.
Enabling the Database with iAS
Set up the database session script:
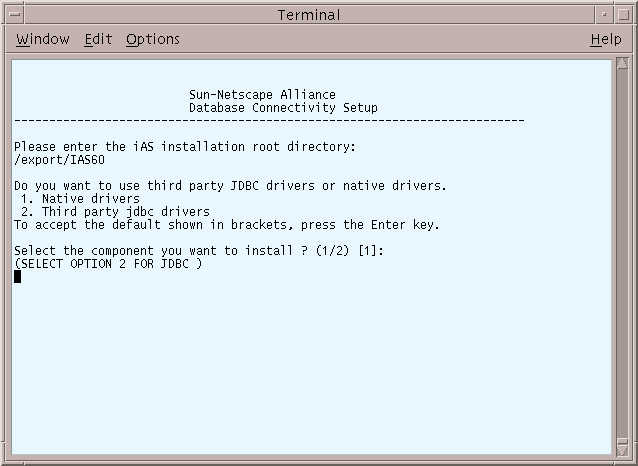
The Database Connectivity Setup prompt displays. Enter the location where iAS is installed (shown as /export/IAS60 in the example).
The Driver Installation screen displays. Press Enter to continue.
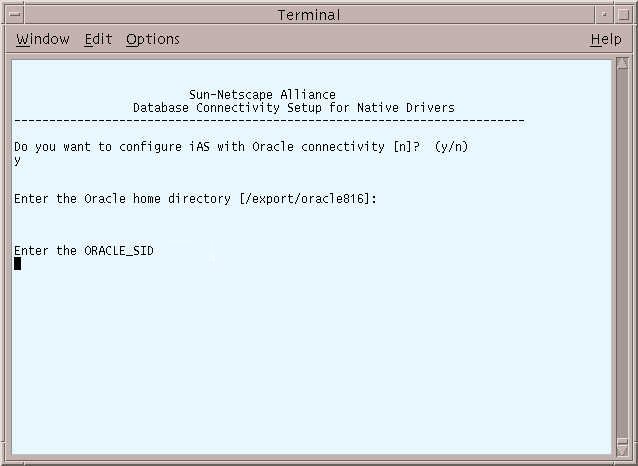
The Configuring with Oracle prompt displays. Type Y to configure iAS with Oracle.
The Oracle prompt displays. Enter your Oracle home directory.
The next Oracle prompt displays. Enter your Oracle SID that you wish to connect to.
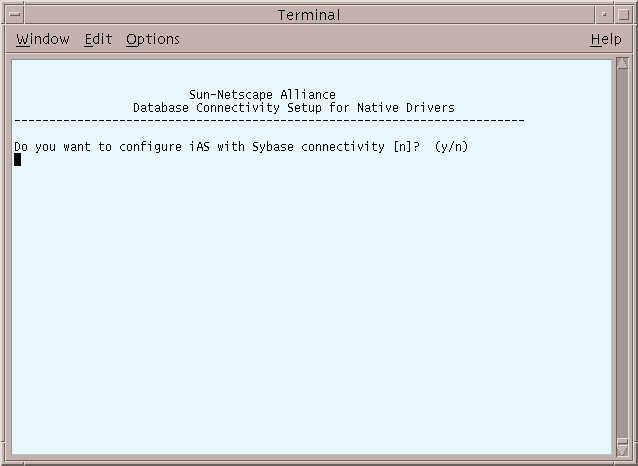
The Sybase prompt displays. Press Enter to continue.
The Informix prompt displays. Press Enter to continue.
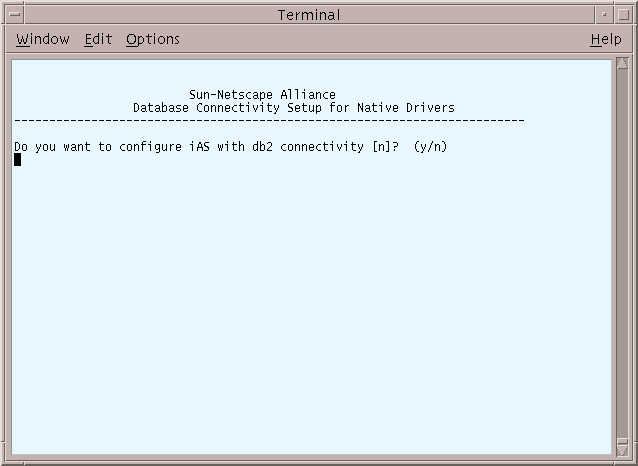
The db2 prompt displays. Press Enter to continue.
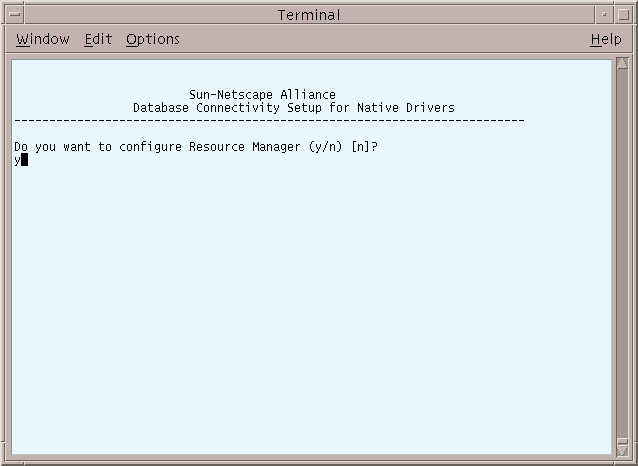
The next prompt displays. Type Y to configure the Resource Manager.
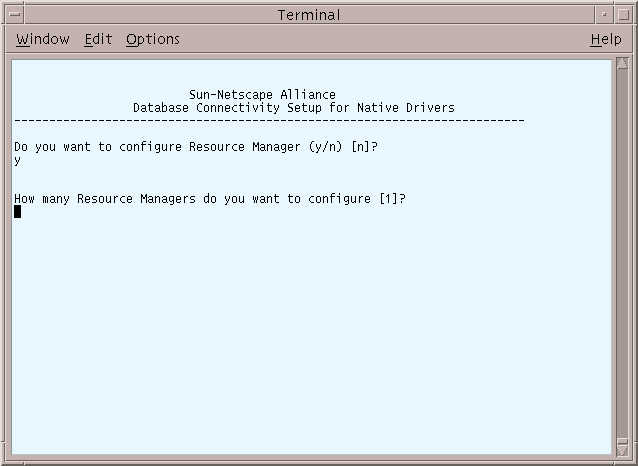
The next prompt displays. Press Enter to accept the default.
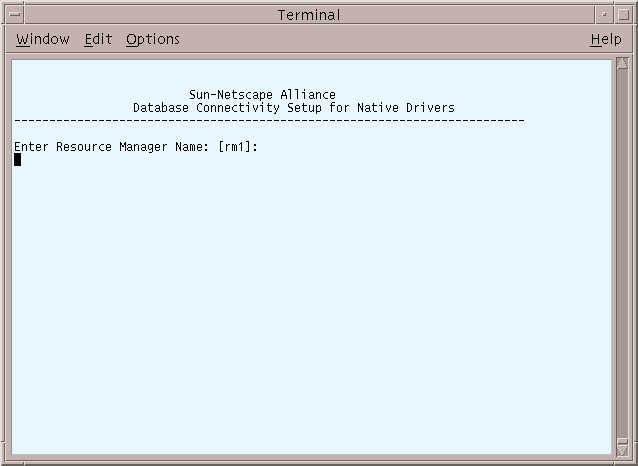
The next prompt displays. Press Enter to accept the default.
The next prompt displays. Press Enter to accept the default.
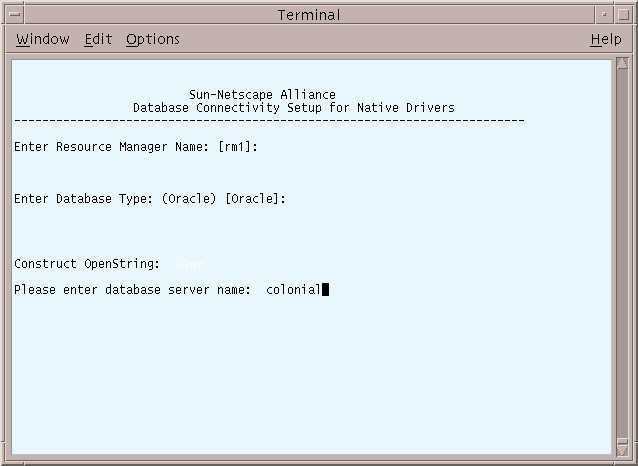
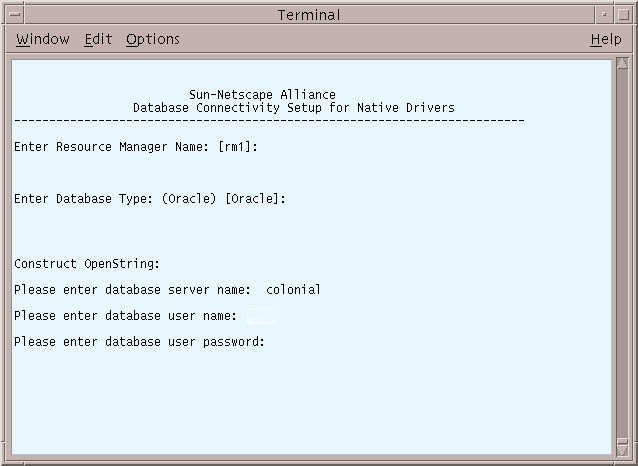
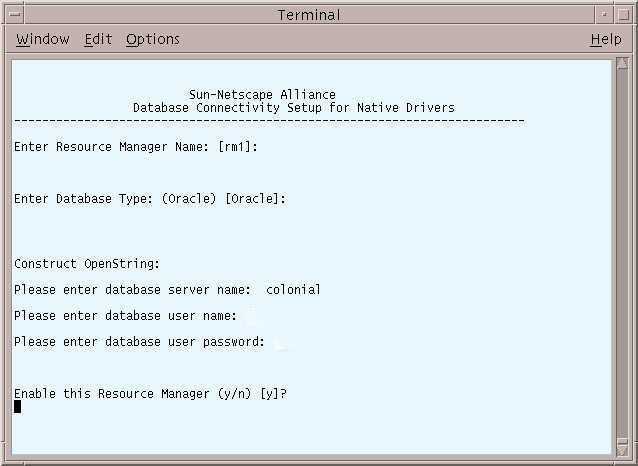
The next prompt displays. Enter the database server name (the machine where Oracle is installed).
The next prompt displays. Enter the database user name and password.
Note During SellerXpert installation, you will need to specify this Oracle user name and password. The SellerXpert installer will create this user in Oracle.
The next prompt displays. Press Enter to enable the Resource Manager.
Creating an iPlanet Directory Server (LDAP) Instance
Start console using this command:
When this screen displays, enter your password and click OK. This is the password you specified in Step 18 of the iAS installation.
- % IAS-ROOT/startConsole
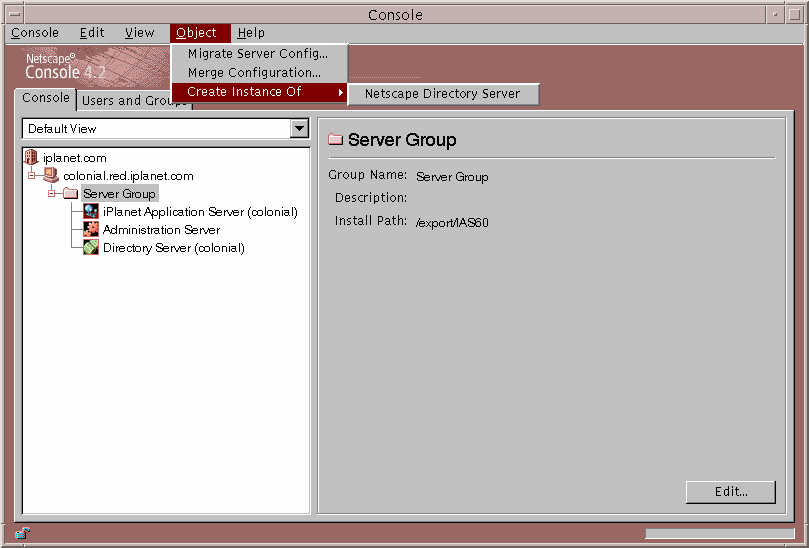
Choose the Server Group, located on the left side of the screen. Click Object, then from the drop-down menu, choose Create Instance of Netscape Directory Server.
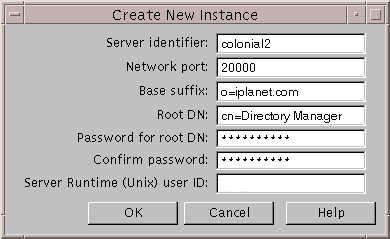
The Create New Instance window displays.
In the network port number field, type 20000 or your specific port number.
Create a password and then re-enter it again to confirm.
Note The network port number and root DN password will be required entries when installing SellerXpert.
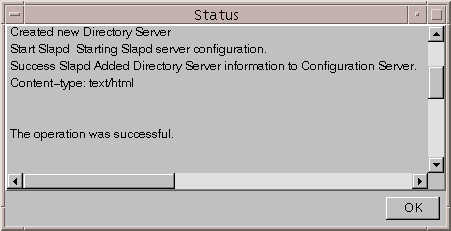
Click OK. The following screen displays. Click OK.


Previous Contents Index DocHome Next
Copyright © 2001 Sun Microsystems, Inc. Some preexisting portions Copyright © 2001 Netscape Communications Corp. All rights reserved.
Last Updated September 07, 2001