Preparing for Installation
This section provides the procedures for preparing the external OTP installation server and the clustered OTP hosts for Open Telecommunications Platform installation.
The preparation process is comprised of the following procedures, which must be performed in sequence.
 To Set Up and Verify the External OTP Installation Server
-
Log in as root (su - root) to the external OTP installation server.
-
If the external OTP installation server is the same server to which you downloaded the Open Telecommunications Platform software, go to Step 2.
-
If the external OTP installation server is not the same server to which you downloaded the Open Telecommunications Platform software, perform the following steps.
-
Copy the entire Open Telecommunications Platform installation directory from the download server or from the OTP Installation DVD-ROMto the external OTP installation server.
The download server is the server to which you downloaded the Open Telecommunications Platform product in To Download and Uncompress the OTP and Solaris OS Installation Zip Files. :
For example:
-
If your download server name is downloads
-
You have moved the unzipped OTP install directory to /otp1.0
-
You have NFS-mounted the /otp1.0 directory on the download server
You would then type:
# cp -r /net/downloads/otp1.0 /otp1.0
-
-
Add the following line to the /etc/dfs/dfstab file.
share -F nfs -o ro,log=global -d "OTP 1.0 Installation Directory" /otp1.0
Note –The /otp1.0 directory is referred to throughout this document as the OTP installation directory.
-
Type svcadm restart nfs/server to stop and then restart NFS and NFS-mount the installation directory.
-
-
Type pkgadd -d /otp1.0/Products/packages -R / SUNWotpcli
The directory /opt/SUNWotp10/CLI is created.
-
Set up the external OTP installation server.
Type /opt/SUNWotp10/CLI/setupExternalInstallServer /otp1.0
The installation process installs the OTP application provisioning service and the Open Telecommunications Platform plug-in.
Wait for the installation process to complete. The installation process may take up to 10 minutes to complete.
-
Open a Web browser.
Go to URL http://install server:9090 where install server is either the IP address or the fully qualified name of the external OTP installation server.
If installation was successful, the service provisioning system log in page appears.
-
(Optional) Click change password and change the password on the next page.
Type the default user name and password admin in the user name: and current password: fields.
Type the new password in the new password: and confirm new password: fields, and then click continue to change password.
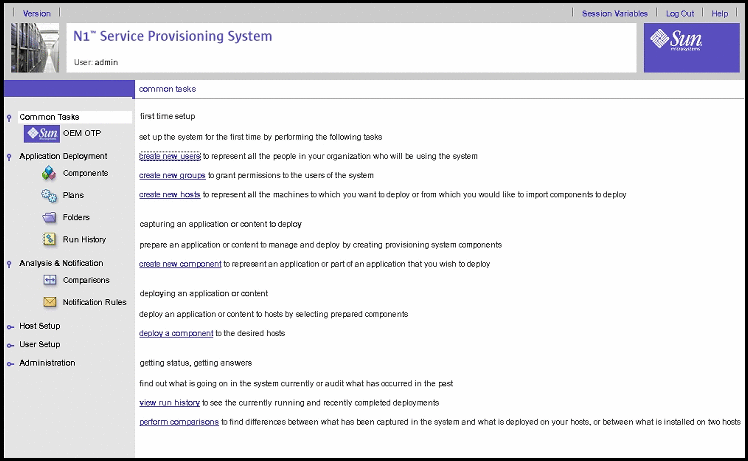
The log in page appears. Log in to the service provisioning system. The Common Tasks page appears.
Figure 5–2 Common Tasks Page
-
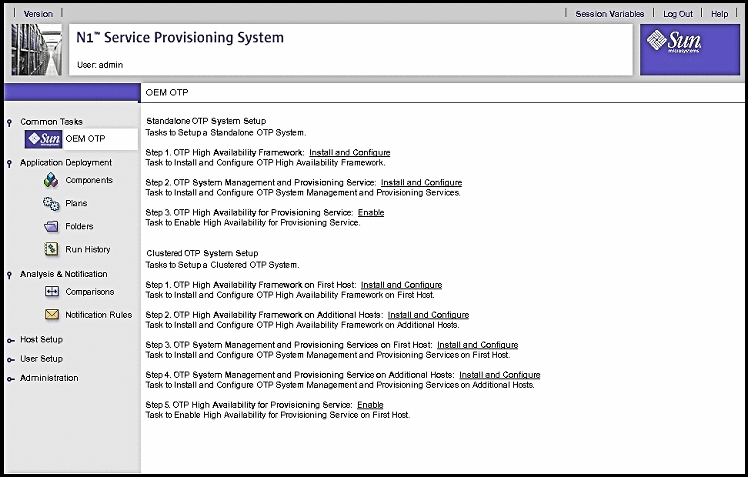
Click OEM OTP under Common Tasks in the left menu to display the Open Telecommunications Platform home page.
Figure 5–3 Open Telecommunications Platform Tasks Page
-
Click Plans under Application Deployment to display the plans screen.
Figure 5–4 Plans Screen
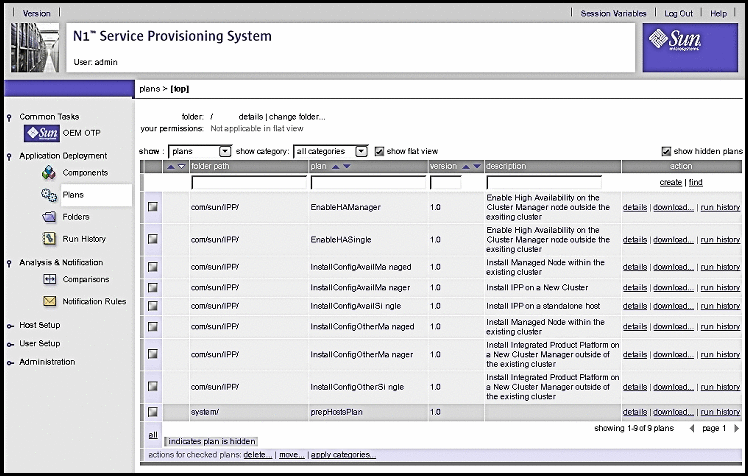
Successful display of the screens verifies installation of the service provisioning system and the Open Telecommunications Platform plug-in.
-
Next Steps
Set up the service provisioning remote agent on the clustered OTP systems as described in the next procedure.
 To Set Up the Service Provisioning Remote Agent on the Clustered OTP Systems
The service provisioning remote agent must be installed on the standalone OTP host for a standalone OTP system, and on each clustered OTP host for a clustered OTP system. The remote agent must be installed on each OTP host for Open Telecommunications Platform installation to succeed..
Perform the following steps for each new OTP host
Before You Begin
The external OTP installation server must be set up and verified as described in Preparing for Installation.
-
Log in as root (su - root) to the new OTP host.
-
Install the OTP CLI package.
Type pkgadd -d /net/external OTP installation server/otp1.0/Products/packages -R / SUNWotpcli where external OTP installation server is the name of the external OTP installation server.
For example, if the installation server name is otpinstall, you would then type:
# pkgadd -d /net/otpinstall/otp1.0/Products/packages -R / SUNWotpcli
The directory /opt/SUNWotp10/CLI is created.
-
Install the service provisioning remote agent.
Type /opt/SUNWotp10/CLI/setupRemoteAgent install directory where install directory is the Open Telecommunications Platform installation source directory. For example:
# /opt/SUNWotp10/CLI/setupRemoteAgent /net/otpinstall/otp1.0-install
The setupRemoteAgent script creates the service provisioning user account and installs the remote agent.
Next Steps
Add each new OTP host to the external OTP installation server as described in the next section.
 To Add Hosts to the External OTP Installation Server
Before you can install the Open Telecommunications Platform to the standalone OTP host or to the clustered OTP hosts, you must add each host to the host list on the external OTP installation server. Perform the following steps for each new OTP host.
Before You Begin
-
The external OTP installation server must be set up and verified as described in Preparing for Installation.
-
The service provisioning remote agent must be installed on all of the clustered OTP system hosts as described in To Set Up the Service Provisioning Remote Agent on the Clustered OTP Systems
-
Open a Web browser and log in to the external OTP installation server service provisioning service.
Go to URL http://install server:9090 where install server is either the IP address or the fully qualified name of the external OTP installation server.
-
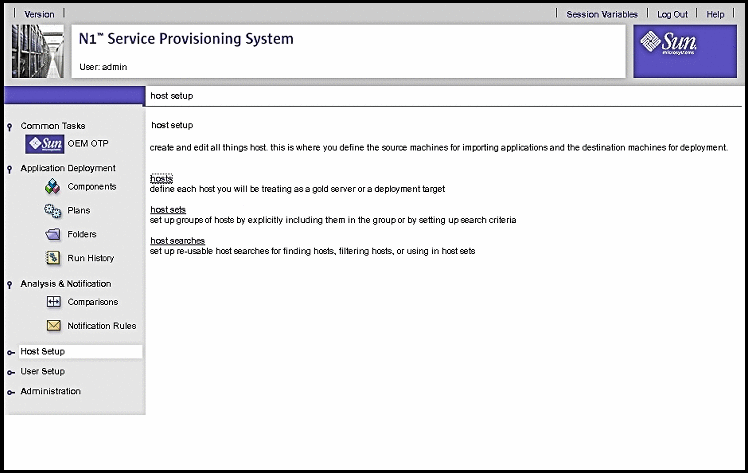
Click Host Setup in the left menu to display the Host Setup page:
Figure 5–5 Host Setup page
-
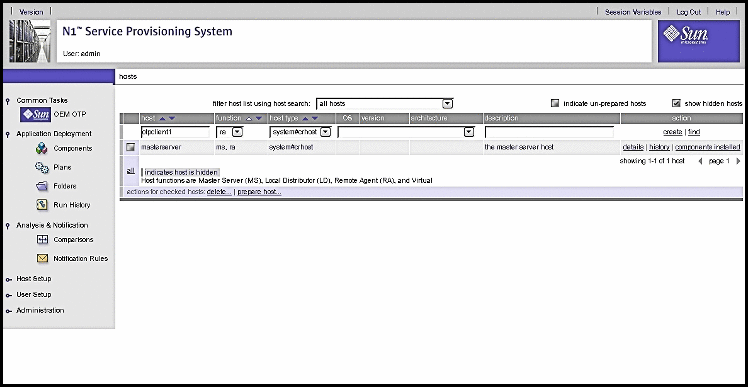
Click hosts in the central menu to display the hosts page:
Figure 5–6 Hosts Page
-
In the host field, type the name of the new OTP host.
-
(Optional) In the description field, type a description of the new OTP host.
-
Click create.
The host details edit page is displayed as shown in the next step.
-
-
Specify the host values on the details edit page:
Figure 5–7 Host Edit Details Page
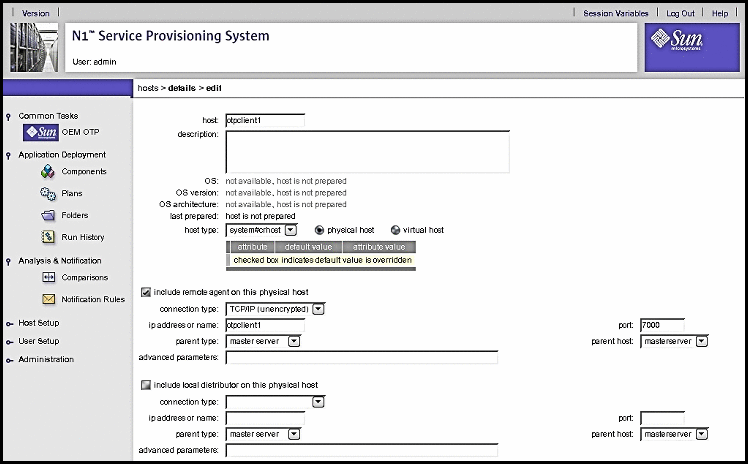
Note –The above example of the host edit details page shows only the required fields at the top of the page.
-
Click include remote agent on this physical host
-
Click the arrow to the right of the connection type field to display the drop-down list.
Choose TCP/IP (unencrypted).
-
In the ip address or name field, type either the IP address of the host or the host name.
-
In the port field, type 7000.
-
Scroll to the bottom of the page and click save.
The host is added to the hosts list on the external OTP installation server. The hosts list page is displayed.
-
Check the box to the left of the host name, and then click prepare host...
The host is prepared for provisioning.
-
Next Steps
Repeat this procedure for every host to which the Open Telecommunications Platform is to be installed. When you have finished adding all hosts to the external OTP installation server hosts list:
-
If you are installing the Open Telecommunications Platform to a standalone OTP host, install the Open Telecommunications Platform as described in Installing the Open Telecommunications Platform On A Standalone OTP Host.
-
If you are installing Open Telecommunications Platform to a clustered OTP system, install the Open Telecommunications Platform as described in Installing the Open Telecommunications Platform On A Clustered OTP System.
- © 2010, Oracle Corporation and/or its affiliates
