Templates
 To Create a Template
-
Login to WebSynergy.
-
Click Add Applications and expand the CMS folder.
-
Click Add against Journal portlet.
The Journal portlet is added to your page.
-
Click on the Templates tab.
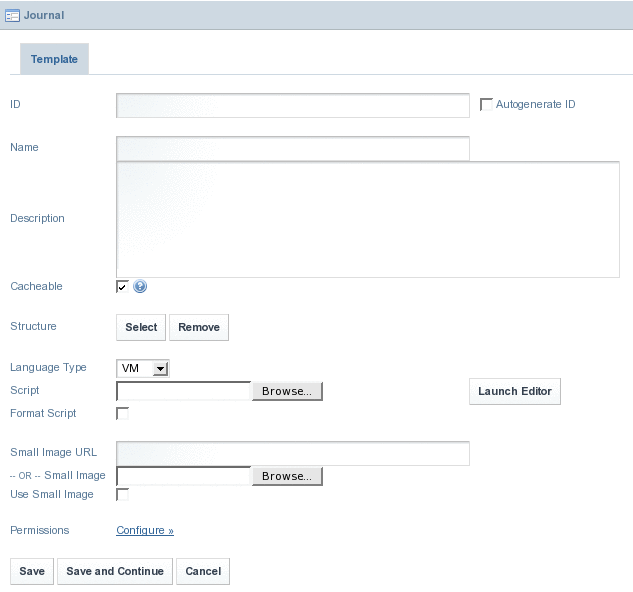
Click the Add Template button to create a template. The Template page appears.
Figure 4–36 To create a Template
-
Specify an ID, Name and Description for the template. Click the Select button to select a Structure for the template.
The Select and Remove buttons against the Structure field can be used to associate or to disassociate a structure from the Template.
Figure 4–37 To create a Template
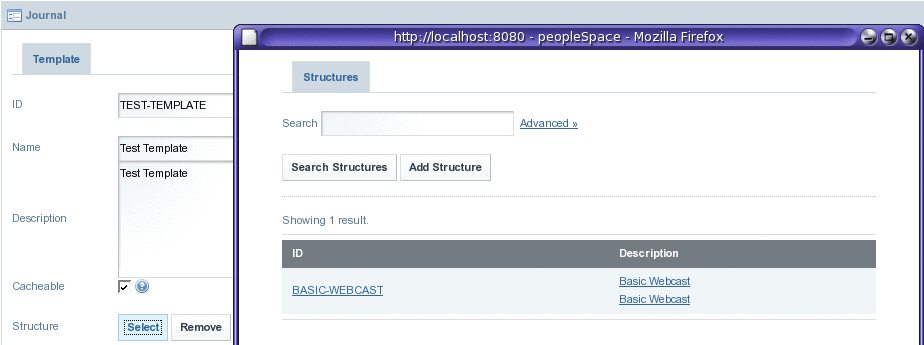
A window for selecting Structures is launched.
-
Click on name of the Structure to select it.
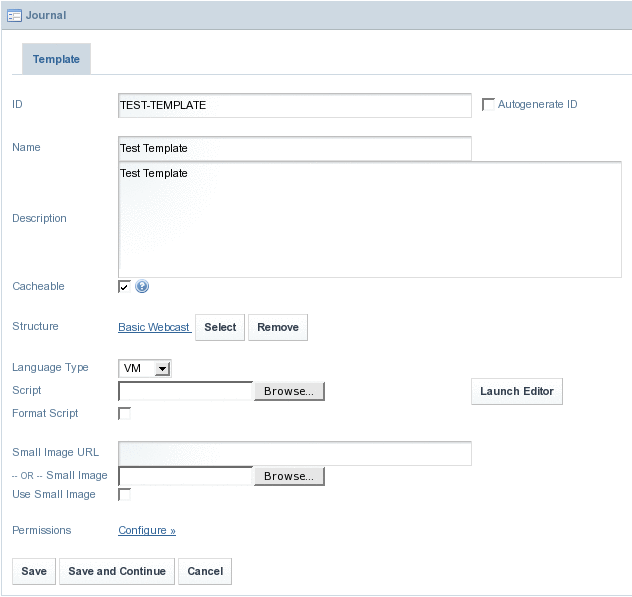
In our example, click on BASIC-WEBCAST. The Structure is selected.
Figure 4–38 To create a Template
-
To edit the template layout content, you can use one of two methods:
-
To create a completely new template:
-
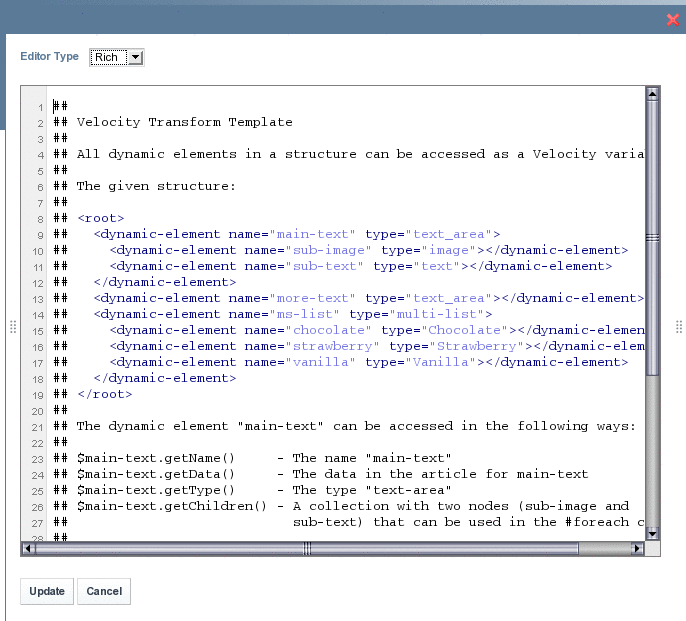
Click the Launch Editor button.
An Editor pops-up. You can select an Editor Type. Plain and Rich are the two available editor types. Plain is the default editor type, but you can select Rich, as it is easier to work with Rich editor.
Figure 4–39 To create a Template
-
Click on the Update button, after making changes to the template.
-
-
To make use of an existing template:
-
Select a language from the Language Type list.
VM, SXL, and CSS are the available language options.
-
Click on the Browse button against the Script field to browse an existing template.
-
Select the Format Script checkbox.
-
Click Launch Editor to open the browsed script
-
Click on the Update button, after making changes to the script.
-
-
If you find it to be necessary, Add a small image to represent the template in the description field,
You can , enter the URL path for an image in the Small Image URL field, or you can browse an image by using the Browse button. To use the image in the template, select the Use Small Image checkbox.
-
Click Save.
 To Edit a Template
-
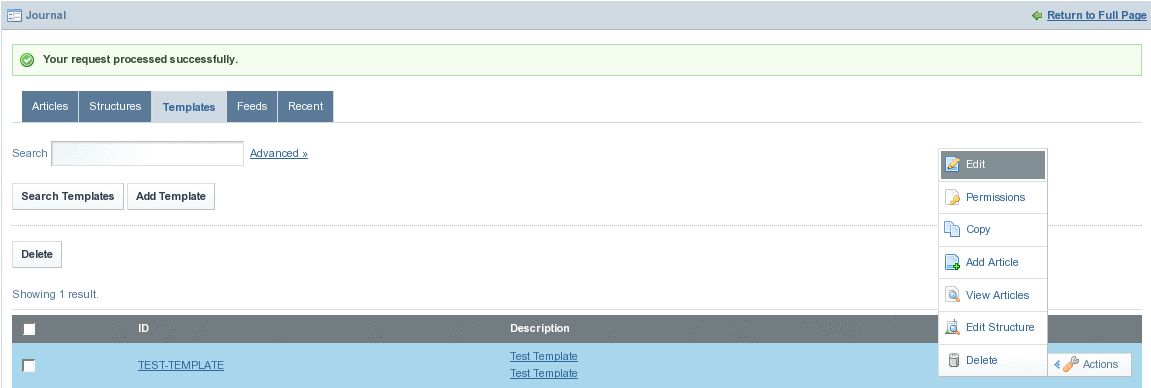
Click on the Actions button against the template, and select Edit from the menu.
Before editing the actual template, it is advisable to view the associated articles because their layout will be affected by any changes made to your structure. After editing the template, you can view these articles with the new template layout. You can click View Articles from the Action menu to view associated articles.
Figure 4–40 To edit a Template
-
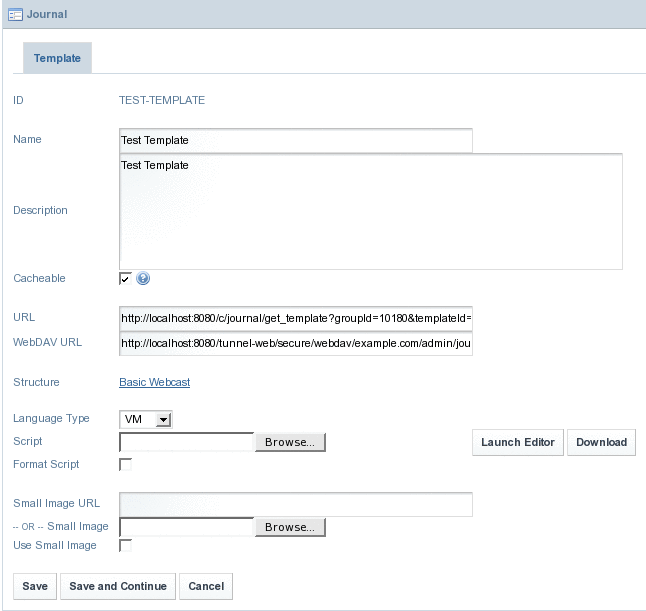
Edit the template as desired.
In the edit screen, you can edit anything in the template except for the template ID, which can not be changed once the template has been created.
Figure 4–41 To edit a Template
-
Click Save.
 To Delete a Template
-
To delete a template, you must first delete all the articles associated with that template.
To delete all articles, click on the Actions button and select View Articles from the menu.
Figure 4–42 To delete a Template
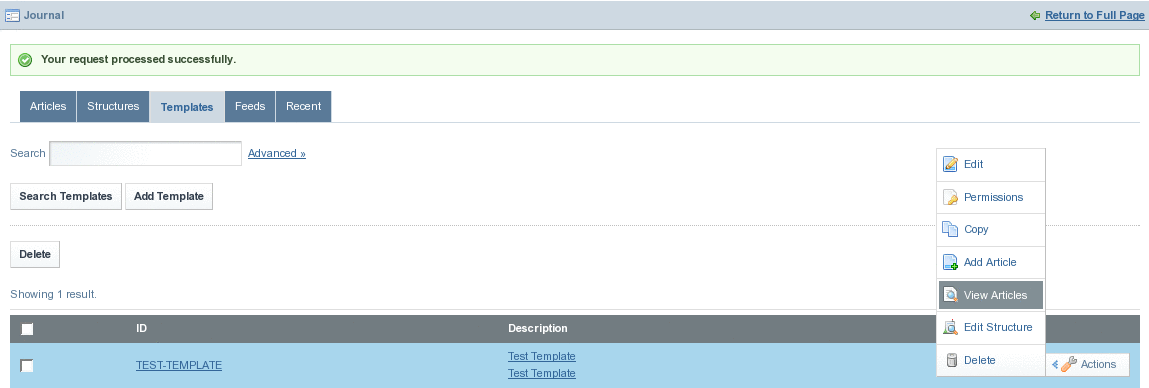
All the articles associated with the Template are listed.
Figure 4–43 To delete a Template

-
Select all articles, and click on the Delete button.
A dialog-box with the message “Are you sure you want to delete the selected articles?” appears. Click OK to delete all articles.
Figure 4–44 To delete a Template

-
Click on the Templates tag once again.
Select the template and click Delete.
Figure 4–45 To delete a Template
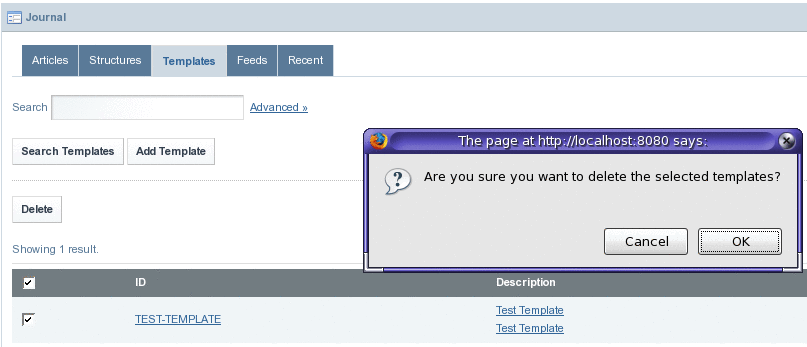
Click OK on the dialog-box for confirming delete operation to delete the template.
- © 2010, Oracle Corporation and/or its affiliates
